Visual Diary: Odds & Ends

During the busy period at work, I’ve been tinkering on various odds and ends in Daggerfall Scout. This Visual Diary is a wrap-up of the things I’ve been playing with.
 SkyDev1

Skies

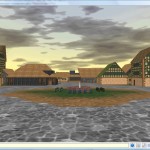
The skies in Daggerfall are not constructed by a sky box, sphere, or infinite plane. Rather they are a backdrop composed by two tiling images, one for the west part of the sky and one for the east part. As the player looks left and right, the images are scrolled left and right. As the player looks up and down (or levitates) the images are scrolled up and down slightly to match the horizon line. This approach made for some dazzling skies back in the day, but has a few technical limitations for modern interpretations.

  • While the sky looks quite decent at 1024×768 (screenshot), it does not scale well to high resolutions. On a widescreen monitor running at 1920×1200, the visible portion of our sky backdrop is being enlarged by over 30 times its original size. No amount of filtering can save it from looking stretched, and this spoils the effect greatly.
  • By using backdrops, the sky does not actually go above the player’s head (or very far below the horizon), which limits the maximum pitch (angle looking up or down) to around 60-70 degrees.. If you’ve played Daggerfall, you might remember not being able to look straight up or down as you can in modern games. This is because there’s nothing up there to see!
  • The sky backdrops are designed to give the illusion of sky to a player standing at ground level, or levitating slightly above it. My goal in Daggerfall Scout is to allow the explorer to walk around towns, or zoom all the way out to view a whole city at once. In the former case, skies would look fine, in the latter any pairing between horizon lines is lost and the illusion fails: the sky is visibly just an image painted behind a tiny floating city.

With the above in mind, I need to make a choice on how best to represent the sky in Daggerfall Scout. Do I turn the sky on when walking around at street level, then off again when the explorer zooms out too far? I would also prefer to be able to look 90 degrees up and down, but Daggerfall’s sky backdrops do not allow for this.

Unfortunately, there is no perfect solution. My options are to either limit mobility and view angle, turn skies on and off as required, or to implement another type of sky (which means losing Daggerfall flavour). I will return to this later.


 ShadowDev1

Shadows

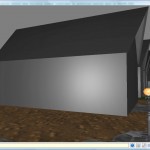
This one is easy to turn on in Ogre (screenshot made using basic stencil shadows), and the effect is quite dramatic even with traditional per-face lighting. Shadows can be adjusted for time of day so they are long in the early morning or late afternoon, and short during the middle of the day.

I am not using shadows permanently at this stage, as the final decision on how to handle shadows has not been made. I will probably end up using a unified light and shadow model before the final version, so this particular shadow technique is not final.

Also, If you look to the bottom-right of this screenshot, you will notice a working compass. This should help explorers keep oriented in cities.


 LightDev10LightDev9LightDev5LightDev6

LightDev7

Lights

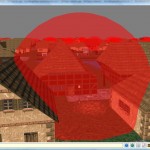
Before illuminating my scenes properly, I wanted to get an idea of where lights are positioned, and how their radius extends to the buildings surrounding them. As a mock-up, I dropped in a red semi-transparent sphere over every light source in Daggerfall city. You might remember from Visual Diary: Bright Ideas that street lights are added wherever a flat using a texture from TEXTURE.210 (Lights) is present. In the first screenshot, you can see the lamp-post at the middle of the red sphere.

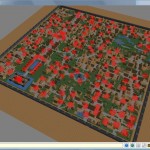
In the second screenshot is the entire city of Daggerfall, with all “lights” visible. There are several dozen potential light sources in this scene. This is also a great insight into how the developers positioned lights. They line walkways, surround gardens and flood the wealthy market district. Not all cities are as well lit as Daggerfall. Wayrest only has several in key points, and Sentinel is almost lacking street lights entirely.

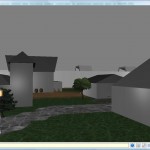
In the next three screenshots, I have enabled a simple per-pixel shader that creates a light radius against buildings based on their distance from a light source. I’ve turned off textures so I can get a better idea of how the values look moving from light to shade. If anything, it looks a bit too smooth. I quite liked the rougher bands of the old Daggerfall lights, but this is something that can be implemented after some time playing with shaders.

Keeping in mind that I wish to view cities from street level, or all at once, one of the frustrations I have with lighting is the performance hit on lower-end hardware. To show the whole scene from above with all lights visible, a forward renderer requires a tremendous number of passes. There are several ways to optimise this (LuciusDXL has given me some great pointers), but the absolute best results come from using a different pipeline (deferred rendering, or light indexed deferred rendering).

I have chosen not to write my own engine this time around so I can focus on exploring Daggerfall, and not sink valuable time into engine building. The downside to this is that I’m limited to the features my chosen engine (Ogre) offers. Now, I’m aware Ogre’s compositor framework allows you to build a deferred renderer, but this involves more time than I am willing to invest. So for now at least, I’m limiting myself to forward rendering.

What this means is that I need to optimise lights when at ground level, and turn them off when the explorer zooms out to view the whole city at once. Alternatively when zoomed out, I can just switch off per-pixel materials and add simple point lights to the scene. It’s not like you can see much detail from all the way up there anyway.

Posted in Daggerfall Scout, Visual Diary.