Note: This information is out of date as of July 2019 and no longer applies. Fonts in Daggerfall Unity are now standard Unity TextMeshPro (TMP) fonts internally and font replacements are part of the Localization features entering preview in v0.10.26-alpha.
Introduction
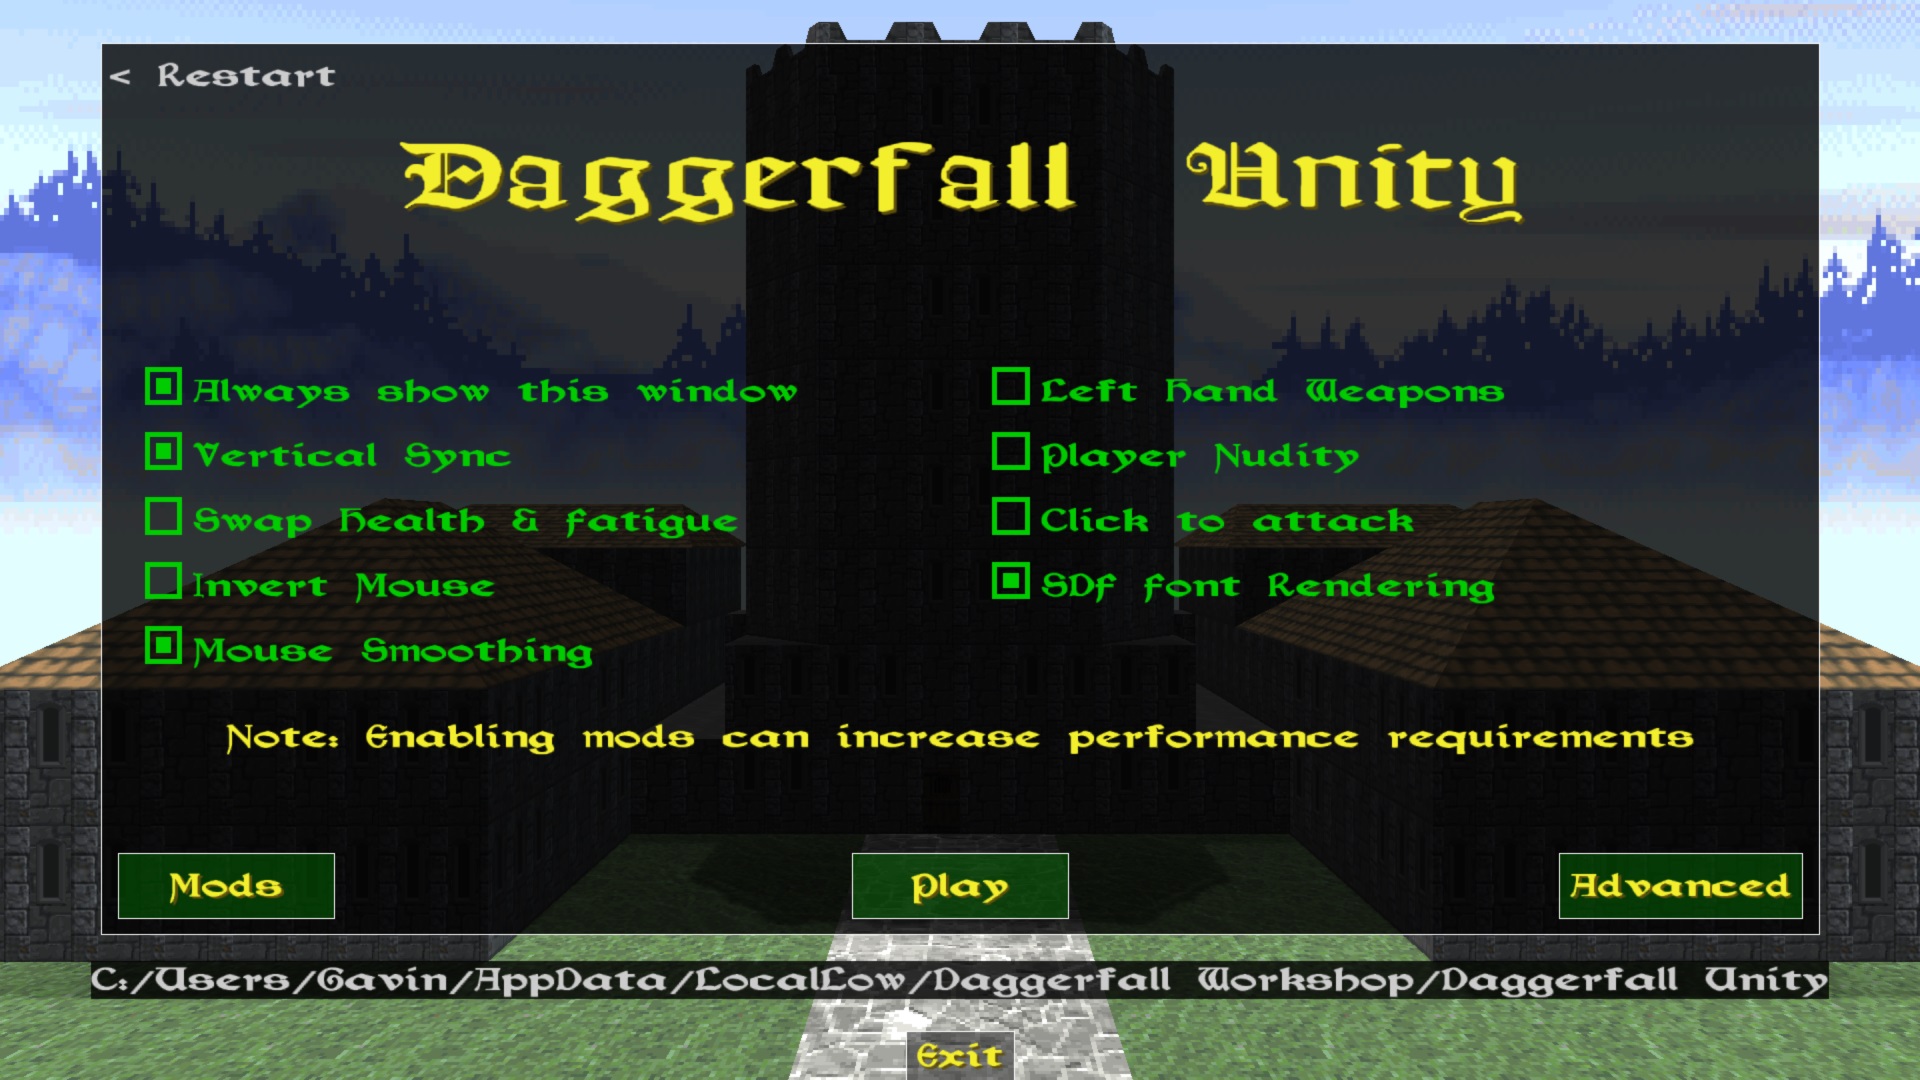
All the way back in September, I upgraded font rendering in Daggerfall Unity to support Signed Distance Field (SDF) fonts. This enabled smooth high-resolution font replacements which can operate under the same “layout rules” as classic Daggerfall’s pixel fonts, with a substantial improvement to reading comfort as this comparison screenshot demonstrates.

Rather than storing individual display pixels of a text glpyh, SDF fonts store a distance value that can be turned into display pixels later at any resolution using a custom graphics shader. Unlike regular pixel fonts that become quite pixelated at high resolutions, SDF text can use those distance values to generate sharp detail even at UHD resolutions and beyond. If you’re interested in the inner workings of Signed Distance Fields, there are loads of great resources out on the web. This tutorial doesn’t look very deeply at SDF concepts, only the process of creating new SDF fonts for Daggerfall Unity.
Resources
There are a few resources you will need to work through this tutorial.
- Unity 2018.2.11 (we’ll be using a free Unity asset to generate our final SDF texture)
- Codehead’s Bitmap Font Generator (for creating initial texture atlas)
- SDF Texture Generator Free (Unity asset for creating SDF textures)
- TES Font Pack (we’ll be using Morris Roman Black font from this pack as an example)
You can use whatever font or tools you like to generate your SDF font atlas. This is just the process I’m using that will generate known-good output for Daggerfall Unity. If you do use a different toolchain, the only thing that matters is the output image is a proper SDF texture and the glyphs are laid out in a specific way.
Font Layout Technical
The first step in creating a new font for Daggerfall Unity is to select a good font. This isn’t as easy at it might sound due to how fonts work in classic Daggerfall itself. Following is a technical primer to help understand the font layout process and why some fonts will look better than others.
Every book, text resource, quest, and popup in Daggerfall uses hardcoded formatting similar to old-school teletext where formatting bytes are injected into a signal later parsed by a decoder and formatted on-the-fly at the same time signal is being read. The formatting data is literally in the byte-stream for these text resources and was hand-placed when text was written. This setup is wildly inflexible compared to modern standards like HTML markup. The end result is there’s a very tight coupling between classic’s screen resolution and pixel font dimensions, and where formatting characters such as line breaks are placed in the stream. We can’t just replace fonts wholesale or the resultant formatting will no longer be correct. And because Daggerfall Unity connects to a classic Daggerfall installation for default game data, we inherit these same limitations.
To work around this, font technology in Daggerfall Unity takes a two-stage hybrid approach for classic UI emulation with custom fonts. The first stage is to create a layout based entirely on classic font dimensions. This ensures the layout rules are respected as per the text resource byte-stream. To visualise this, here’s a sampling of classic UI text with the layout areas highlighted. The background image is just for reference, the actual layout information stored is just the red squares. Note there’s also a “single pixel” spacing gap between each character in layout data (it’s actually several pixels because Daggerfall Unity is always rendering at high resolutions, but more on that in a moment).

Once the layout has been generated as per classic requirements, this information is used by second stage: text rendering. If you have classic font rendering enabled then text is drawn as above using a simple blit shader. But if SDF fonts are enabled then a different shader is used to render SDF text. The output looks like below.

The actual layout areas are exactly the same in both cases, and each character is scaled to fit within that same rectangle. SDF fonts also overdraw into their adjacent “single pixel” spacing area, as these spaces look huge and unnecessary once you have high-resolution text. It also allows the SDF font to have a few pixels more for detail. At runtime, the only difference is the shader used to render text. The final output process is so basic that it’s possible to switch seamlessly between classic and SDF text at any time (shift+F11 in-game).
This two-stage layout process exposes a limitation of Daggerfall Unity’s SDF rendering. Because it’s necessary to maintain classic formatting streams, each SDF character may be slightly stretched or squashed to occupy the space their classic equivalent would otherwise fill. You will notice this most when glyphs in your replacement font have very different aspect ratios to the glyph in the classic font they are forced to match. In the screenshots above, the most obvious is the lower-case L character. This is just a single pixel vertical line in classic, but has serifs in replacement glyph. The result is the lower-case L is a bit squished when replacement font is rendered.
But provided you select a font with similarly shaped characters overall, this effect is minimal and most users probably won’t notice or care.
Creating A Font Atlas
Once we’ve selected a good replacement font, the first step is to generate a source font atlas for our SDF texture. In this case, we’ll be using the MorrisRomanBlack.ttf font and Codehead’s Bitmap Font Generator to build the atlas.
First install MorrisRomanBlack.ttf to your system. This is done by right-clicking the .ttf file and selecting Install from popup menu.
Then open Codehead’s Bitmap Font Generator (called CBFG moving forwards) and configure settings as shown below. Please double-check you don’t miss anything, every setting is important in some way.
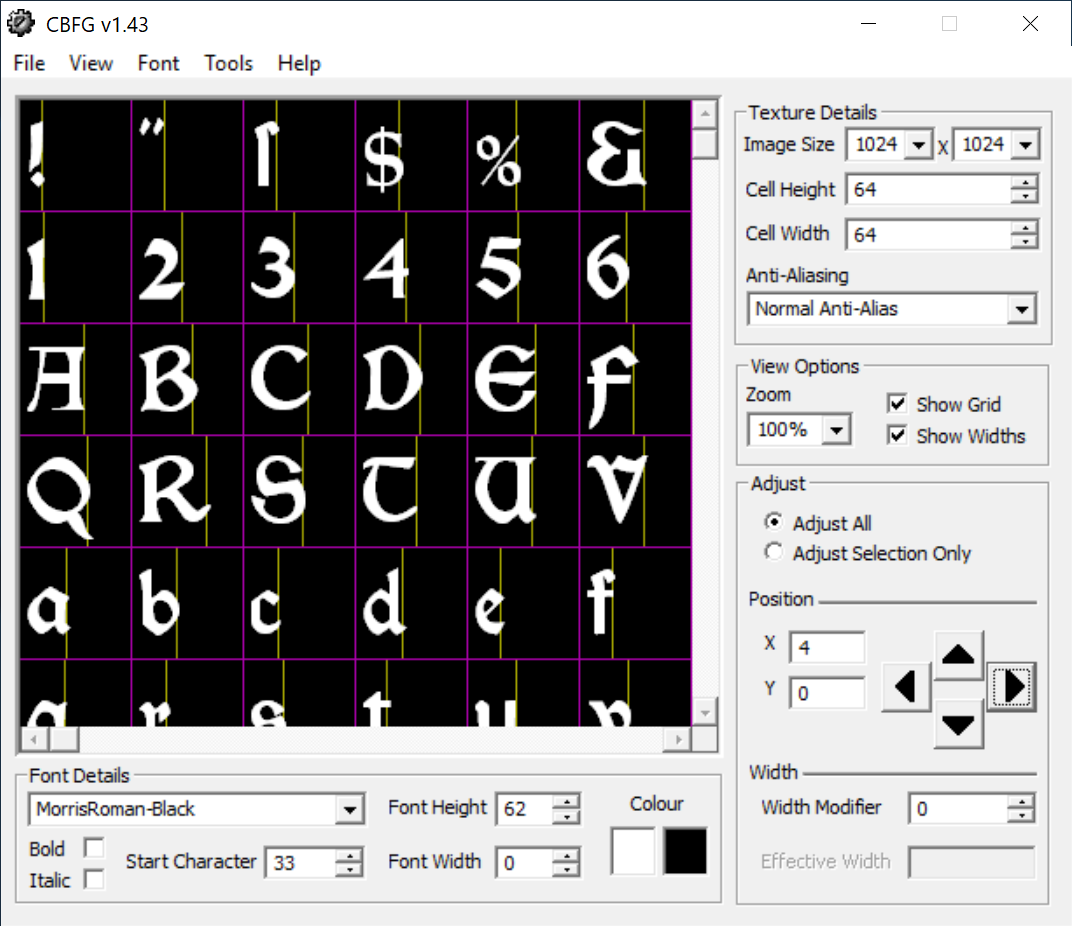
Depending on your font, you might need to clean up a little to ensure there’s no overlap at top or bottom of each cell. Keep in mind the SDF process will dilate the area around each character by a few pixels, which could cause stray pixels to be sampled at runtime. Accented characters are the worst offenders as they often have details very close to top or bottom of cell. I recommend setting zoom to 200% and looking through atlas one glyph at a time and adjust position of individual characters up or down if they are too close to cell floor or ceiling. This is the reason we set the “Font Height” to 62, to ensure there’s a couple of pixels free already built into the 64×64 cell. Note that I’ve also adjusted all glyphs 4 pixels to the right so there’s also some empty space around them on left and right. This will help Daggerfall Unity work out glyph dimensions when texture is read at runtime.
To adjust an individual character, select that cell in CBFG and ensure “adjust selection only” is selected. Then use up, down, left, right arrows to adjust vertical position inside cell. You might need to work through this process a few times until you have a source atlas you’re happy with. You can save your settings in CBFG and return to tune them later.
Once you’re happy with atlas, click File > Export > Targa32 (TGA) and save the atlas somewhere you can find it later. This will create a 1024×1024 output image with white on transparent pixels and nicely anti-aliased glpyhs. The anti-aliasing is important so the texture will convert nicely to SDF later. I saved this image as “MorrisRomanBlack-Atlas.tga”.
The full technical requirements of this texture are:
- Start character must be ASCII 33.
- Image size must be a nice square POW2 size like 1024×1024.
- There must be exactly 16×16 cells in the final image. For a 1024×1024 atlas this means 1024/16 = 64×64 pixels per cell.
- The glyphs must be nicely anti-aliased for best results from SDF conversion.
- Each glyph needs a few pixels of empty space all around them inside cell, especially on left-hand side of cell or glyph may appear truncated in game.
- Atlas must be exported with transparency intact, which is why we used TGA32 in CBFG.
Setting Up SDF Texture Generator
In this tutorial, I’ll be using a free Unity asset to generate the final SDF texture asset. If you’re comfortable with using Unity, you can just skim this part. If you’re using a different SDF generator then you can skip it altogether. You’ll just need to ensure the output image matches technical requirements above.
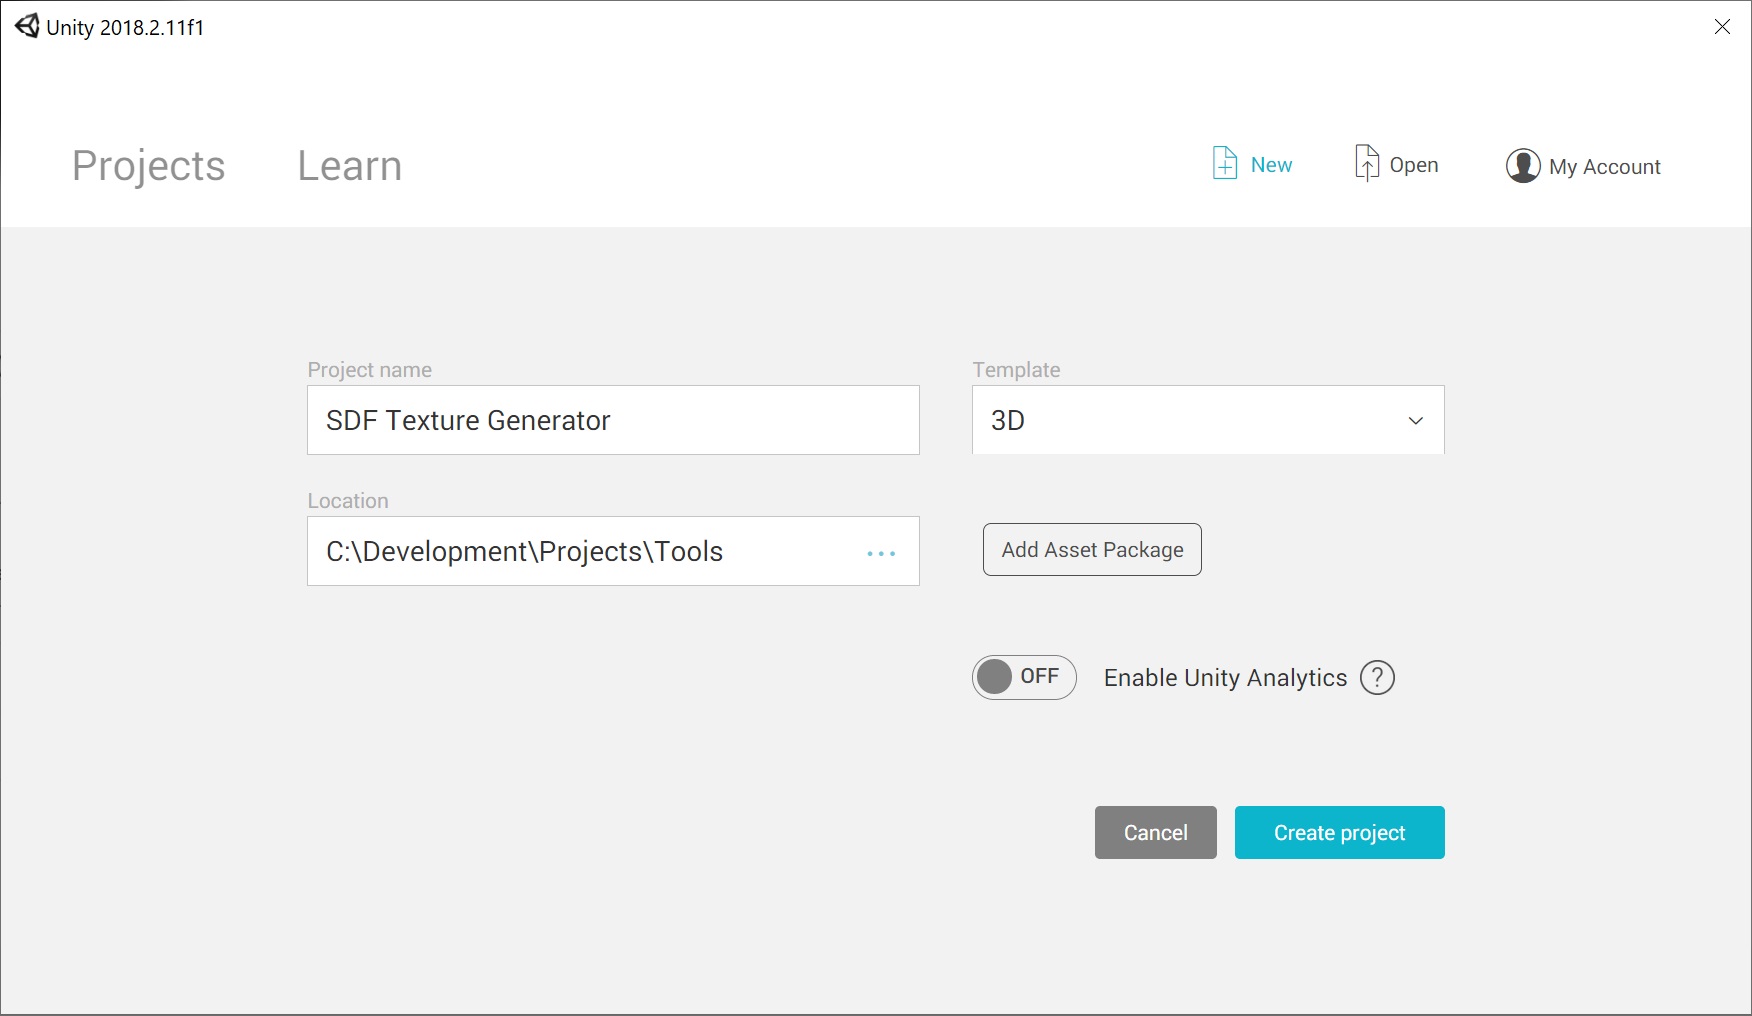
If you haven’t already, install the Unity editor. You can use any 2018.x version, but I’m using 2018.2.11f1 as this the current baseline for Daggerfall Unity itself. Then we want to start a new project called something like “SDF Texture Generator”.
Once your project opens, go to the Unity Asset Store (Ctrl+9 shortcut) and search for the “SDF Toolkit Free”. Download and install this asset into your project.
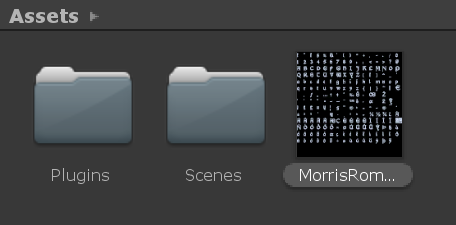
Once this tool is installed, we can use it to create our SDF texture. But first we need to drag and drop our source texture atlas into the Unity project. I simply dragged and dropped my “MorrisRomanBlack-Atlas.tga” created earlier directly into the Assets panel. Don’t worry about the imported texture settings, the tool will take care of that for us.
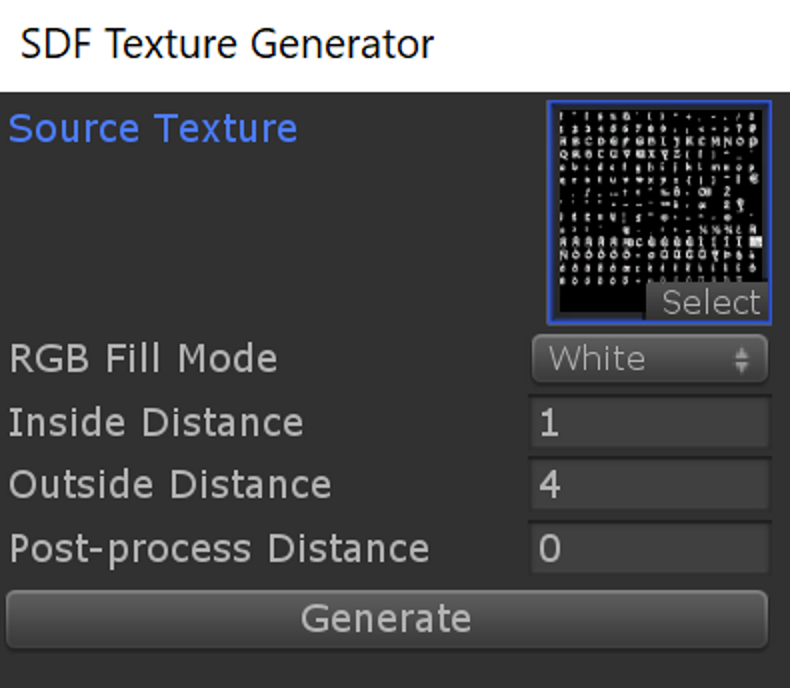
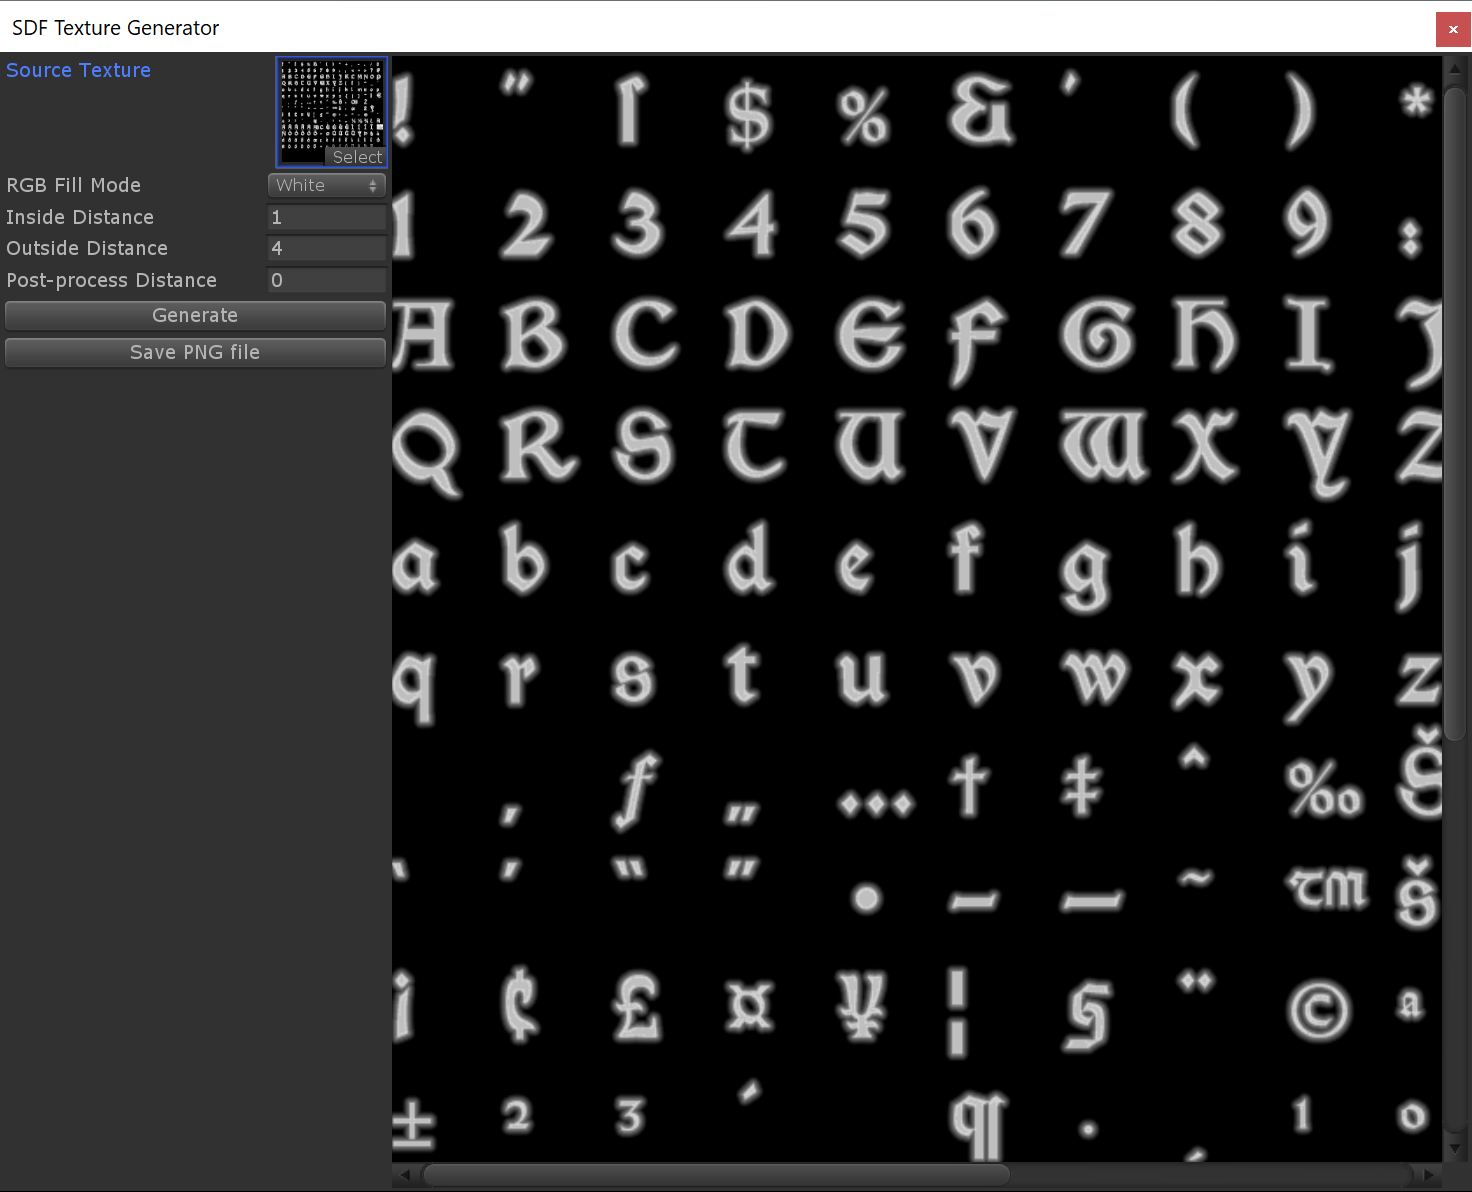
Now open the tool using Window > SDF Texture Generator. If the source atlas texture isn’t selected already, then click select and choose your texture from the list of available assets. Ensure settings are configured as below then click Generate.
This will output the final atlas texture pre-processed for SDF rendering. Click Save PNG File to export the texture. I saved this as “MorrisRomanBlack-SDF.png”. All we need to do now is rename this image appropriately and it’s ready to be used in Daggerfall Unity.
Using SDF Font In Daggerfall Unity
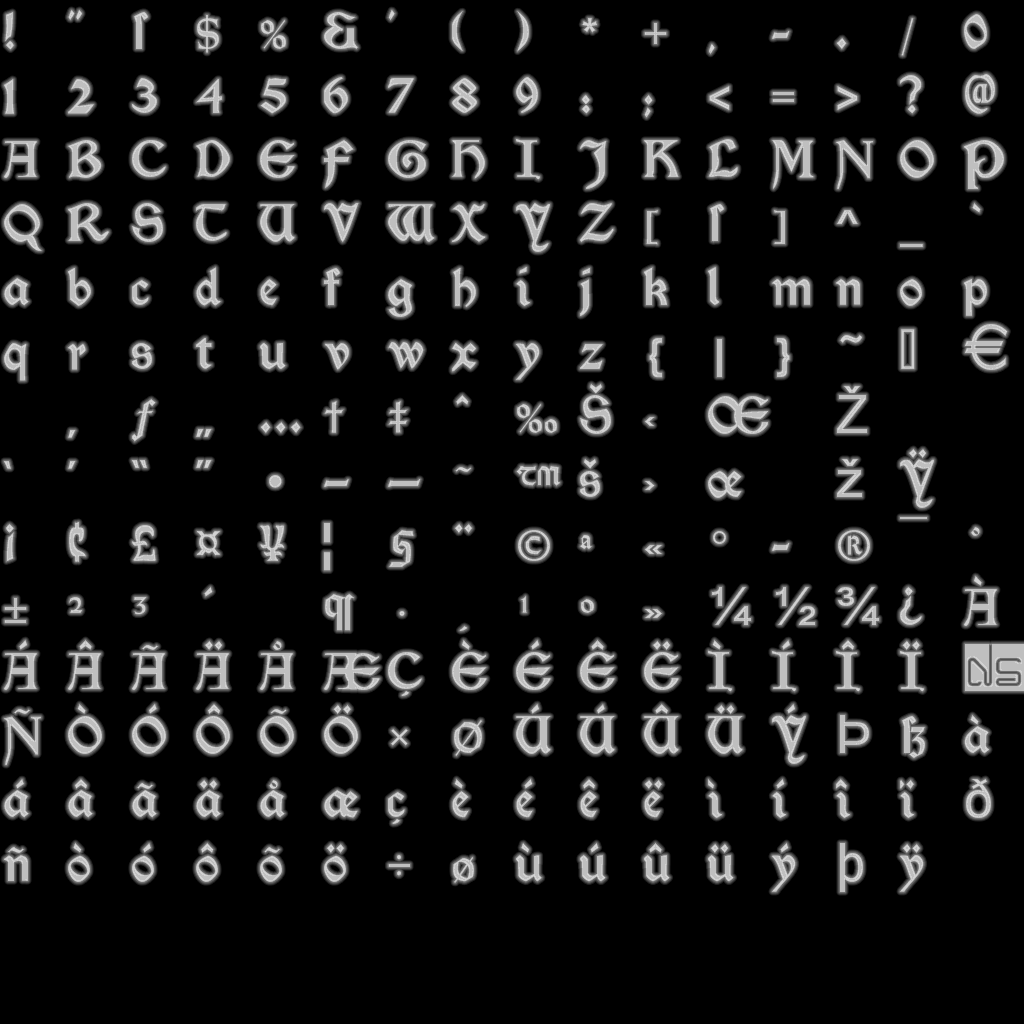
If you’ve followed the steps above, or used an alternate process, you will have a final SDF texture like below. I’ve just edited in a black background here to make it more visible in article. Normally it’s white on transparent, and you don’t want to change that.
Finally, to use this texture in Daggerfall Unity, we just need to rename it appropriately so the game knows which classic font it’s supposed to replace. In this tutorial, I’m replacing the default text font used almost everywhere which is FONT0003. To get this into the game:
- Rename final SDF texture to FONT0003-SDF.png.
- Copy into your Daggerfall Unity installation fonts directory in StreamingAssets/Fonts, overwriting the existing font file (keep a backup if you want to change back later).
Next time you start Daggerfall Unity, the new font should be visible everywhere FONT0003 is used, which is most places.

Conclusion
I hope this article helps those of you interested in creating new fonts for the game. Once the new SDF atlas texture has been created, you can distribute it directly to end users and they just need to drop it into their StreamingAssets/Fonts folder.
If you run into any problems with the tutorial, please create a topic in Help & Support forum and I will try to assist.
Good luck!
For more frequent updates on Daggerfall Unity, follow me on Twitter @gav_clayton.