Improved Terrain Tiling

To date, I have used a brute-force approach when tiling textures in cities and terrains. Each texture tile is mapped to a quad of vertices where each corner describes a UV coordinate allowing its texture to be drawn normally, rotated, flipped, or both rotated and flipped. This saves a great deal of texture space as only one version of texture is required to achieve four variations.

While it saves on texture memory (great for a 1996 game), this system has some inherent problems, not least of which is the number of vertices being used. For example, a full 8×8 block terrain has a total of 128×128 quad tiles with 4 vertices each. That’s a total of 65536 vertices just to handle the ground plane of a big city like Daggerfall or Wayrest. This is larger than Unity’s maximum mesh size, so everything needs to be split up into chunks. As cities are completely flat, wouldn’t it be great if we could just render all these tiles onto a single quad, using only 4 vertices for an entire city?

Happily, this is not only possible, we can solve a few other problems with tiled textures in the process. All through the magic of custom shaders.

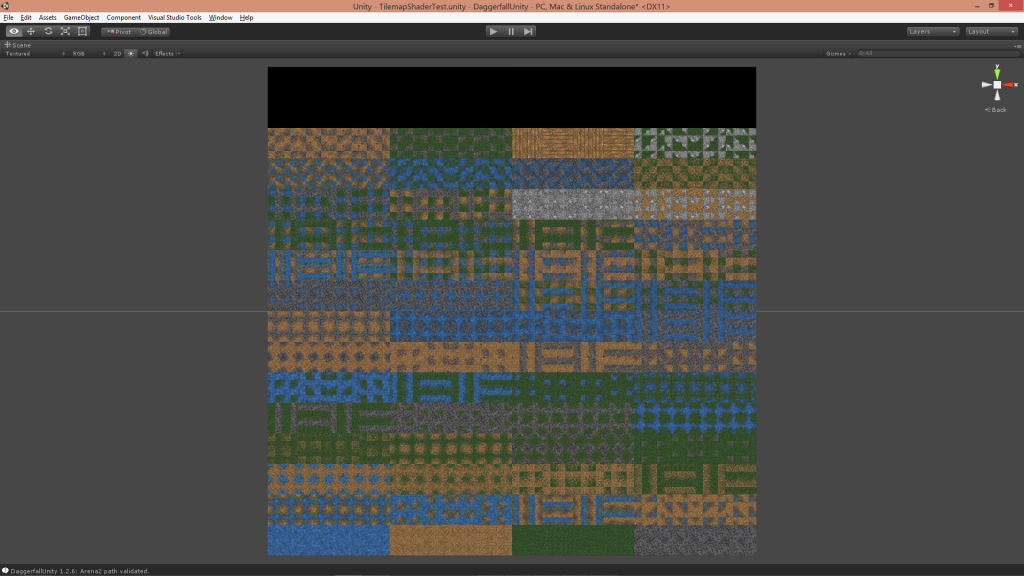
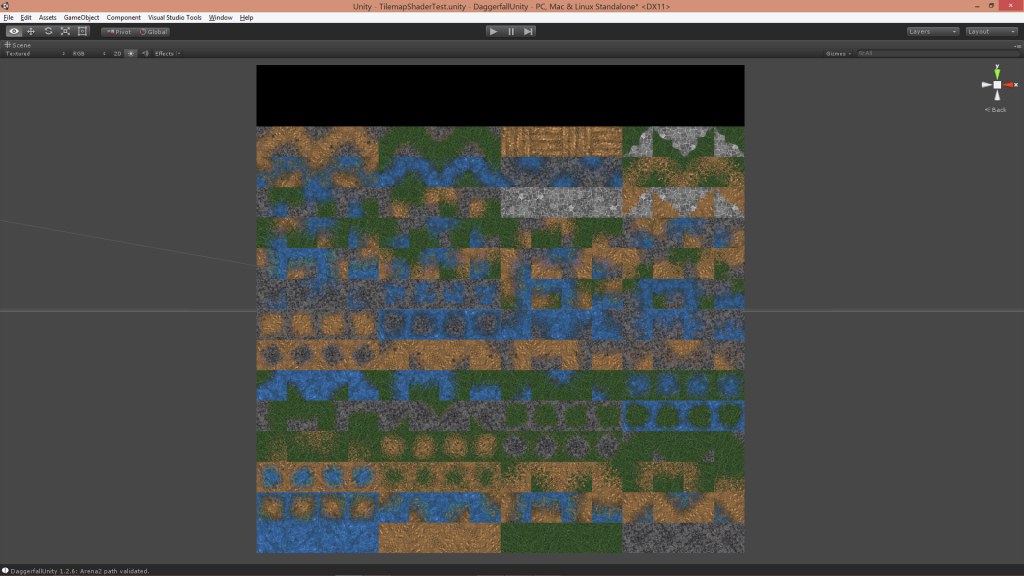
The first step is to change how the ground atlas is stored. Rather than just reference a single texture and modify using UVs, we’re going to pre-transform each texture in all 4 possible configurations (normal, rotated, flipped, rotated+flipped). This removes the need for UV changes and saves time in the fragment shader, and allows for some extra packing to happen as you’ll see shortly. The new tile set atlas looks like below (note that Unity texture [0,0] is bottom-left).

Atlas1

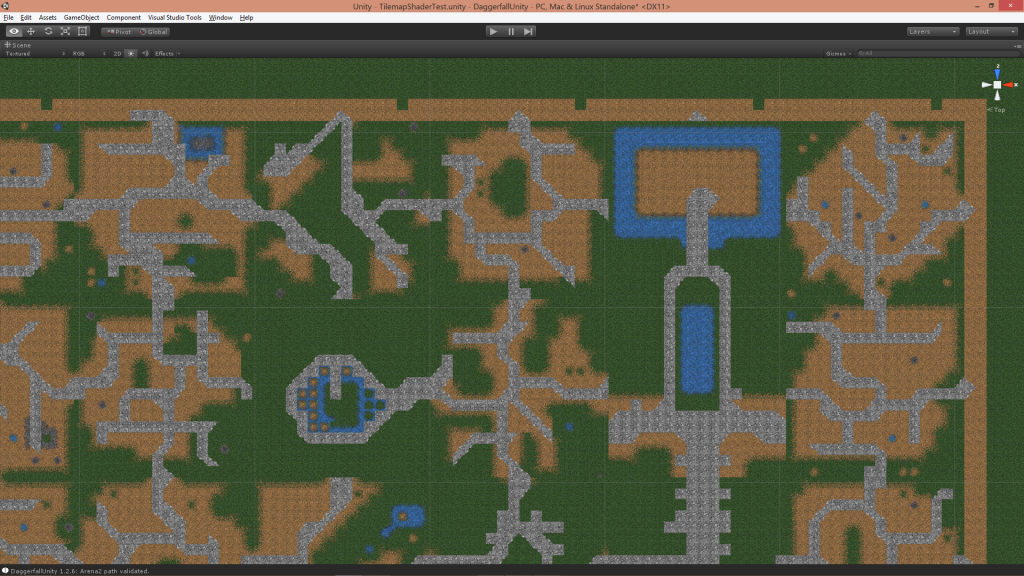
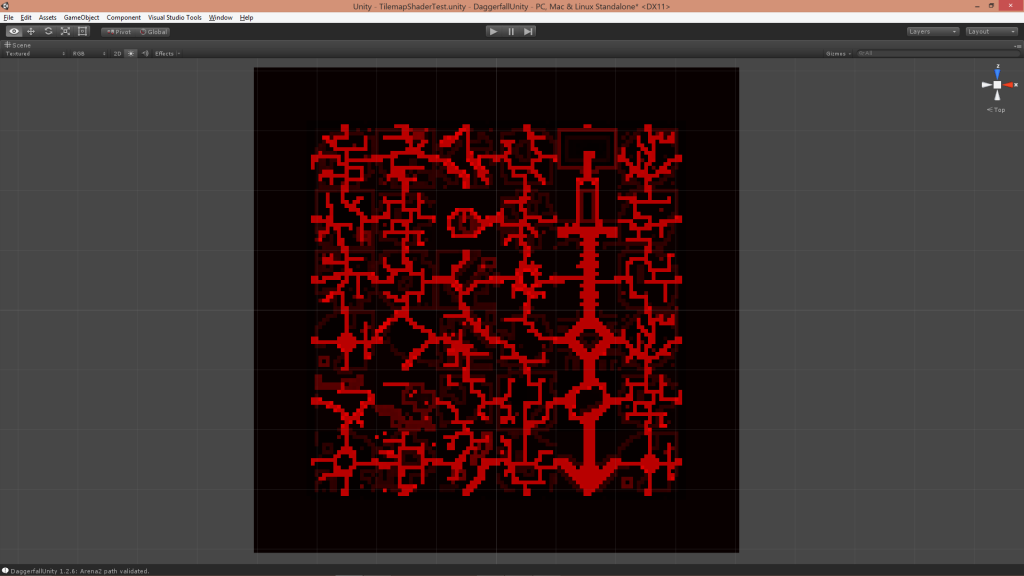
In order to reference these tiles in the fragment shader, we also create a tile map texture. This texture packs an index into the red channel that is basically a number 0-255 corresponding to a tile in the atlas above. This texture must be point-sampled to ensure no corruption of indices occurs. The tile map for Daggerfall city is below.

Tilemap

Now the shader has an atlas of tiles and indices referencing which tile to use. The following bit of code will read index from tile map then render out correct texture tile from the atlas.

int index = tex2D(_TilemapTex, i.texcoord0).x * _MaxIndex;
int xpos = index % _TilesetDim;
int ypos = index / _TilesetDim;
float2 uv = float2(xpos, ypos) / _TilesetDim;
float xoffset = frac(i.texcoord0.x * _TilemapDim) / _TilesetDim;
float yoffset = frac(i.texcoord0.y * _TilemapDim) / _TilesetDim;
uv += float2(xoffset, yoffset);
return tex2D(_MainTex, uv);

The result is a fully tiled city quad using just 4 vertices.

TilemapInAction

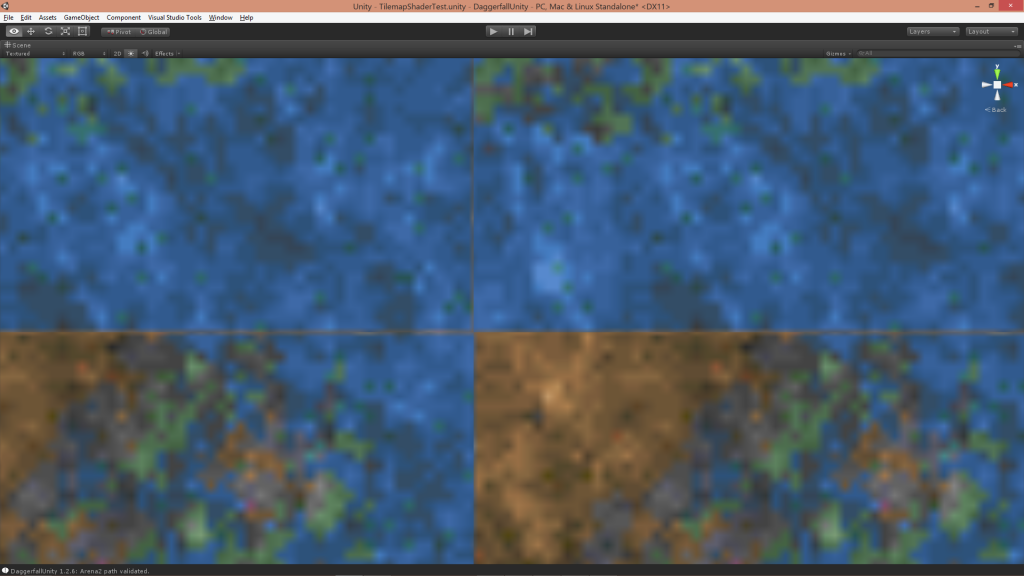
This works great, and it’s fast. If we were just using point filtering with no mipmaps, our job would be done already. Unfortunately linear filtering adds one set of problems and mipmaps add another. The first problem is texture colours bleeding in from adjacent tiles due to how linear filtering works. Image below demonstrates problem, note the dirt texture being sample at edge of water.

Bleeding

There are a few of ways to fix this, but one of the most robust is to manually wrap textures around to their opposite side in the atlas. This means that when the linear filter samples outside the tile area, texture wrapping will be simulated. The new atlas shows this concept with each tile wrapped 50% on all sides. Note: This solution works for tiling textures, but not for non-tiling textures where texture clamping needs to be simulated instead. The atlas generator is yet to support both wrapped and clamped tiles.

Atlas2

With a new atlas format, our fragment shader needs updating to sample interior part of each texture.

// Get offset to tile in atlas
int index = tex2D(_TilemapTex, i.texcoord0).x * _MaxIndex;
int xpos = index % _TilesetDim;
int ypos = index / _TilesetDim;
float2 uv = float2(xpos, ypos) / _TilesetDim;

// Offset to fragment position inside tile
float xoffset = frac(i.texcoord0.x * _TilemapDim) / _GutterSize;
float yoffset = frac(i.texcoord0.y * _TilemapDim) / _GutterSize;
uv += float2(xoffset, yoffset) + _GutterSize / _AtlasSize;

// Return fragment
return tex2D(_MainTex, uv);

These additions fix linear sampling to all but remove bleeding for tiling textures. Compare this image to the earlier version.

BleedingFixed

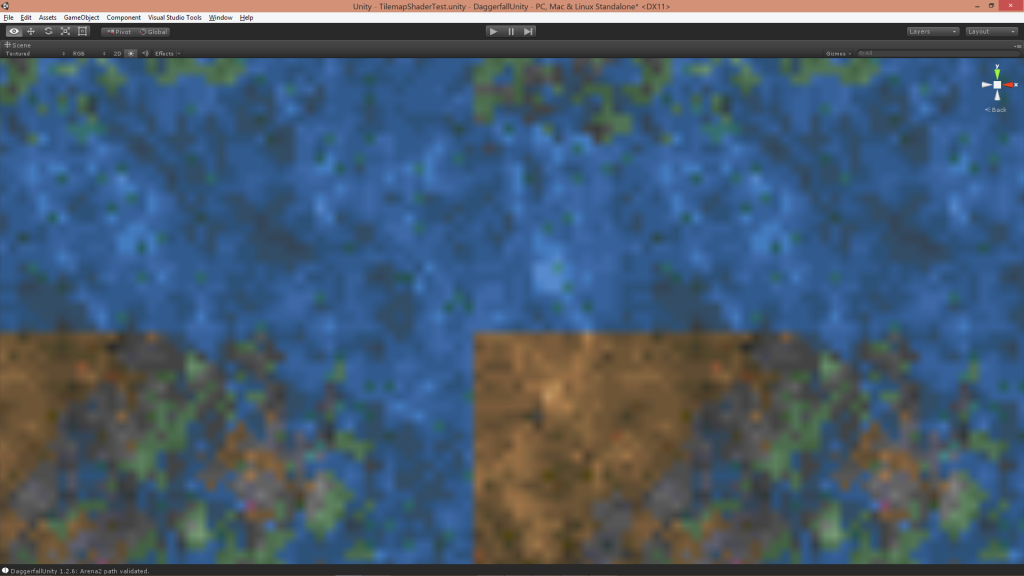
With texture bleeding taken care of, the next challenge is dealing with mipmaps. The graphics card has no understanding of our atlas, so tile wrapping makes it sample from the wrong mip level, which creates a whole new problem with cracks as shown below (you might need to open image to full size to see the cracking discussed).

MipMapCracks

Fixing this problem requires manually calculating the mip level in fragment shader. Fortunately there’s a lot of references online for dealing with this. Rather than just naively return the texture sample using tex2d, we need to use tex2dlod instead. Below is change to final line of code.

// Manually set mip level and return fragment
float mipLevel = GetMipLevel(i.texcoord0, _AtlasSize);
return tex2Dlod(_MainTex, float4(uv.xy, 0, mipLevel));

And the GetMipLevel() function.

float GetMipLevel(float2 iUV, float2 iTextureSize)
{
	float2 dx = ddx(iUV * iTextureSize.x);
	float2 dy = ddy(iUV * iTextureSize.y);
	float d = max(dot(dx, dx), dot(dy,dy));
	return 0.5 * log2(d);
}

With this new code, our mip cracking problem has vanished.

MipMapCracksFixed

And there we have it. A super-fast method of tile mapping from an atlas which defeats both texture bleeding and mip sampling problems, and only needs a single quad mesh.

There’s still more work to do, mainly around atlas generation. I need to handle wrapped tiles and clamped tiles differently, and manually pack mip levels to improve overall quality. I will get back to this in the new year with my performance review. On the subject of performance, these concepts can be expanded to reduce draw calls for the terrain system and city environments. This is just the first spoke in a big wheel of optimizations.

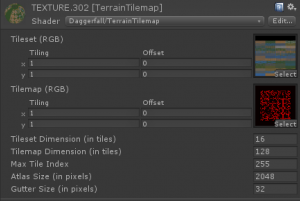
This last screenshot is of the material inside Unity editor, which shows how everything hangs together.

ShaderInEditor

References

I could not have pulled this off without the help of several people much smarter than myself. All the links below were used in formulating this solution.

Connor Hollis – Fast Tilemap Shader
http://connorhollis.com/fast-tilemap-shader/

IceFall Games – Terrain Engine
http://mtnphil.wordpress.com/2011/09/22/terrain-engine/

nVidia – Improve Batching Using Texture Atlasing
https://developer.nvidia.com/sites/default/files/akamai/tools/files/Texture_Atlas_Whitepaper.pdf

0 FPS – Texture atlases wrapping and mip-mapping
http://0fps.net/2013/07/09/texture-atlases-wrapping-and-mip-mapping/
Streaming World – Part 3

With all the major parts in place, next steps are all about improving overall appearance and boosting performance. I will tackle performance in the next and final part of this series. For now, let’s take a quick look at adding some visual appeal.

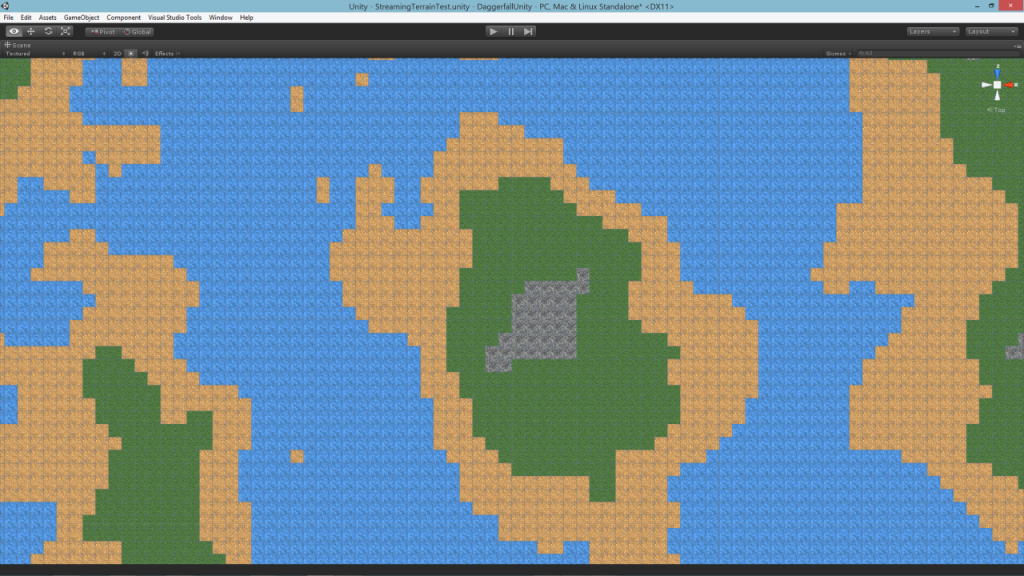
My first job is to improve texturing. All the screenshots you’ve seen so far have just been a flat grass texture. I implemented a basic simplex noise setup to create tiled patterns like below.

BeforeMarchingSquares

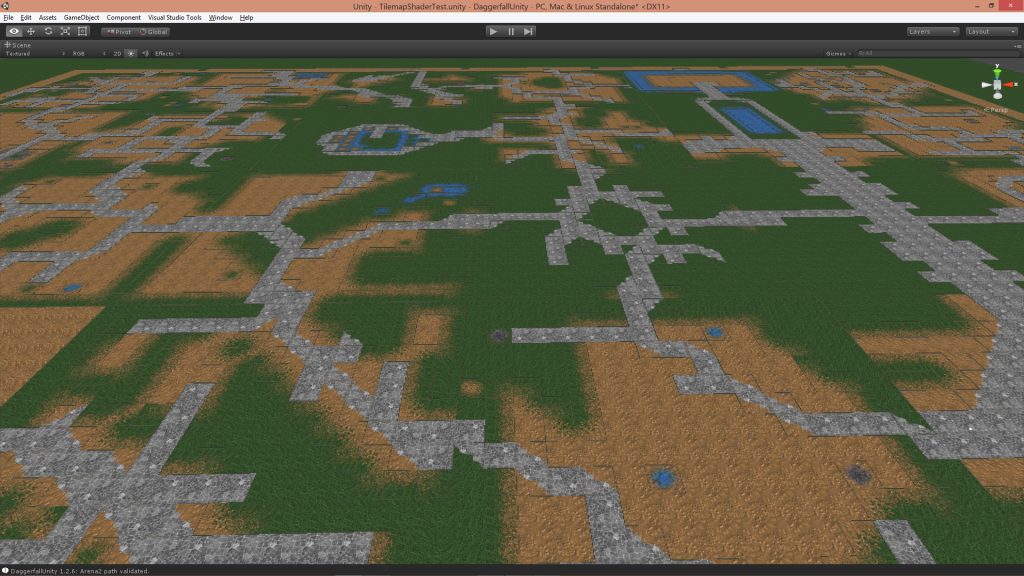
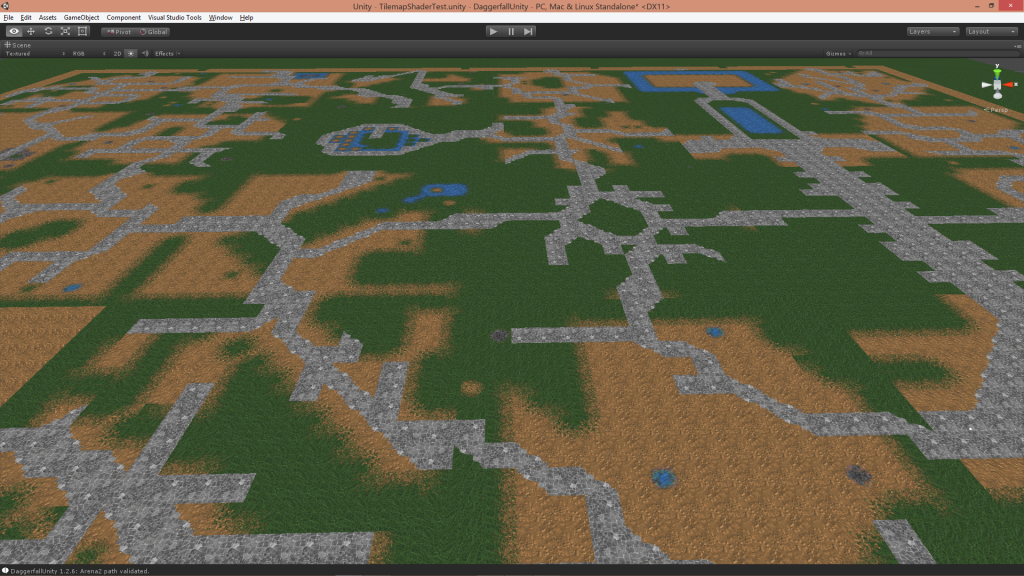
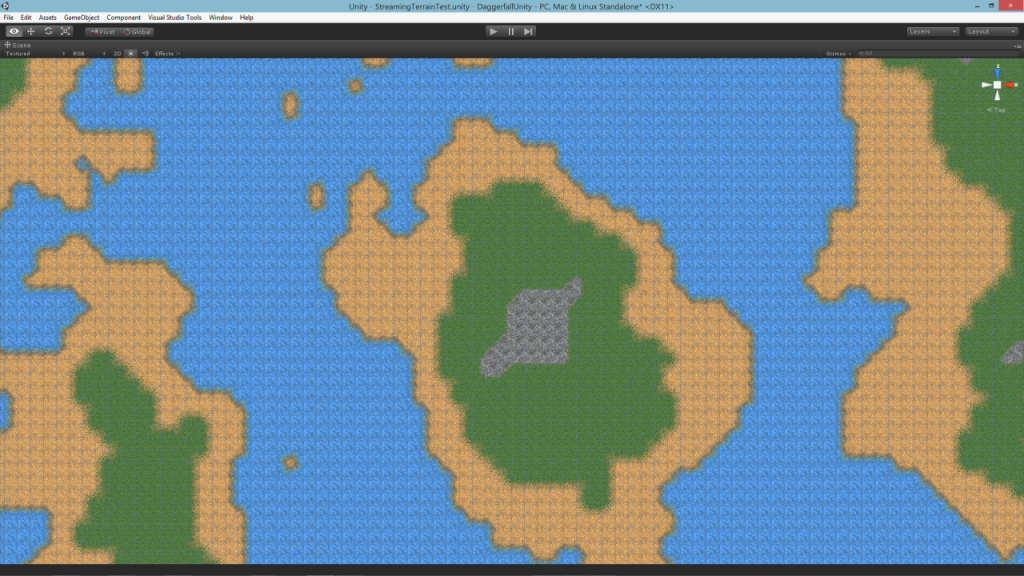
I then used marching squares to handle tile transitions from water > dirt > grass > stone. Daggerfall actually has a wider range of possible transitions (e.g. water > grass) but for simplicity I’ve only implemented the basic transitions so far. With marching squares the transitions look like this.

AfterMarchingSquares

I also added a little fog so distant terrain gradually blends into horizon. This gives the atmosphere a greater feeling of depth at long ranges like you would see in the real world.

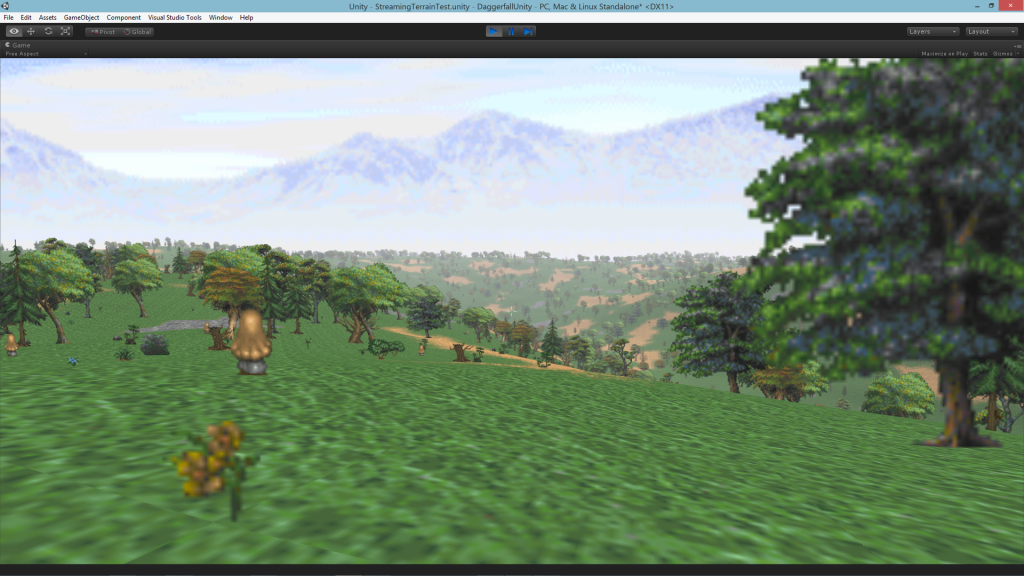
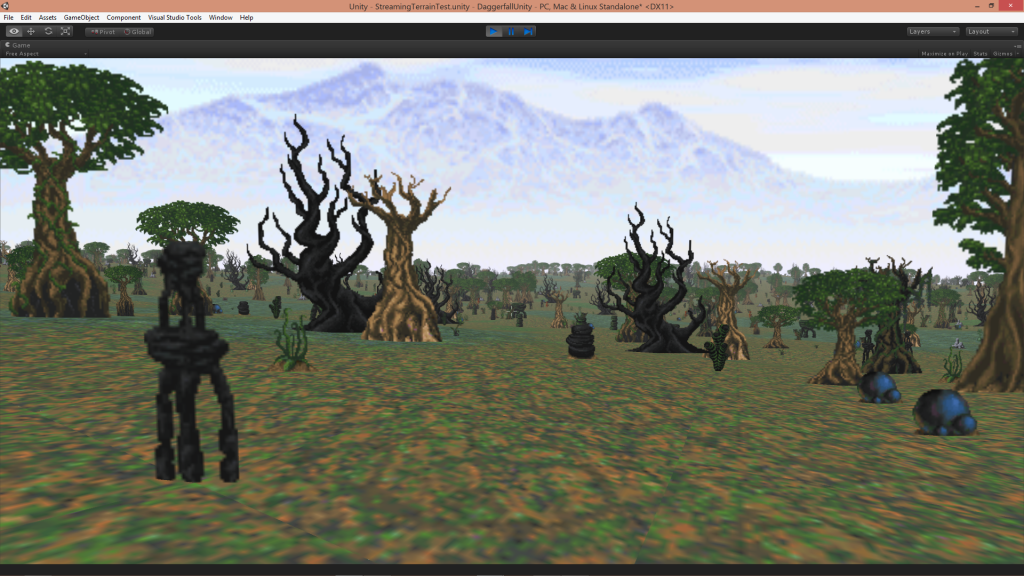
The final step was to add nature flats (vegetation, rocks, etc.) to scene. This is just a basic random function with a density set per tile type. This could be expanded later to change vegetation density based on any number of variables. Finally, we have a world that almost looks ready to explore.

In the hills near Daggerfall

Hills of Daggerfall

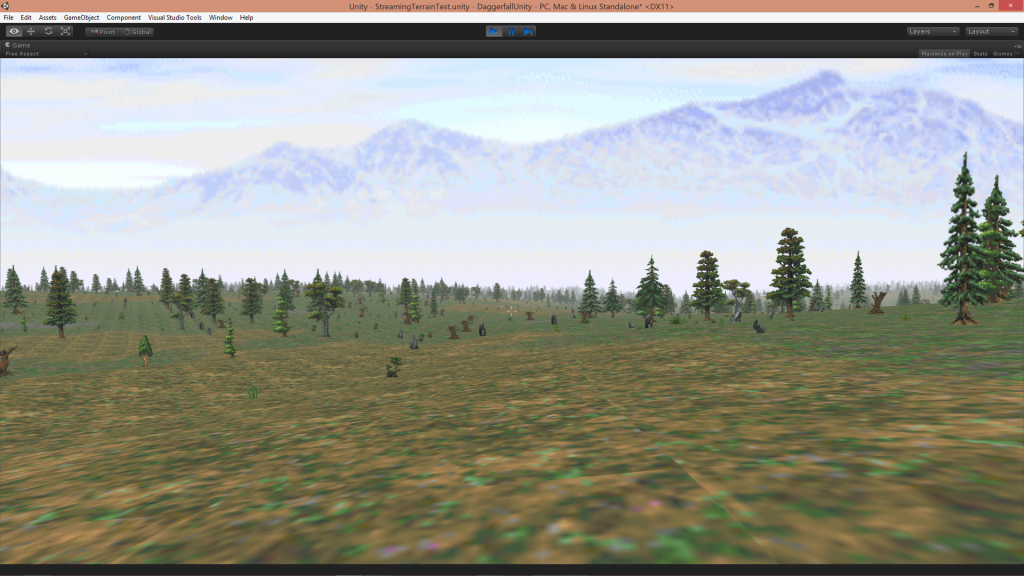
Isle of Balfiera

Isle of Balfiera

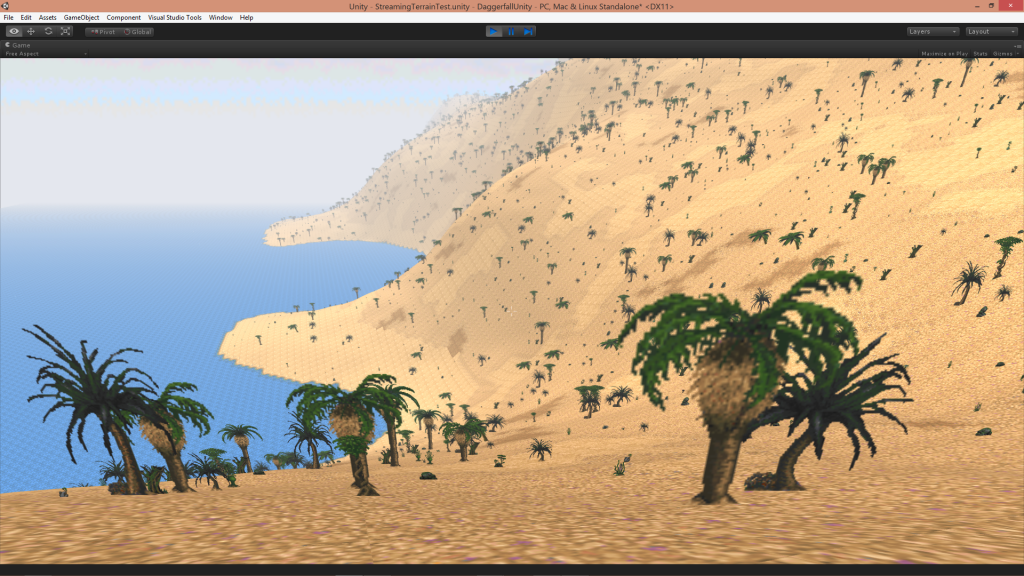
Off the coast near Sentinel

Coastal Sentinel

Swamplands of Tigonus

Swamplands of Tigonus

There’s still a great deal of work to go before this is ready. Due to the rapid nature of development, nothing has been optimised yet and performance is very poor. My first priority is a full performance review of the entire tools to get this where it needs to be. Everything from loading textures and models all the way up to drawing terrain and foliage needs to be improved. This will unfortunately delay the streaming world features until early next year, but the end result will be a much improved code base.

Another, smaller item will be the overall scale of terrain and distribution of vegetation. If you look at the coastal Sentinel screenshot above, the terrain ramps up much too rapidly. I need to set terrain scale based on biome (e.g. desert is flatter than mountains), and terrain noise based on biome (e.g. desert is more rolling than mountains). This is just a matter of tuning the numbers going into terrain generation for an overall more pleasing game space.

On the whole, I’m very happy with how the streaming world is shaping up. It’s basically where I want it in terms of recreating Daggerfall’s simplistic overworld, and just needs performance and aesthetic tuning. I can’t wait to get all of this completed so you have a whole world to build on using Daggerfall Tools for Unity.

This will be my final post for the year. I’m shutting down work at the end of this week and will be spending valuable time with family. I wish you all a very happy and safe Christmas and look forward to catching up again in the New Year.

Progress Recap and Future Direction

I can’t believe it’s December already. The Holiday Season will be upon us before we know it. I also can’t believe Daggerfall Tools for Unity has only been in development a few months. If you’ve just started following this project, here’s how it looked on August 16th this year after wrangling import of a single model.

Scourg Barrow exterior model

Now it looks like the below and can do all this stuff. Check out the Direnni Tower Demo page if you would like to play the demo this video was created from.

In less than 4 months, this Unity Asset has gone from loading a single untextured model to full locations with dungeons, enemies, weapons, combat, sound, building interiors, and a fully streaming overworld system is on the way. I am very proud of what I’ve accomplished so far. But more importantly, I’m having fun.

And to my great pleasure and surprise, others have taken an interest in what this project signifies. You guys understand these tools represent freedom to do creative things with Daggerfall, beyond just remaking the game. The simple demo above is only a taste of what’s possible.

For the first time all content and gameplay of Daggerfall can be recreated using a modern, powerful game engine. An engine which supports more than a dozen platforms and provides an entire development ecosystem backed by an enthusiastic community. It’s now possible to create entirely new Daggerfall experiences and share your creations with other Daggerfall fans. For example, community member Eric managed to get a city build running on Android.

If you’re interested, you will even find great tutorials and documentation to help you get started. And of course, everything is 100% open source.

If you don’t have development skills, you can still help by letting others know about these tools. The sky’s the limit for Daggerfall now, we just need more interested people to help reach those heights.

So that’s the last four months. What happens next? Obviously my first priority is to release version 1.2 with streaming overworld features. But that’s only a short-term goal, I also have plans for 2015 to share with you.

I want to keep growing and refining these tools, and encourage other developers to get on board. I believe the time is finally right to build a small game with Daggerfall Tools for Unity. This not only shows what is possible, it provides a starting point for others and helps critically evaluate suitability of these tools for larger projects. Part of the process will be tightening up loose screws and adding features to solve problems encountered on a real project. The result will be a new Daggerfall-styled game for you to enjoy, and a more refined version of the tools. I will talk more about this project in early 2015.

I also need to provide a support hub for Daggerfall Tools for Unity. Beyond just documentation and tutorials, support means engaging with new developers and giving them a place to cooperate and share information. This hub will be a new site attached to dfworkshop.net with a community focus. I want to make the emphasis all about you and what you create, no matter how large or small. There’s no reason we can’t build a microcosm of the lively mod scene enjoyed by later Elder Scrolls titles. I am planning out the beginnings of this site now and should be ready to launch in first half of 2015.

So that’s the tools in review, with exciting new things to come. I’m feeling very positive about next year and look forward to meeting new Daggerfall fans in the future.

One more thing. If you’d like to keep tabs on my daily progress, I try to tweet small updates as frequently as possible. You will find me on Twitter @dfinterkarma.