Setup Enhancements In 0.2

There are a few areas where setting up Daggerfall Unity could be a lot easier:

  • Obtaining Daggerfall’s game files. There is no easy way of obtaining Daggerfall’s game files for non-Windows users. You basically need to install the game on a Windows PC then copy game files to your platform of choice.
  • Using the right game files. Most setup issues boil down to the game files being a CD-based version (movies not copied into arena2), not patched to .213, or game files have been modified over the years and don’t work as expected.
  • Settings not persistent. Every time you download a new version of Daggerfall Unity, you need to configure your settings.ini and keybinds all over again. There is no way of pushing out new settings without giving you whole new files each time with all default values.
  • Unclear when something goes wrong. If you start the game without setting your Daggerfall path, or if files are missing, you just see an unhelpful black screen or an obscure message.

Starting from 0.2, I will try to address the above problems with the following changes:

  • Providing game files download. Starting from Daggerfall Unity 0.2, I will provide a download archive for a known-good set of game files. This archive can be unzipped and used on Windows/Linux/Mac. You can still point to your own installation as before, so this download is completely optional, but it will be the recommended source of Daggerfall’s game files moving forwards. As Daggerfall’s game files are static, you will generally only need to download this archive once and it can be used for all future versions of Daggerfall Unity.
  • Settings will be persistent. The settings.ini and keybinds files are now deployed to Application.persistentDataPath, so you will keep your settings whenever upgrading Daggerfall Unity. New settings will be automatically synced without changing your other settings.
  • Setup UI. The new Daggerfall Unity game setup UI will be a friendly starting point guiding you through first-time configuration. If there are problems with your game files, the setup UI will try to point you in the right direction. This will evolve over time based on user feedback.
  • Options UI. Coming later in 0.2 cycle will be a Daggerfall Unity options UI. Most settings can be configured without opening settings.ini or keybinds files at all.

More news on the 0.2 release will be posted soon.

Items Part 3 – Paper Doll

With item bitmaps and dyes out of the way, it’s finally time to begin work on paper dolls. The concept of layering cutouts of clothing and other accessories over a figure is centuries old, and a perfect solution for early video games where memory was at a premium. Daggerfall’s paper doll system is easily one of the most extensive to be found in video games of the time.

Before equipping anything to the paper doll, a few key pieces had to be researched.

  • Body Morphology. Every bit of armour and clothing has 8 variations to suit the male and female body shapes of Argonians, Elves, Humans, and Khajiit. The correct texture set must be mapped to the correct race and gender.
  • Position. The X, Y coordinates of each item on paper doll is coded into their texture files. This is tightly coupled to morphology.
  • Draw Order. Every item template has a value to determine the correct item rendering order on paper doll.
  • Equip Table. The equipment slots available to player and rules for what is equipped where.

I won’t go into detail about the first three, that information is just managed by the API as part of importing or generating items. The equip table is a little interesting however with a total of 27 slots available. I use the same index setup as Daggerfall itself.

  • 00 Amulet0 (amulets, torcs, etc.)
  • 01 Amulet1
  • 02 Bracelet0
  • 03 Bracelet1
  • 04 Ring0
  • 05 Ring1
  • 06 Bracer0
  • 07 Bracer1
  • 08 Mark0
  • 09 Mark1
  • 10 Crystal0
  • 11 Crystal1
  • 12 Head (helms)
  • 13 RightArm (right pauldron)
  • 14 Cloak1 (casual cloak, formal cloak)
  • 15 LeftArm (left pauldron)
  • 16 Cloak2
  • 17 ChestClothes (shirt, straps, armbands, eodorics, tunics, surcoats, robes, etc.)
  • 18 ChestArmor (cuirass)
  • 19 RightHand (right-hand weapon, two-hand weapon)
  • 20 Gloves (gauntlets)
  • 21 LeftHand (left-hand weapon, shield)
  • 22 Unknown1
  • 23 LegsArmor (greaves)
  • 24 LegsClothes (khajiit suits, loincloths, skirts, etc.)
  • 25 Unknown2
  • 26 Boots (boots, shoes, sandals, etc.)

The two unknowns could just be reserved indices as I was unable to find any equipment Daggerfall mapped to these slots. If there’s more to this, I’m confident it will be found in future testing.

As usual the API handles equipping items for developer, it’s easy as calling EquipItem(item) on the entity’s equip table. If an item of that type is already equipped, it will be dropped in the next compatible slot (if one is free) or swap out an existing item based on swap rules for that item template.

Now that we know which items the player has equipped, the textures to use, and their position and draw order, it’s fairly trivial to start layering down bitmaps onto the paper doll. But as usual, a couple of additional problems must be solved.

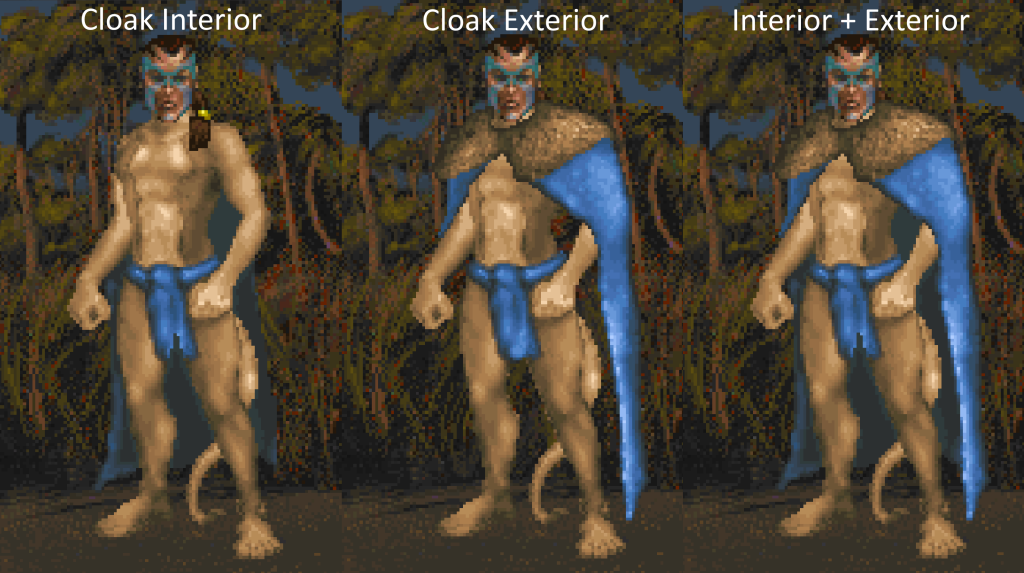
First up are cloaks, which have both interior and exterior parts drawn at different stages of the build. The below image shows how the two parts work together.

Cloak Components

The interior is drawn first, then the avatar, then the cloak exteriors. It’s actually possible to wear two formal or casual cloaks in Dagerfall (slots 14 and 16). Note: the above image was taken prior to order being fixed which is why the loincloth is slightly eroded in first and third images.

Our next problem is masking. Daggerfall has a special mask index allocated to hide hair that would otherwise be drawn outside of helmets. During the build process, the mask becomes transparent and overwrites anything else in that position. Masking is used for both helmets and hooded robes/cloaks.

Mask Components

Other items can then be drawn based on their draw order. The below animation shows a step-by-step paper doll build after sorting items by draw order (click here for full size)

Now that items are equipped, we need a way of removing them again. Daggerfall allows you to click directly on paper doll itself to remove an item from your avatar. This is accomplished by creating a special selection mask where each pixel is an index mapping to 0-26 on the equip table above. This isn’t actually visible, it’s just an array sampled when player clicks on paper doll. Following is how the selection mask looks when rendered out to an image using grey values to represent indices. Each grey value maps to an item slot on paper doll.

AvatarAndMask

I’m finally nearing the end of initial item support in Daggerfall Unity. There is still much to do (loot tables, shops, dropping items, repairing, storing items, effects, and so on) but those problems can each be tackled in turn. What I want to do now is clean up some code and begin a new test release cycle. This will allow me to fix any early bugs before moving onto the next stage of item support. I will post more news on this soon.

Items Part 2 – Dyes

Before moving on to equipping items, I thought it would be fun to show off the equipment dye system in Daggerfall Unity.

Classic Daggerfall uses a 320*200 pixel 256-colour display – or more specifically a Mode 13h display. Back in this era, bitmap graphics were typically a width*height byte array of indices into a 256-colour RGB palette. One of the coolest tricks available to graphics programmers at the time was to change index ranges to substitute colours, change brightness, animate textures, and so on. Daggerfall uses index changes and palette swaps to accomplish all of these tricks and then some – it would be possible to write a series on that subject alone. This article is just about changing dyes to re-colour weapons, armour, clothing, and how the old index swaps can be realised in a true RGBA renderer like Unity.

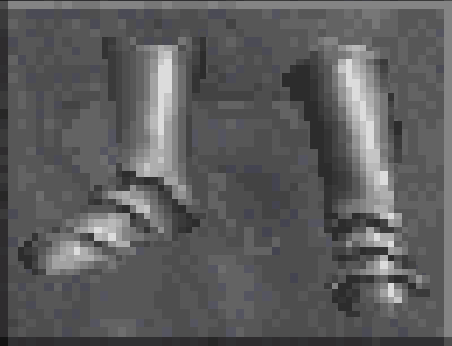
If all of that is difficult to visualise, let’s start with an example. Here’s a pair of basic boots without any changes.
dyes1

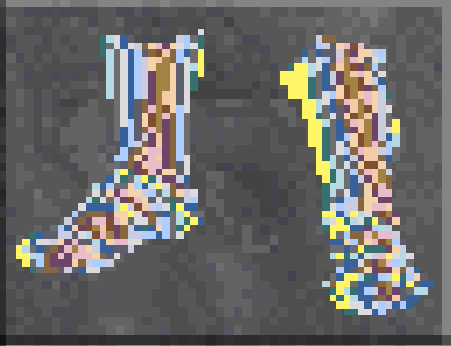
Every pixel above is just a single byte index into a 256-colour palette. For example, index 0x70 points to RGB #DCDCDC in the default texture palette for a very light grey. For weapons and armour, the 16 indices 0x70 to 0x7F are reserved for index swaps (clothing reserves indices 0x60-0x6F). In the case of these boots every pixel falls between 0x70-0x7F, but that isn’t true of all items. Sometimes only a small part of the image will support dyes. If we just substitute every index between 0x70-0x7F to another random index between 0x00-0xFF we get the below.
dyes2

Quite the mess, but it demonstrates that changing indices can radically change the appearance of an indexed bitmap. The important thing to keep in mind is that every pixel is not by itself a colour. Rather its just an index pointing to a colour.

The first challenge in bringing indexed colours into Unity is that every time we read in a Daggerfall bitmap it must be converted to true 32-bit RGBA values where every pixel actually is a specific colour. Fortunately converting to 32-bit RGBA in Unity isn’t difficult. The general process is:

  1. Allocate a Color32 array with the same number of elements as width*height of source bitmap.
  2. For every pixel index in source bitmap, sample the RGB colour of that index to a Color32 value.
  3. Write colour sampled from palette into correct position in Color32 array.
  4. Create a new Texture2D of same width*height as source bitmap.
  5. Promote Color32 array to our Texture2D using SetPixels32() and Apply().
  6. Use this Texture2D as needed.

When it comes to changing the dyes, all that’s required is to substitute the correct indices in step 2 before sampling palette. So where do these colour swaps come from and how does Daggerfall know which swaps to use for what items? Daggerfall actually has a couple of different methods for generating swaps. Let’s start with weapons and armour.

Buried inside Daggerfall’s executable FALL.EXE at offset 0x1BD1E2 (for DaggerfallSetup version) are the metal swap tables. There is one 16-byte swap table per metal type. For example, when encountering index 0x70 for a Daedric pair of boots, replace 0x70 with swap index found at daedricSwapTable[0]. For index 0x71 replace with index found at daedricSwapTable[1]. And so on. These swaps have been known about for some time and you can find more details on this archived page from the wonderful old Svatopluk site.

Clothing does not appear to use pre-defined tables like metals. Rather, each swap table is just 16x sequential indices. For example, purple is 0x30-0x3F and green is 0xA0-0xAF. Swap tables can be generated on the fly using a dye enum mapped to starting index. Daggerfall appears to do this as these sequences are not found in the executable like metal swap tables.

Armed with the power to create textures and swap indices, we can now generate our final boots image based on metal type. here are some examples.
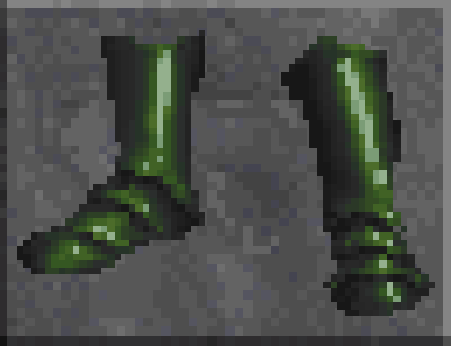
dyes3

Orcish

dyes4

Dwarven

dyes5

Daedric


One benefit of using the same generic process for metals and clothing is that it becomes possible to use clothing dyes on armour, something Daggerfall can probably do but doesn’t make available to players. This could allow for dye station mods down the road for players to further customise their equipment. With Unity using a true 32-bit palette this could extend well beyond Daggerfall’s 256-colours. Anyway, for an example of armour dyed something different:
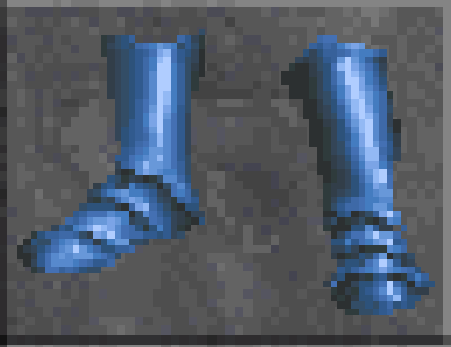
dyes6

Blue Chain Boots


The next challenge now that we’re using true 32-bit textures is a red pair of boots becomes a completely different texture to a green pair of boots. Whereas in Daggerfall the same bitmap can be used both times by just changing indices as described above in the software blitting function. Between this and the inherent (but minor) performance impact of converting indexed bitmaps to Texture2D, we need some way of minimising CPU time and garbage creation. Caching to the rescue.

Daggerfall Tools for Unity (the underlying API suite) already uses texture caching for general world materials, but items have their own set of problems to solve. To this end, I created a new item helper class to serve up equipment icons and handle the caching based on properties unique to items.

Every time an equipment icon is requested, a unique 32-bit key is generated by packing that request’s variables into a bitfield. The packing looks like below.

dye-key-bitfield

  • Colour enum index refers to the swap table in use. This value matches Daggerfall’s own colour enum stored within base item templates.
  • Variant index is an alternate image for this item.
  • Archive index is the texture file number (e.g. TEXTURE.245) containing the icon.
  • Record index is the icon index within the texture archive.
  • Mask bit is used to enable/disable a special mask used to overwrite pixels like hair around helmets. More on this in a later post.
  • There are a few reserved bits to grow the key system later.

It’s worth pointing out the end programmer doesn’t need to worry about how these values are packed. This all happens automatically under the hood when calling GetItemImage(). What matters is the API has a way of uniquely identifying any individual equipment icon based on its display properties.

When calling GetItemImage() the API will first check cache to see if this exact icon has already been converted from Daggerfall’s native file formats. If not, it is converted and stored in the cache for the next time its needed.

To wrap things up, here’s a new gfy showing a variety of dyed items in the inventory UI.

[gfycat data_id=”WetUncomfortableBetafish”]

For regular micro-updates on Daggerfall Unity, I can be found on Twitter @gav_clayton.