Daggerfall Unity 1.0 is now available! After several years in development, and the efforts of many people, Daggerfall Unity is finally considered complete. The project will now move into post-release community support and maintenance.
What is Daggerfall Unity?
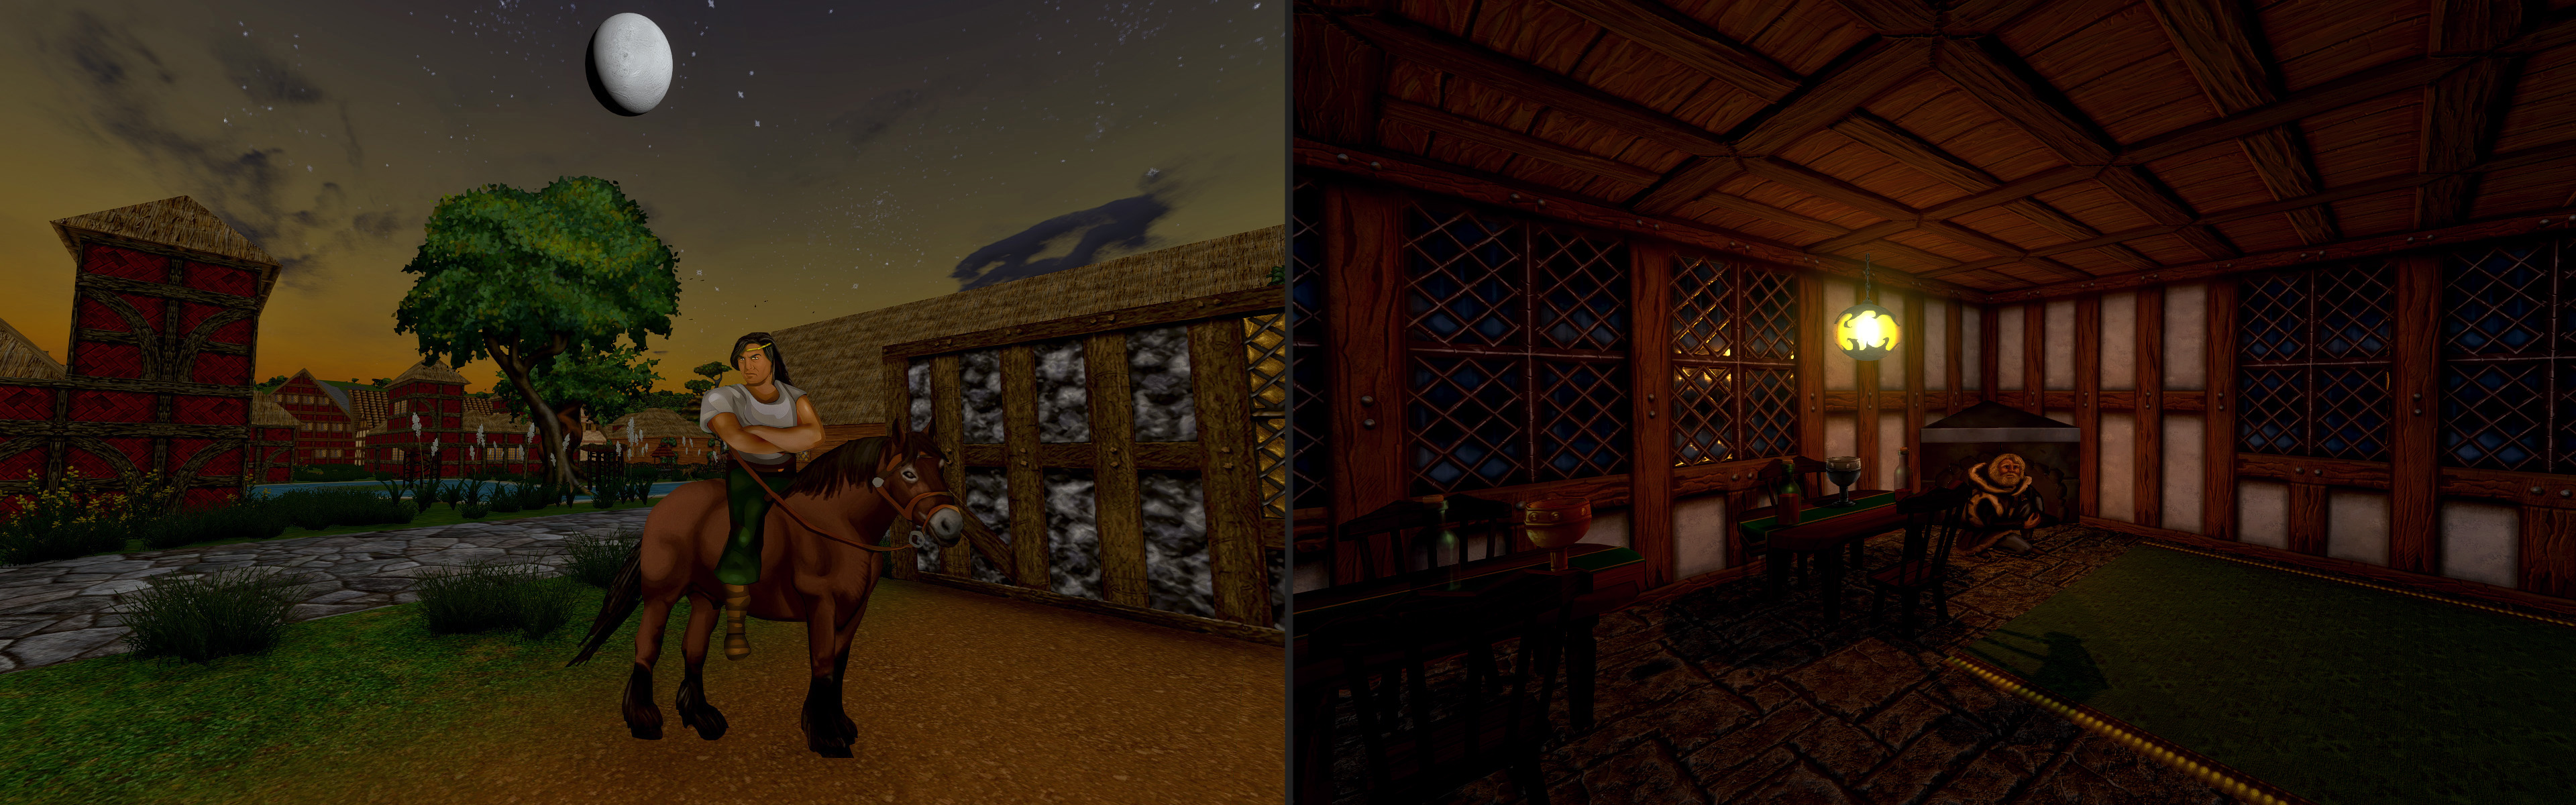
Daggerfall Unity is an open source recreation of Daggerfall in the Unity engine created by Daggerfall Workshop.
Experience the adventure and intrigue of Daggerfall with all of its original charm along with hundreds of fixes, quality of life enhancements, and extensive mod support.
Classic Daggerfall Plus
Cross-platform without emulation (Windows/Linux/Mac)
Retro graphics are boosted by modern engine and lighting
High resolution widescreen with classic style
Optionally play in retro mode 320×200 or 640×400 with VGA palettes
Optionally overhaul the graphics and gameplay with mods
Huge draw distances even without mods
Smooth first-person controls
Quality of life enhancements
Extensive mod support with an active creator community
Translation support via community mods
Get Daggerfall Unity
Daggerfall Unity requires a free copy of DOS Daggerfall to run. This provides all necessary game assets such as textures, 3D models, and sound effects.
You can get a free copy of DOS Daggerfall from Steam and a free copy of Daggerfall Unity from the Releases page. Then simply unzip the latest version of Daggerfall Unity to its own folder and point it to the DOS version. Daggerfall Unity will take care of everything else.
Here are a couple of links with more detailed steps to help you get started using either Steam or a cross-platform process.
Daggerfall Unity has the following system requirements. Please note that optional mods may substantially increase system requirements or cause game to become less stable.
Minimum
Operating system: Windows, Linux, MacOS
Processor: Intel i3 (Skylake) equivalent
Graphics: DirectX 11 capable with 1GB video memory and up-to-date drivers
Memory: 2GB system RAM
Recommended
Operating system: Windows, Linux, MacOS
Processor: Intel i5 (Skylake) equivalent
Graphics: GTX 660 with 2GB video memory and up-to-date drivers
Memory: 4GB system RAM
Featured Mods
Daggerfall Unity has an active mod community with hundreds of incredible mods. It’s impossible to feature them all, but here’s a sampling of a few popular mods that represent a variety of mods the community has created. They range from graphical overhauls, to new quests, new guilds, adding new world areas, and changing game formulas and other behaviours.
DREAM
The Daggerfall Remaster Enchanted Art Mod (DREAM) upgrades game assets including sound, music, videos & all graphics found in the game. It goes beyond a restoration and additionally fixes the old quirks, bugs and increases variety/fidelity everywhere possible.
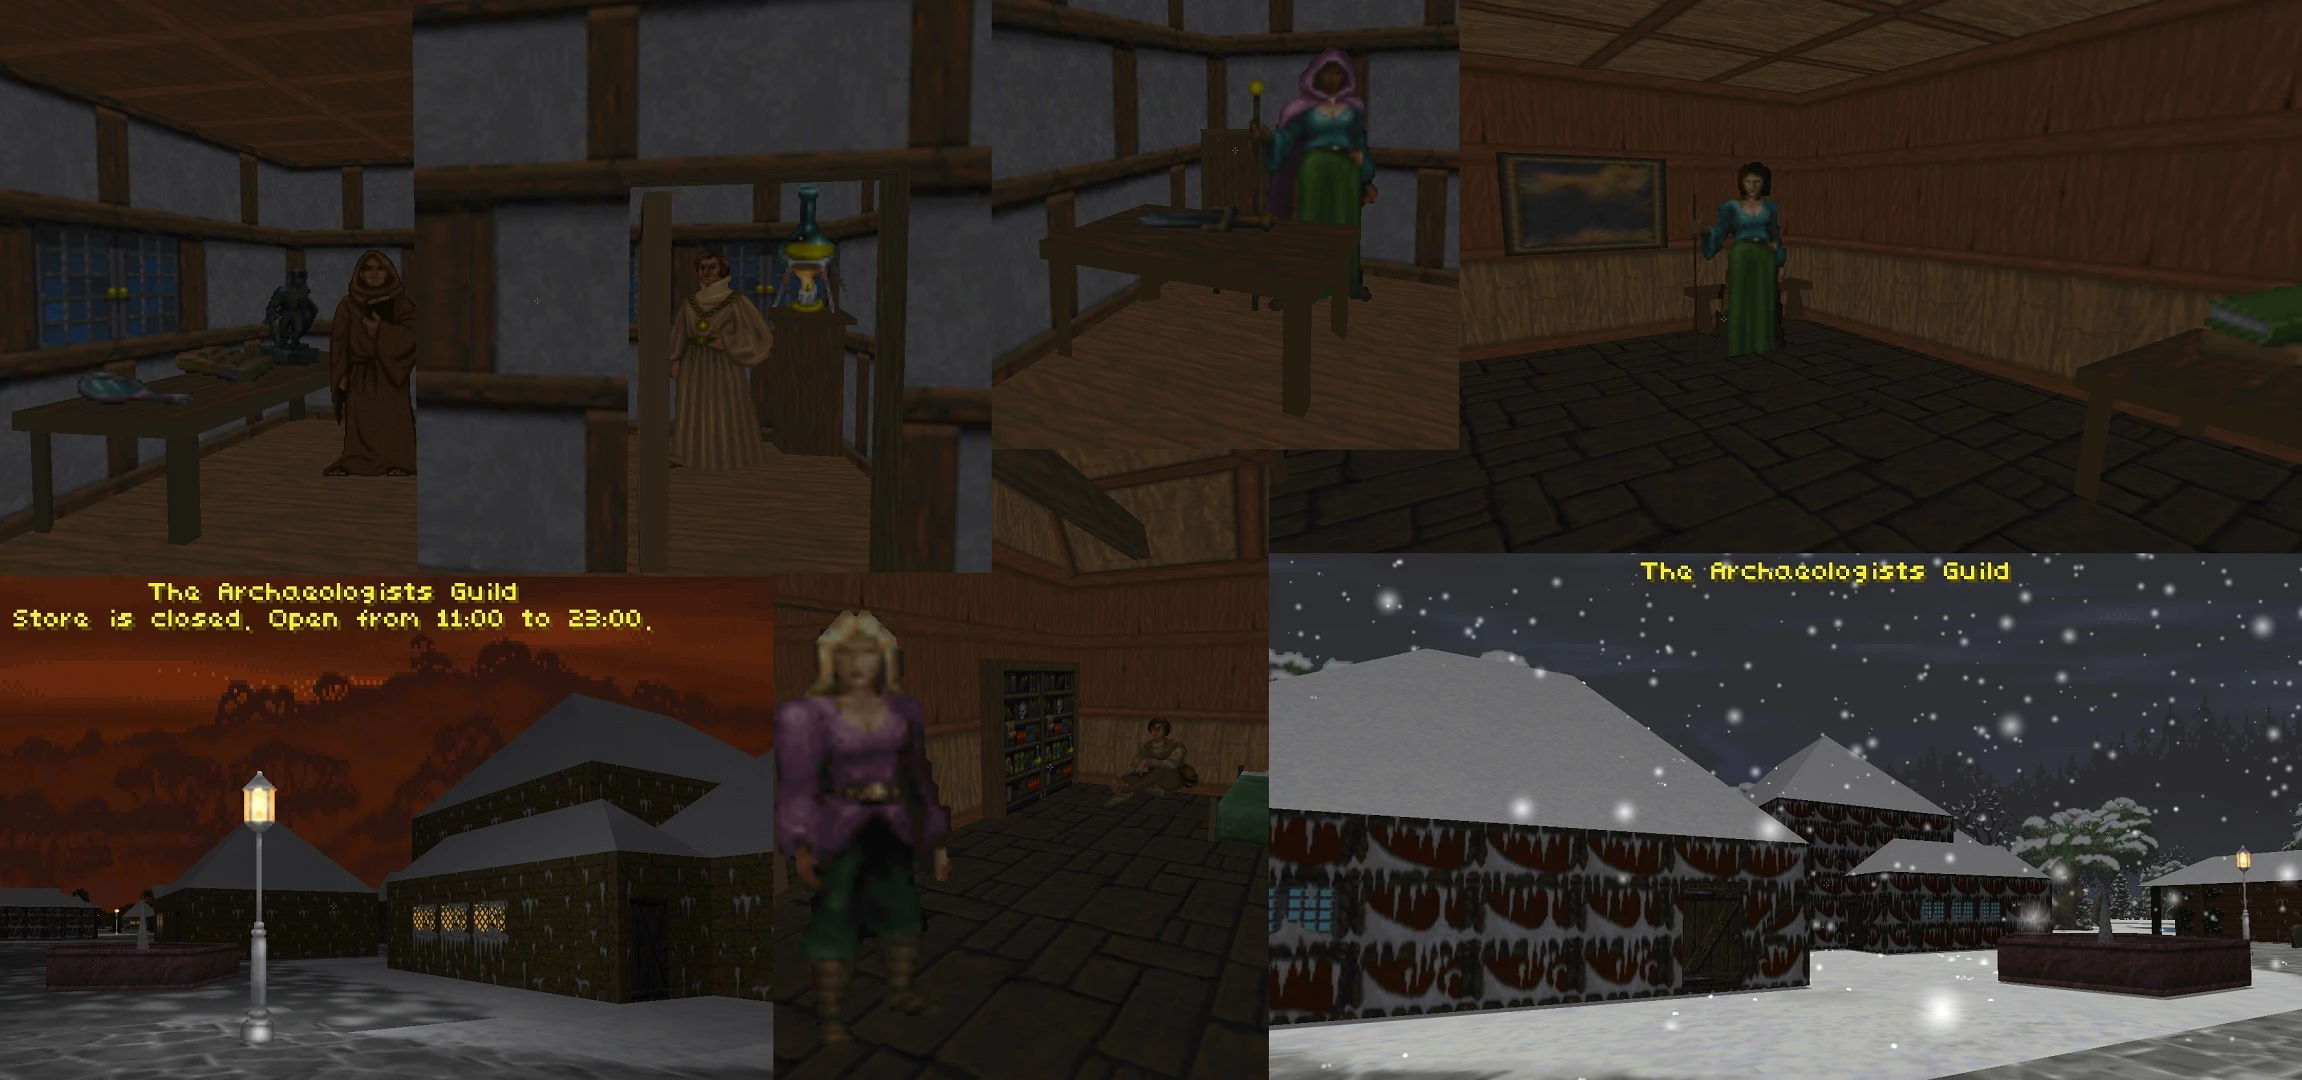
Enhance Daggerfall Unity gameplay by making language skills more viable and adding a new guild to the game, called “The Archaeologists Guild”. Their mission is to delve into the history of Tamriel and they’re interested in all creatures and races who have lived or still live there. Joining gives access to locator devices to aid in dungeon delving.
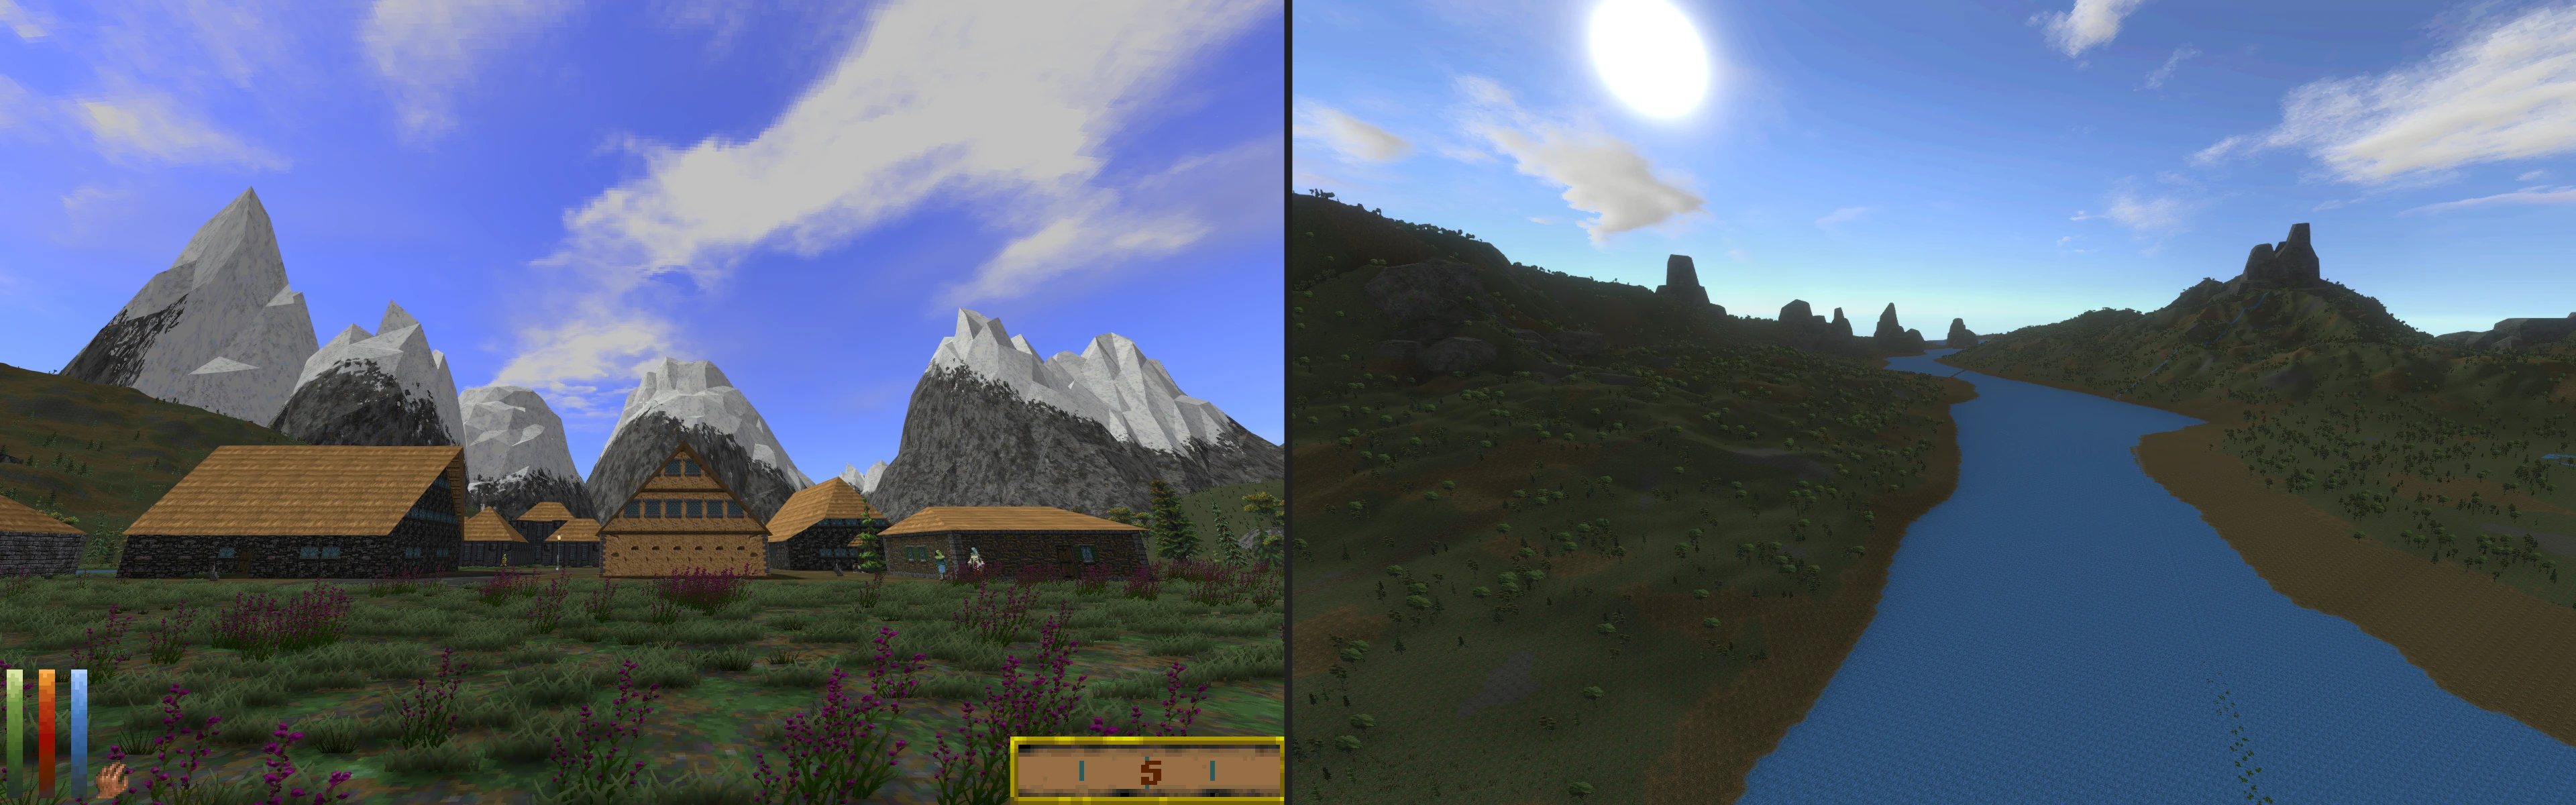
From the ashes of Daggerfall’s past, experience the world of Daggerfall as originally envisioned. With glorious mountain tops that reach for the heavens, and countless new locations to explore.
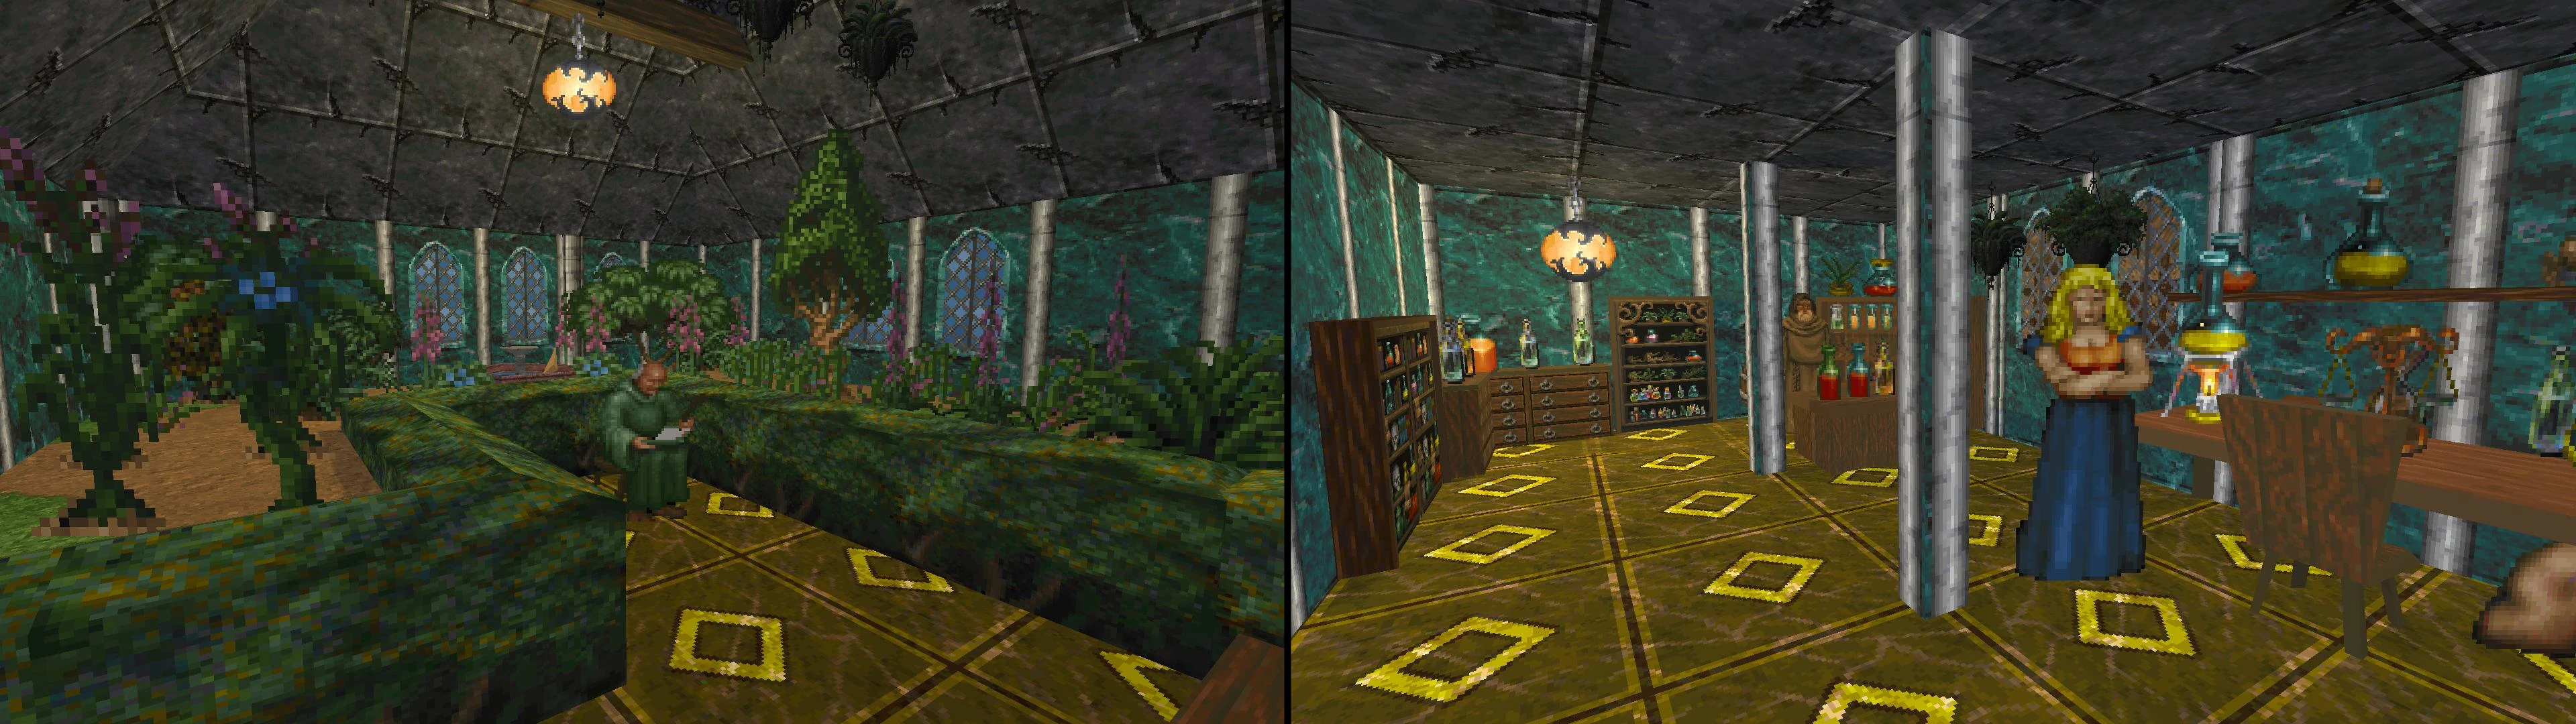
Finding My Religion is a multi-release visual and gameplay overhaul of Daggerfall’s religions. The current release is “Detailed Temples”, which decorates and redesigns the temples’ according to the worshipped deity’s sphere of influence. Julianos boasts a bigger library than others, Kynareth has an indoor garden, Mara has a birthing room and more. Each temple have been expanded downwards, with priests’ quarters and additional rooms for all service members. They also feature a crypt where people of importance have been buried.
Instead of increasing chance to avoid an attack completely, armor now reduces the damage you take, based on the material as well as the type of attack. Skills now determine most of your chance to avoid attacks, including many more features.
If you play using the “GOG Cut” release of Daggerfall Unity, please consider this version is now almost two years out of date and comes preloaded with dozens of mods. It’s buggy, slow, and completely changes how the game looks and plays. The Daggerfall Unity development team did not assemble the “GOG Cut” release and in no way recommend it to play Daggerfall Unity.
Until GOG update the version of Daggerfall Unity on their store, the best outcome is to migrate away from GOG Cut to a standard and up-to-date release of Daggerfall Unity.
Here’s the process to remove GOG Cut and get the best outcome from a fresh install.
Step 1 – Remove GOG Cut
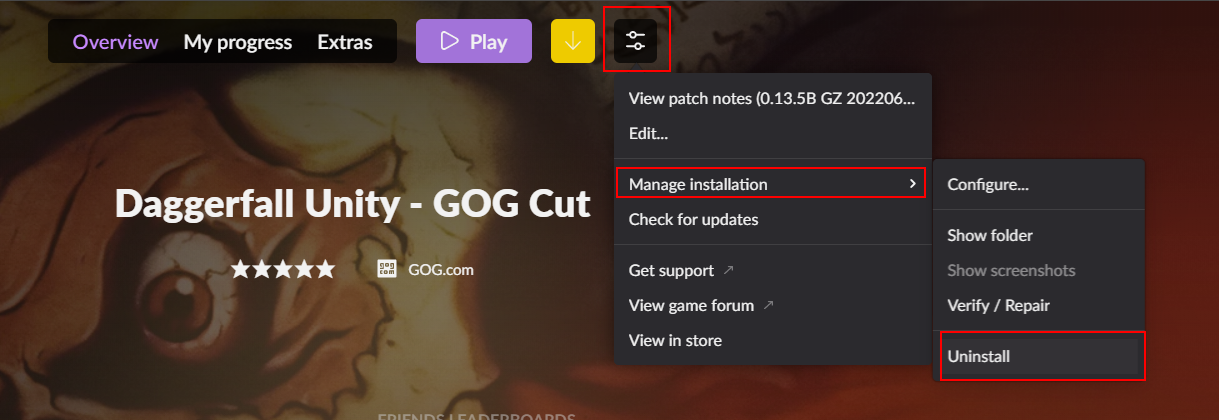
If you installed GOG Cut using GOG Galaxy, you can remove it from GOG Galaxy like below:
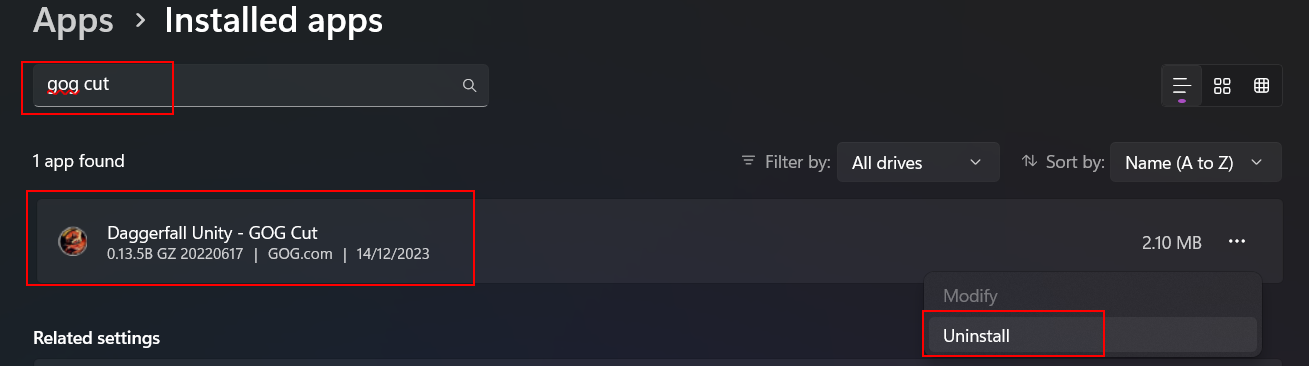
You can also remove from Windows using “Add or remove programs” and searching for GOG Cut like below:
Important
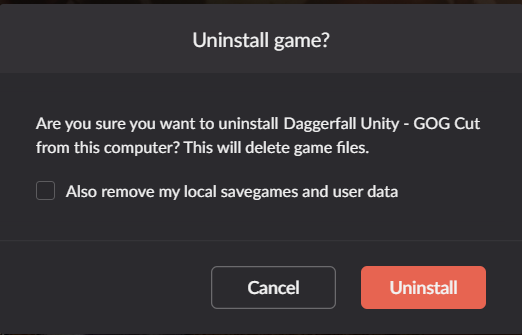
When uninstalling GOG Cut make sure you do not select the below option to remove save games and data if you have a game in progress. Enabling this setting will delete your saves. Instead, we will manually delete settings in the next step.
When ready, click Uninstall to remove GOG Cut.
Step 2 – Delete settings.ini
GOG Cut deploys a poorly optimized and custom version of game settings. To get the best result, please delete this settings file so you’re starting fresh.
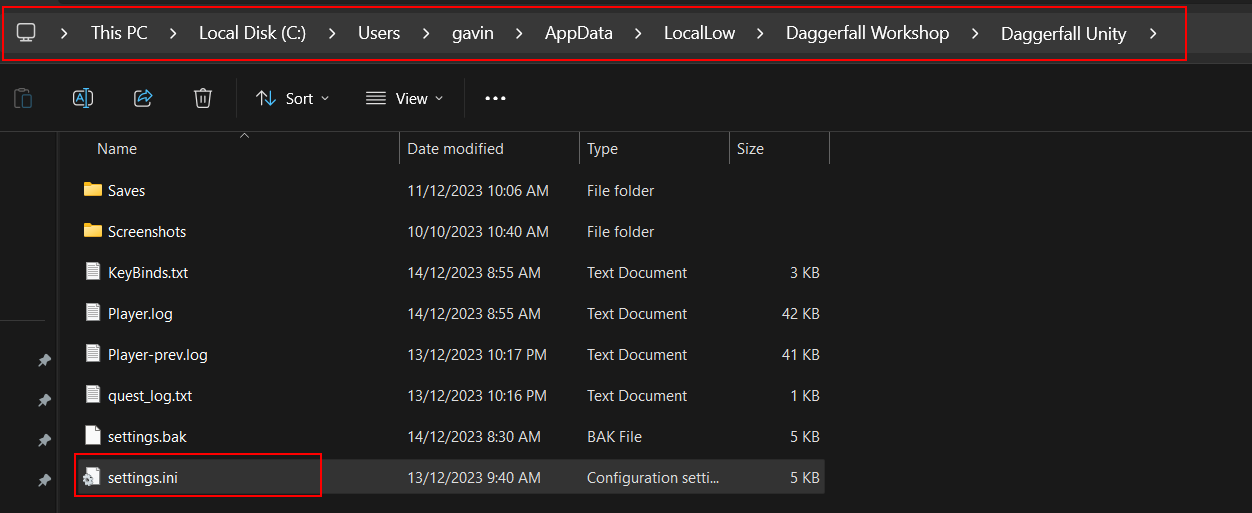
You’ll find settings.ini in the Daggerfall Unity persistent data folder along with your saves, keybinds, and logs. On Windows this is in the following path.
Note that AppData is a hidden folder on Windows, so you might need to show hidden files or manually enter the path. Here’s a screenshot showing the full path from a live install with settings.ini highlighted.
You can safely delete settings.ini. Daggerfall Unity will create a fresh file with defaults next time you run the game.
Optionally, you can delete the KeyBinds.txt file to set your key bindings back to default as well. But if you’ve become accustomed to GOG Cut’s key bindings, it’s OK to leave this file alone.
Step 3 – Install Daggerfall Unity
Installing Daggerfall Unity manually is a simple process that only takes a few minutes. Here are two supported methods of installing Daggerfall Unity. These will take you through the entire setup process.
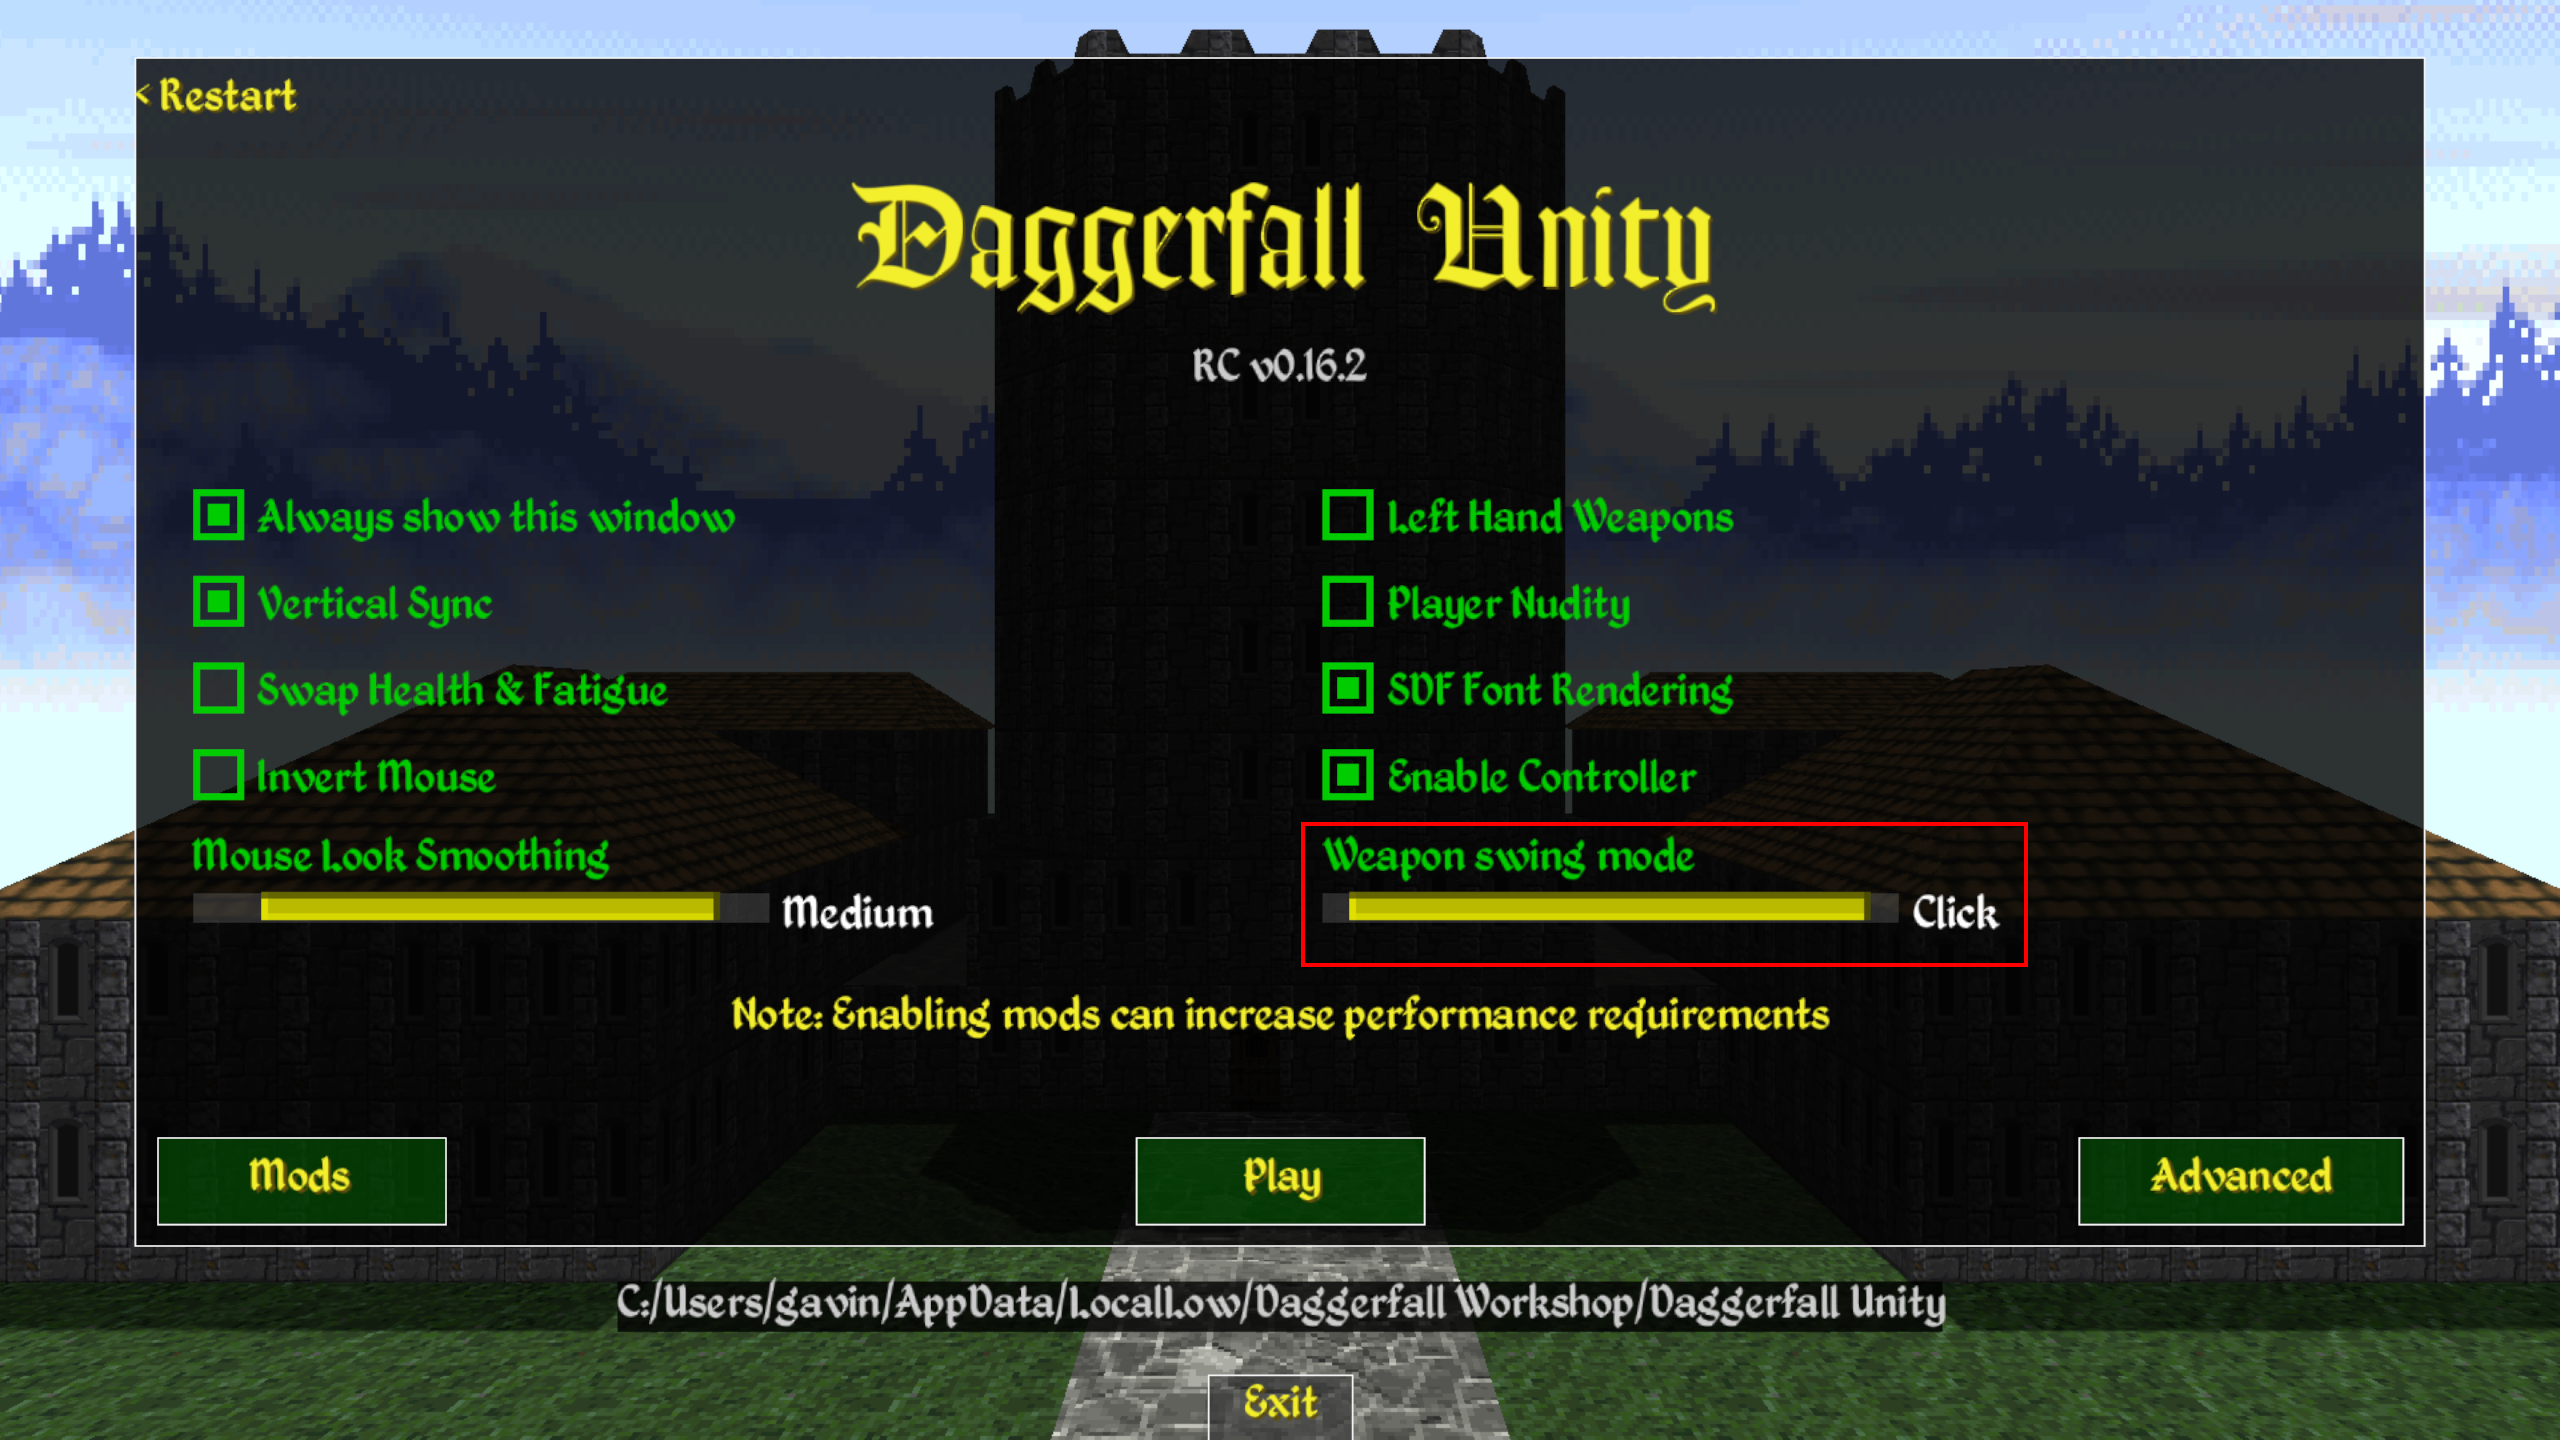
If you’ve been playing GOG Cut for any length of time, you may have become accustomed to “click to attack”, which GOG Cut enabled by default. If you prefer click attacks over classic Daggerfall’s mouse gesture attacks, you can re-enable clicks using the following setting right on the launcher.
Conclusion
You’re done! You now have an up-to-date install of Daggerfall Unity with default settings.
In this third and final instalment, Daggerfall Unity’s rendering review wraps up by fixing more bugs and giving Retro Mode some overdue love. Preview release 0.13.3 is now available on Releases page.
To quickly recap, this review set out to resolve problem of specular “shine” from Unity’s default Standard shader, switch to more accurate and flexible linear lighting space, and upgrade postprocessing stack to PPv2. Along the way, we fixed many small problems with loose texture mods and reviewed lighting. Almost every part of the game involved with drawing something to screen was inspected and tuned up if tuning was needed.
Thanks to community feedback, we were able to address several issues created by initial 0.13 preview release. Our new shaders were extended to support more PBR capabilities. The game received an extensible “Effect Settings” UI to configure postprocessing and other effects at runtime. We helped several mod authors overcome compatibility issues so their mod works with 0.13 and beyond.
With all the large changes now settling down, we could start refining a few things. Here’s what’s new in 0.13.3.
Remove Nature Shadows
Projecting shadows from 2D billboards comes with downsides. These are just 2D cutouts rotating to face camera, so their shadow either twists and turns with billboard or stays fixed in place. Fixed shadows look better overall, but results in any asymmetry becoming disconnected from cutout when seen from the wrong angle.
Nature shadows had other tradeoffs too. In deferred rendering, screen objects always receive shadows, which means trees received self-shadow artifacts while rotating. To workaround this problem, it was necessary to render nature objects in transparent queue which doesn’t write to depth buffer. This in turn created other problems with rendering elements relying on depth information.
After trialling more solutions and workarounds, it became obvious these shadows were causing too many issues for a minor aesthetic hack that only looked good some of the time. Considering classic didn’t have tree shadows either, the best solution was to simply remove them.
If you prefer these nature shadows despite their limitations, you can switch them back on by opening settings.ini and changing “NatureBillboardShadows=False” into True.
Please keep in mind that enabling nature shadows will revert them to transparent rendering queue, so trees and other nature billboards will not operate fully with effects requiring depth information – Ambient Occlusion, Retro Mode Postprocess, ColorBoost, to name a few.
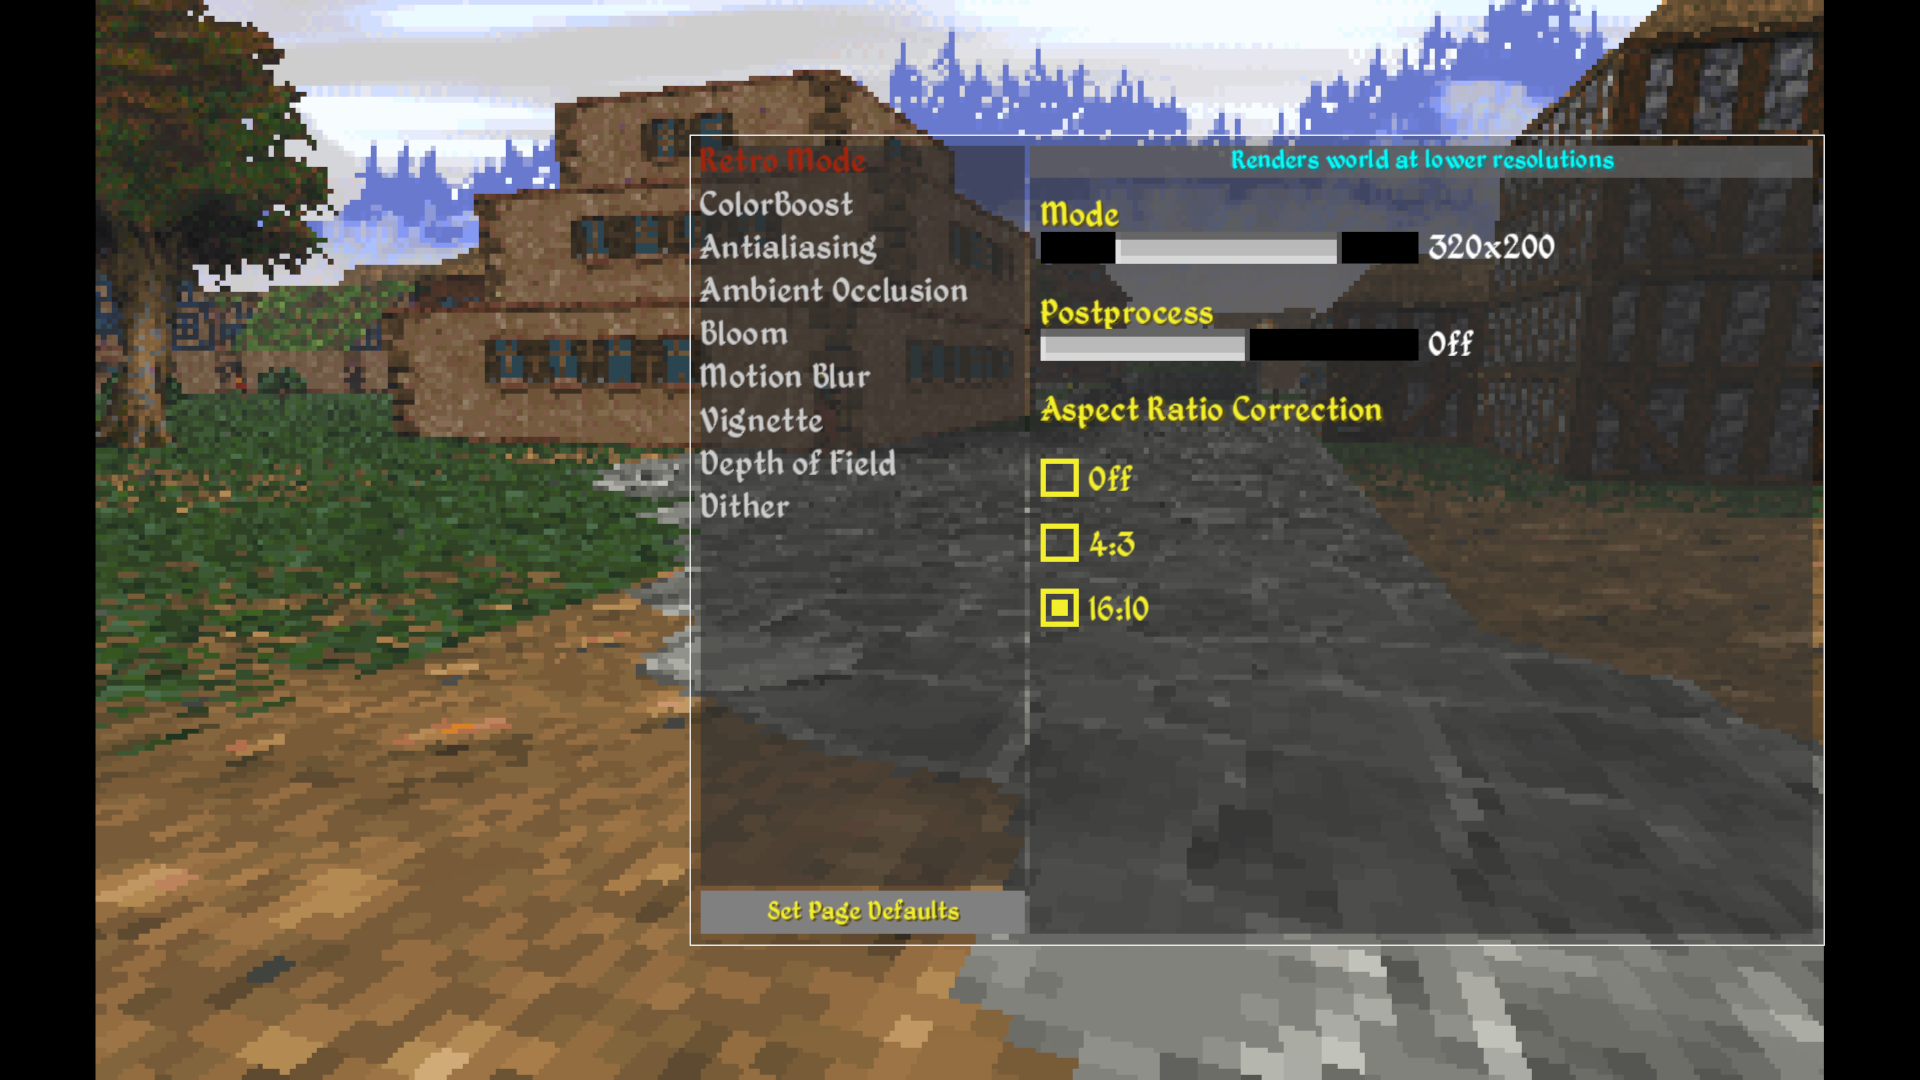
Retro Mode Enhancements
Retro Mode is a feature in Daggerfall Unity where camera renders to a 320×200 or 640×400 resolution target before scaling output into your display area. The feature also comes with postprocess settings for palettization or posterization to crush palette down to fewer colours with neat side-effects like colour banding from nearby light sources.
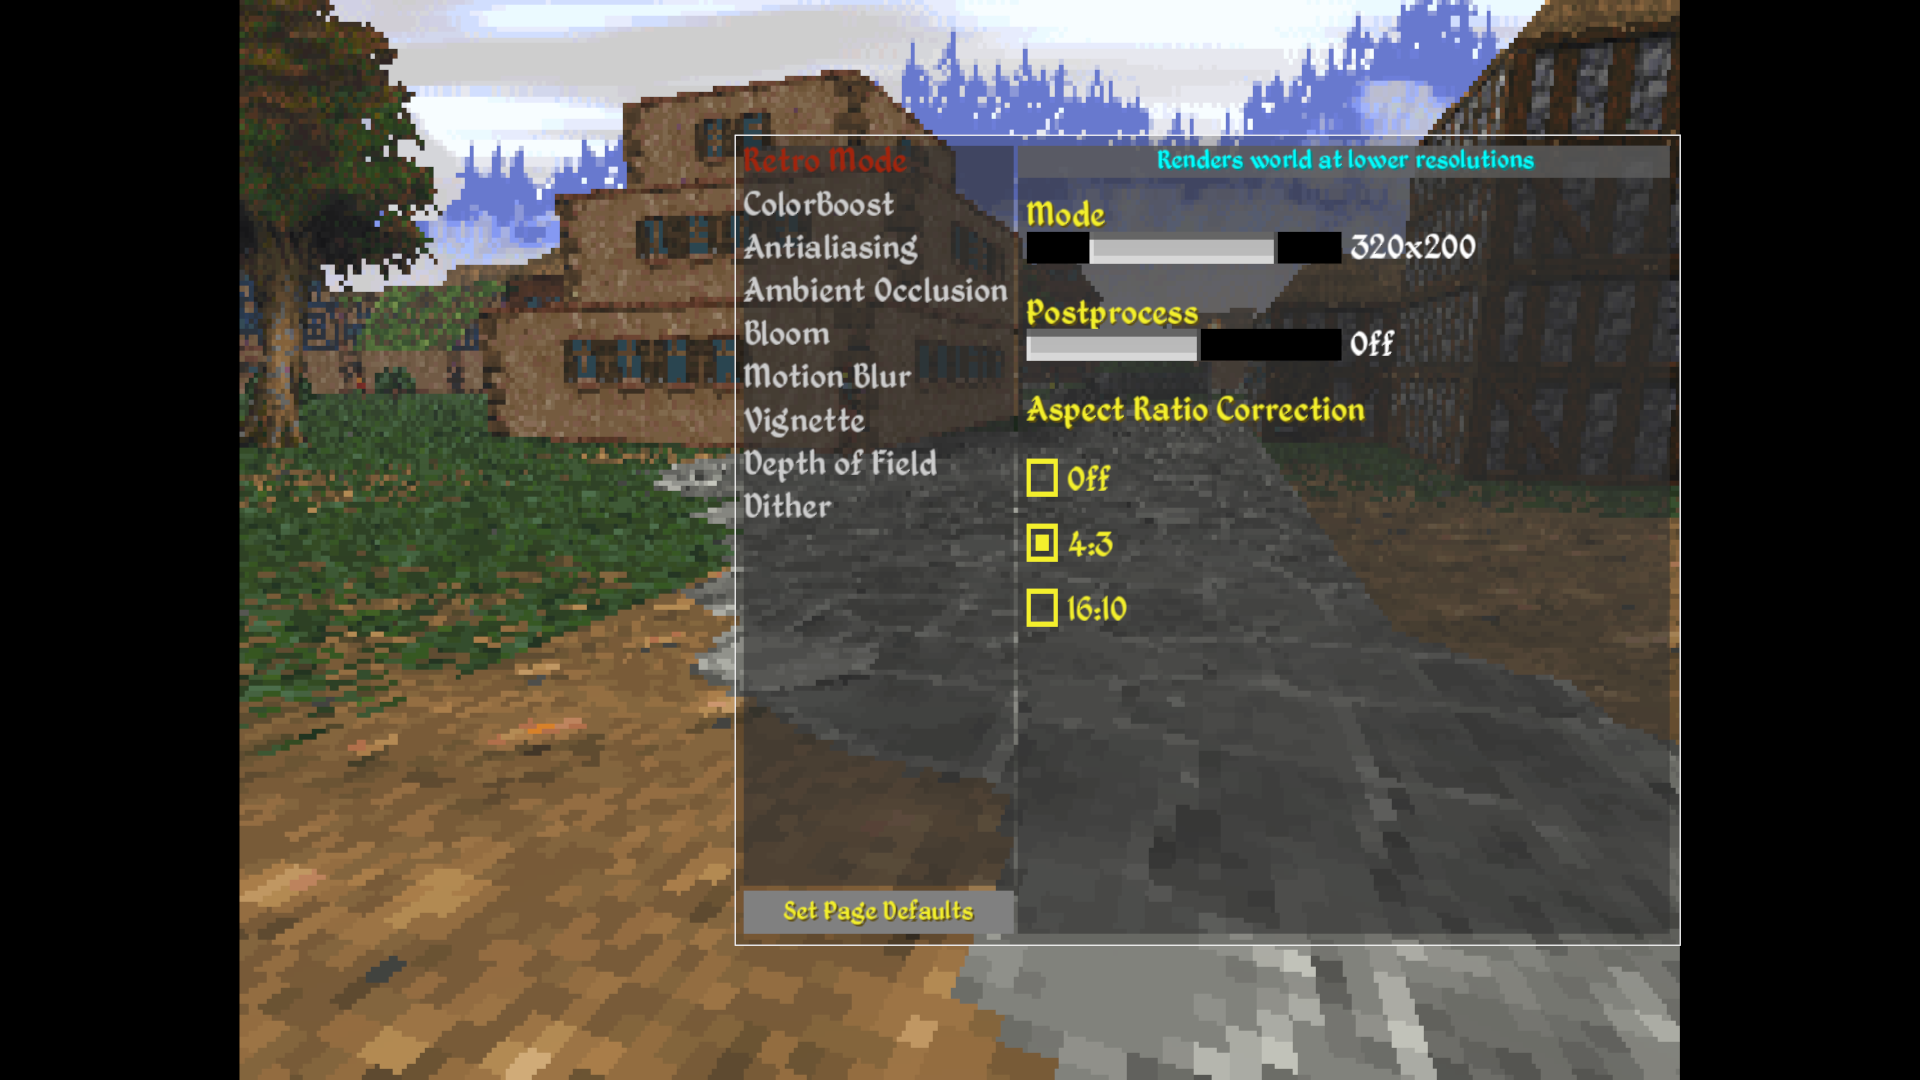
From 0.13.3, Retro Mode is now in the Game Effects UI. You can access these settings from drop-down arrow at top-left of screen when game is on pause menu.
In addition to previous settings for retro mode and postprocess, you now have the option to adjust render scale into 4:3 or 16:10. Enabling either of these settings will scale output to selected aspect ratio inside your actual screen area. If you have a wider screen, e.g. 16:9, then vertical pillarbox bars are added.
Previously this aspect correction was only available as a hacky workaround by fiddling with resolution and UI scaling settings, which was error prone and didn’t work under all platforms. Now with this in Game Effects UI, you can switch around these settings at runtime without restarting game.
If you’re coming from an older version of Daggerfall Unity and have already setup Retro Mode based on the old hacky method, please reset your game resolution back to something with correct aspect ratio for your monitor. For example, if you have a 1920×1080 monitor and set your game resolution to 1280×960 to force the aspect change, please set your game resolution back to 1920×1080 or some other 16:9 resolution. You also no longer need to enable “FreeScaling” option, which has been removed from 0.13.3. This is now all handled automatically in-game from checkboxes shown above, along with fixes for problems created by the old FreeScaling option.
One final note about Retro Mode – now that you can switch settings at runtime and change aspect ratio, not all mods will support runtime switching of resolution or aspect. Any mods rendering to a stacked camera (e.g. Enhanced Sky, Distant Terrain) will need added support for runtime resolution switching (update: Enhanced Sky has this support from v3.0.2). Also custom UI mods might need to add aspect handling based on how they calculate screen position. If you have problems with a mod in Retro Mode, try restarting game, switching off aspect correction, or switching off Retro Mode entirely.
ColorBoost Effect
The best way to introduce ColorBoost is by talking about darkness in dungeons. Daggerfall dungeons aren’t dark, exactly. They’re actually quite bright near player then ramp down sharply into darkness after 30 metres or so. This is technically a requirement of lower draw distance in classic, but it creates a uniquely claustrophobic feeling. In classic, even light sources fade into darkness at range. To put it another way, there’s a high contrast between brightness levels depending on distance from player.
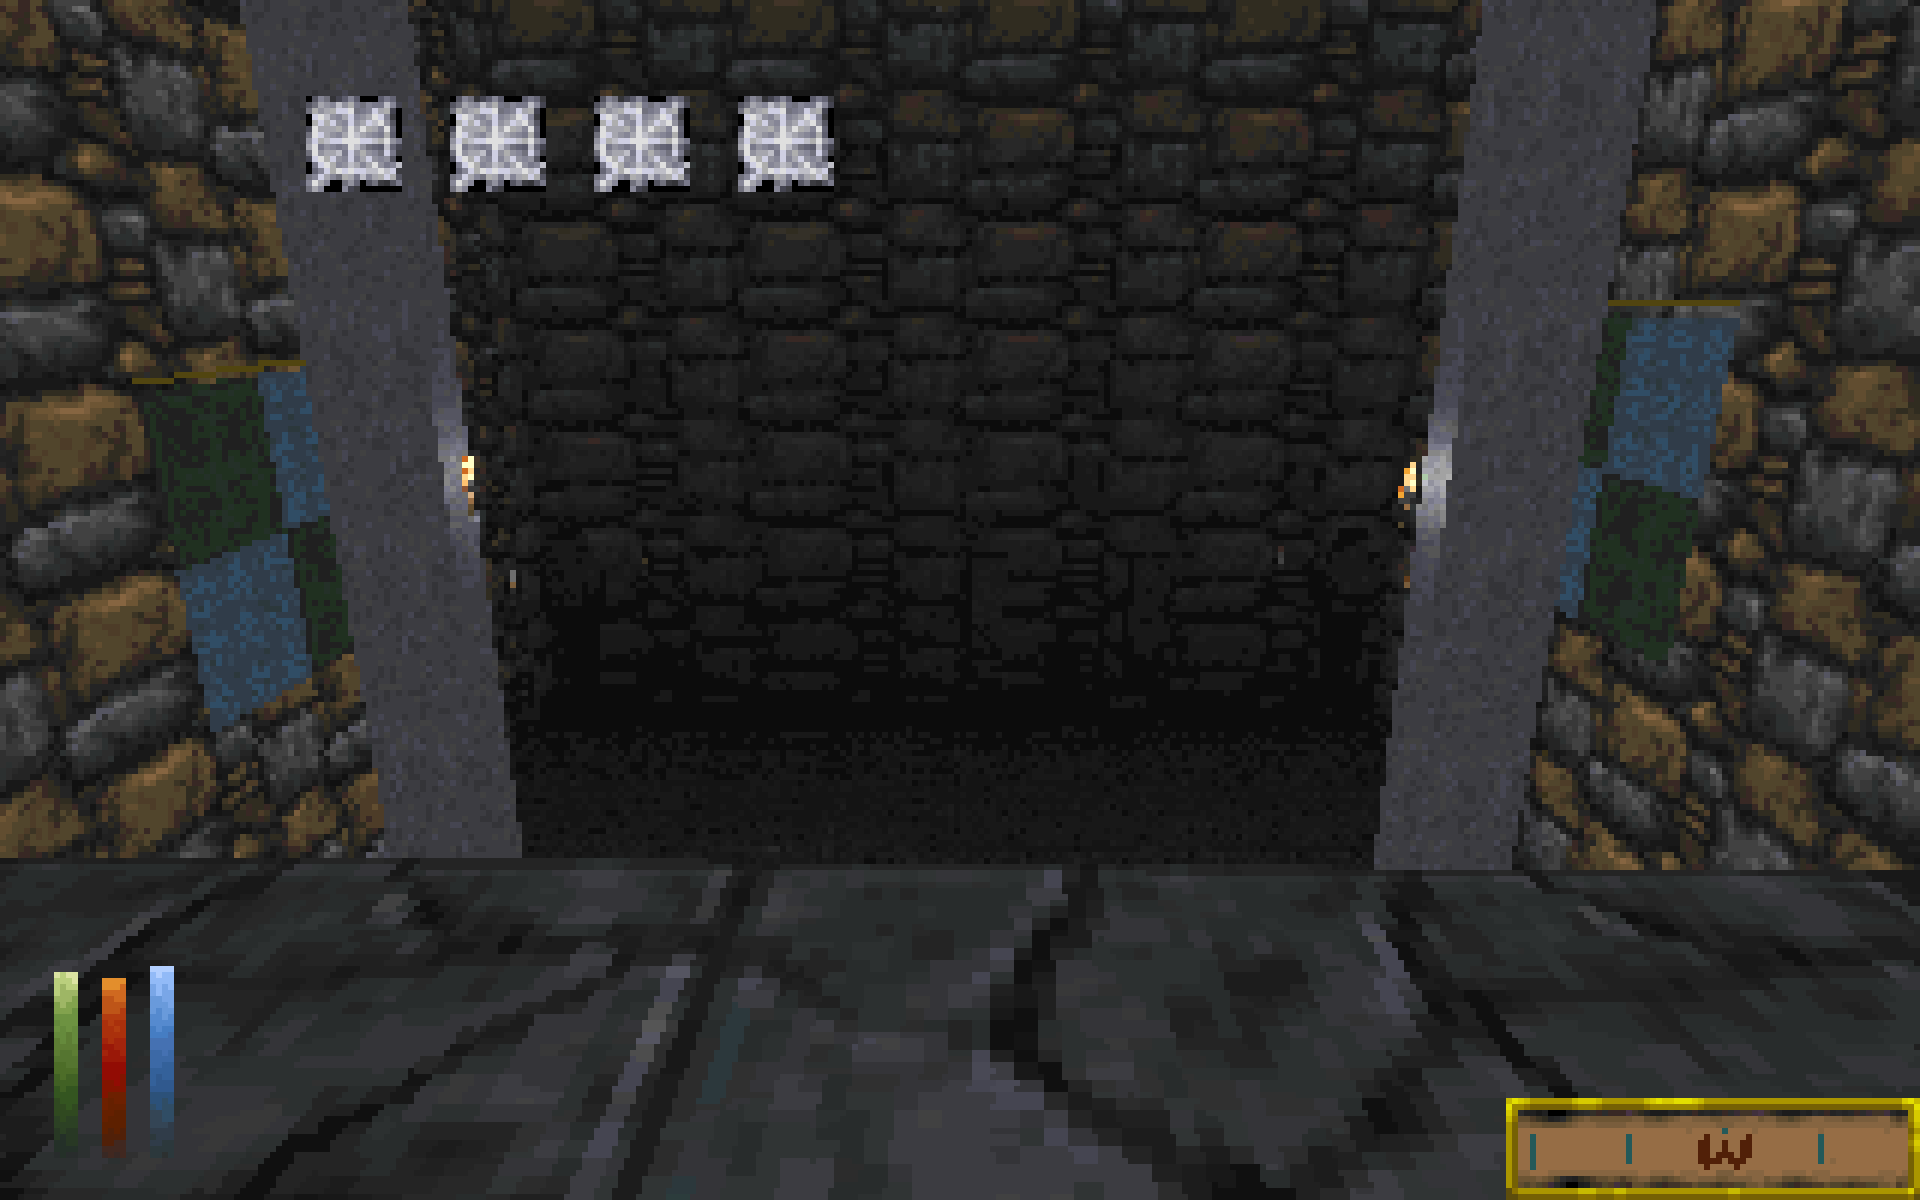
See below classic screenshots for example. Here our player is standing near throne lift in Privateer’s Hold. Note how environment around player is rather bright then ramps down into blackness at farthest point.
If you walk down toward that farthest point and turn around, now the brightly lit area near throne is plunged into darkness and world near player is bright instead. Step back a few more metres and area above stairs becomes totally black. Even those bright torches will fade away.
Daggerfall Unity uses a modern naturalistic lighting system where this kind of thing doesn’t happen. Lights have radius and intensity, and geometry is either touched by some amount light or not. In a naturalistic environment, torches don’t stop casting light behind themselves just because player walked a few dozen metres away.
It’s not quite feasible to capture classic’s rendering and lighting perfectly here (totally different engines and lighting systems after all) but it is possible to create more contrast between near and far brightness to capture this same atmosphere.
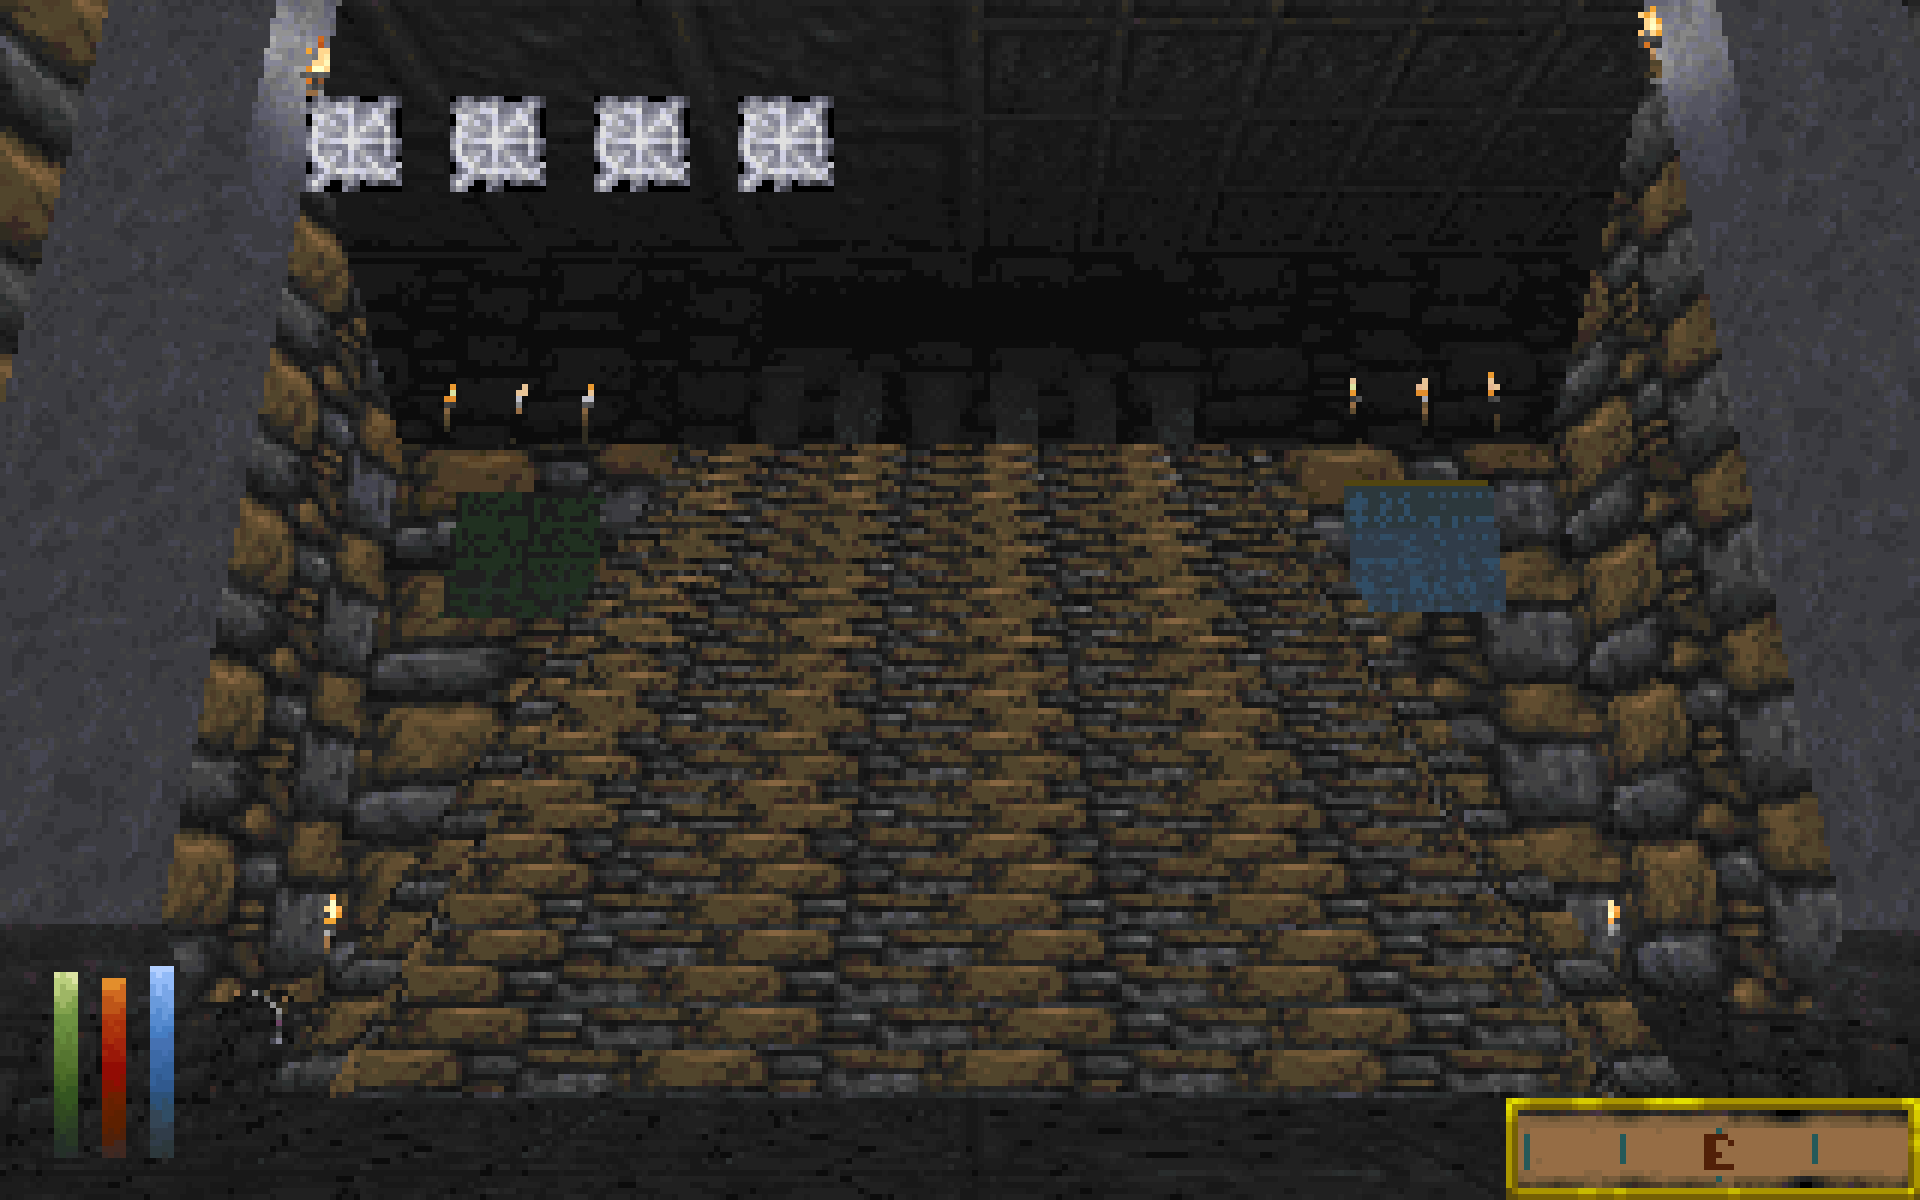
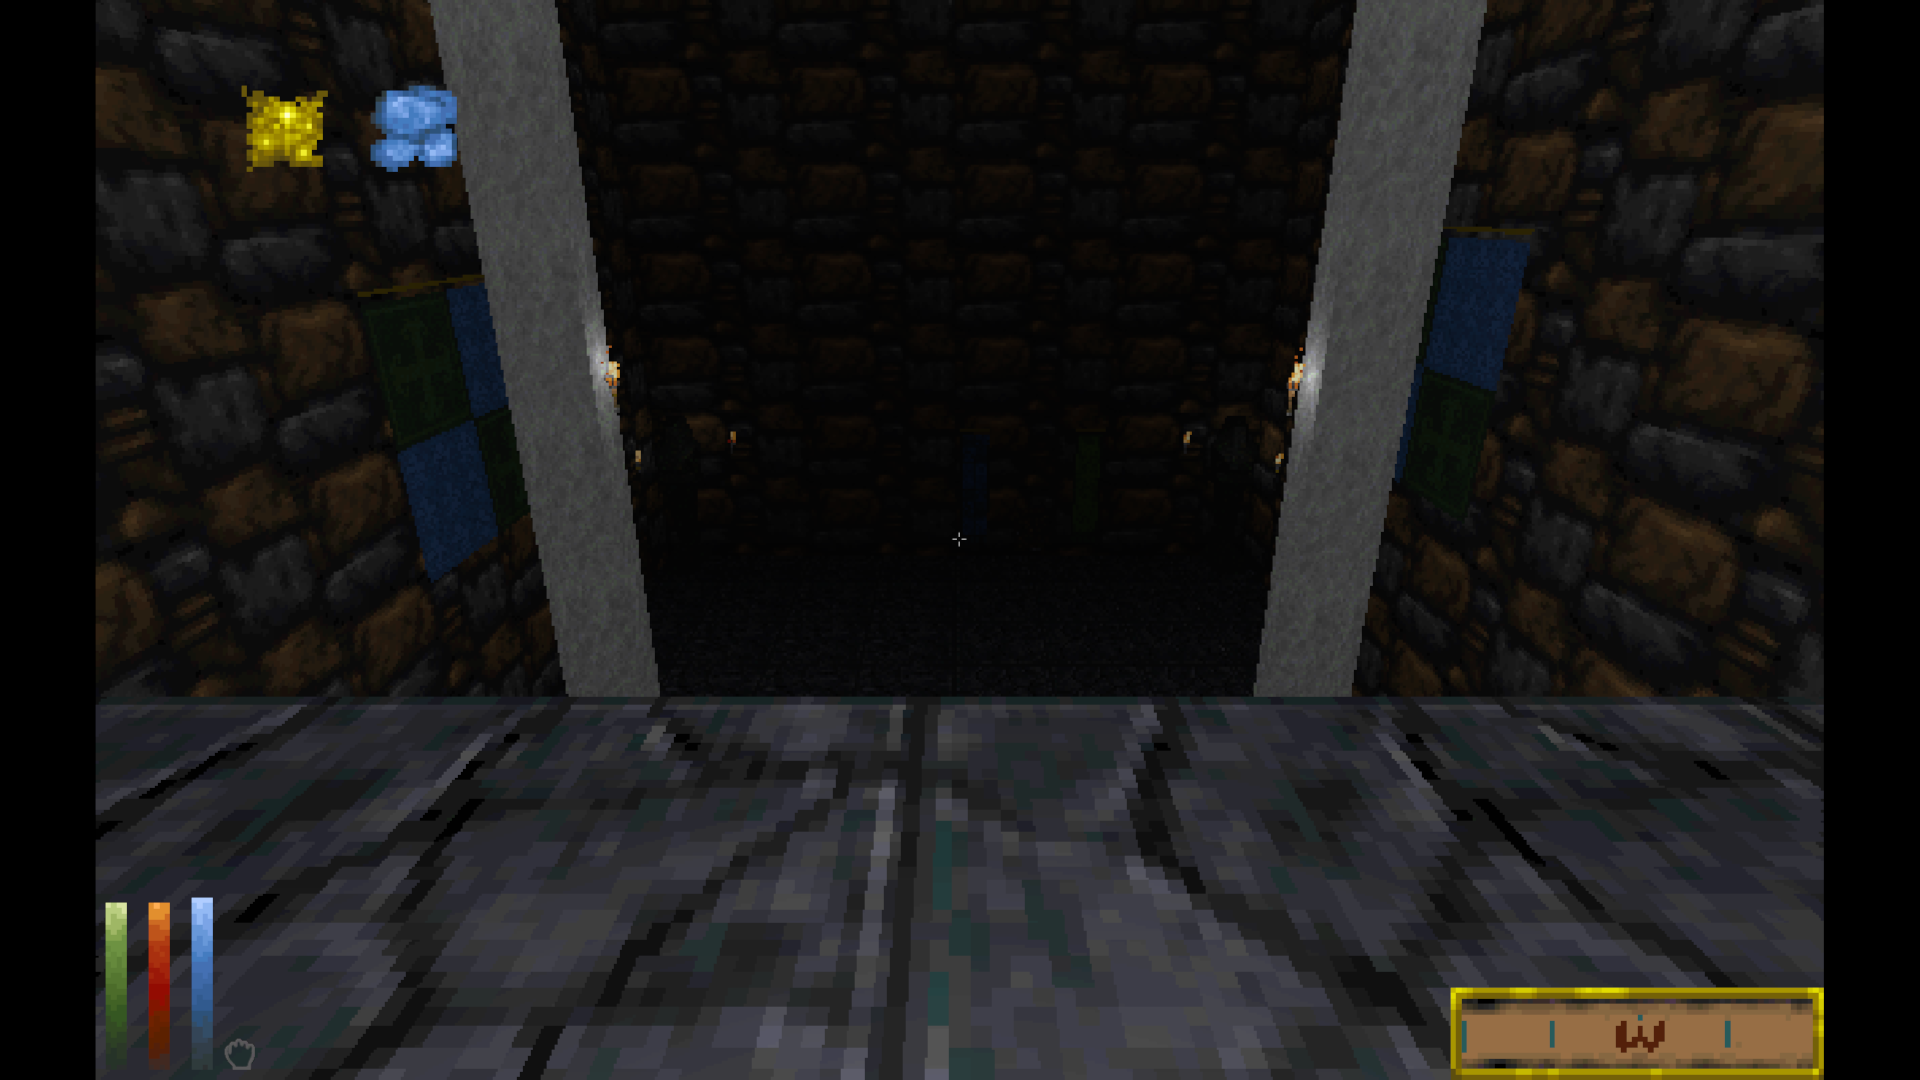
Let’s start with a screenshot of Daggerfall Unity, once again at top of stairs in Privateer’s Hold looking down. Note how distant torches still affect the wall behind them, and scene overall is rather uniform in brightness. A ramp down into darkness isn’t present at all.
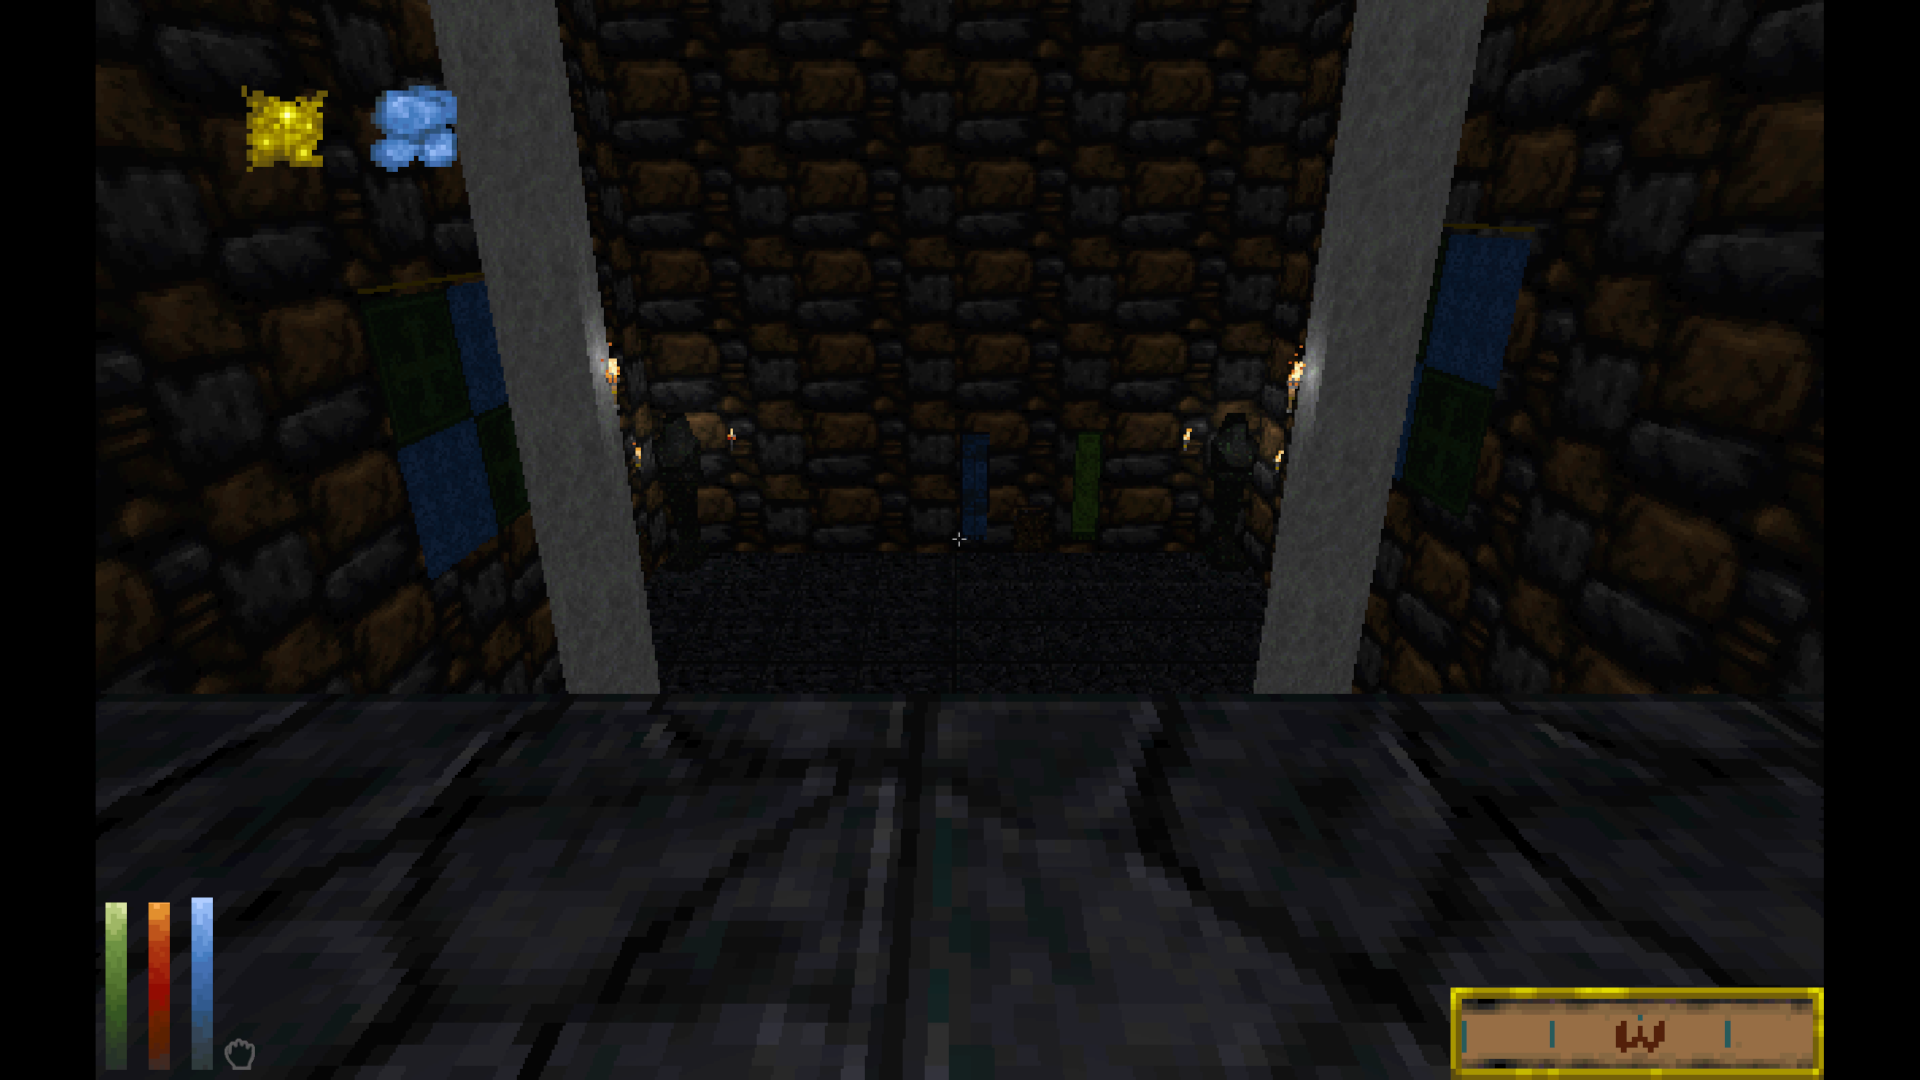
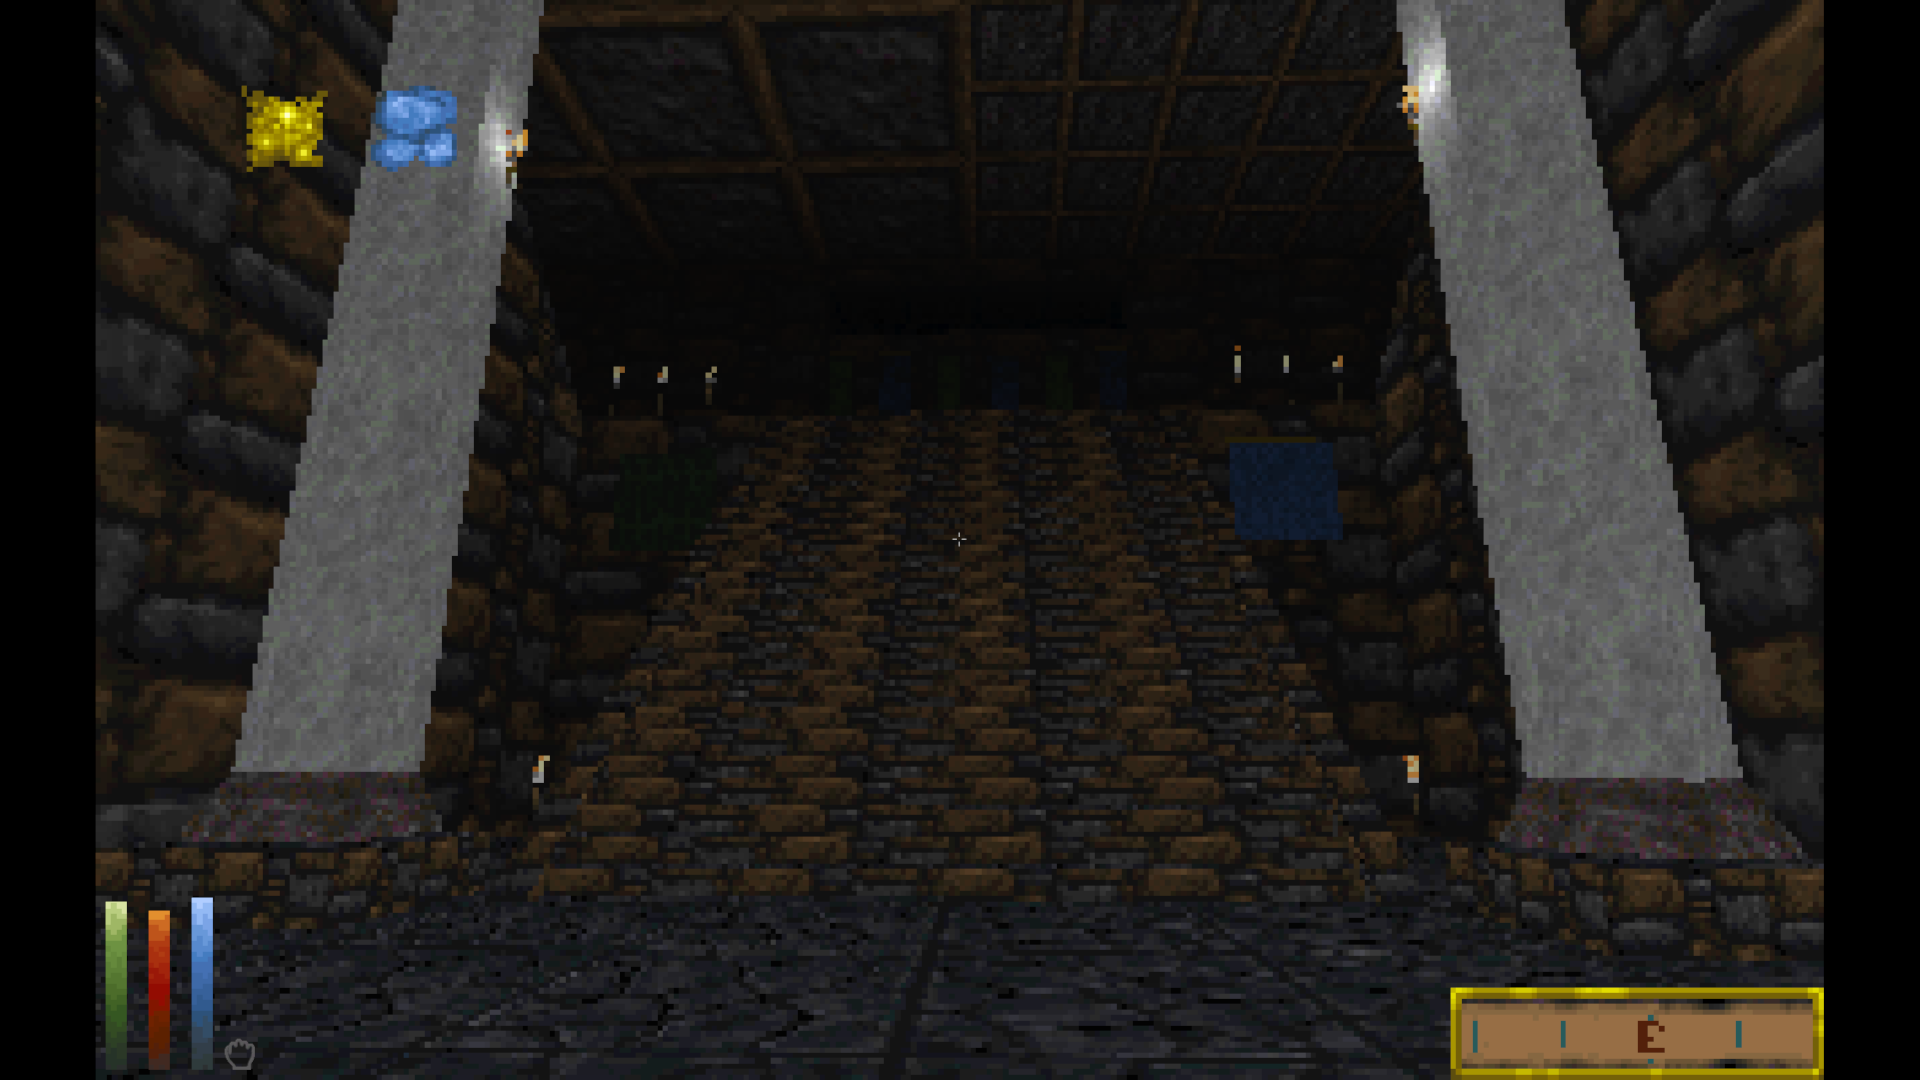
Now ColorBoost comes into play. This postprocessing effect can both increase brightness near player and produce ramp down into darkness inside dungeons. Compare above screen with one below, and note difference in contrast between near and far points. Even the torches start to fade into darkness at range.
In addition to atmosphere, this gives you another way to tune brightness to your preference. Some ColorBoost will brighten things up without completely flattening or over-brightening whole scene. The dungeon falloff effect has adjustable strength down to 0 (disabled).
Here’s a another shot of stairs in Daggerfall Unity at 320×200 16:10 Retro Mode with adjusted ColorBoost settings. This is finally approaching reasonable parity with classic Daggerfall’s dungeon atmosphere despite underlying engine differences.
ColorBoost was originally intended to help in Retro Mode with posterization / palettization enabled, and it’s recommend to use a good amount of ColorBoost in combination with those effects. But you can enable ColorBoost at any time, with or without Retro Mode, and it will work alongside your mods, lighting setup, and other settings.
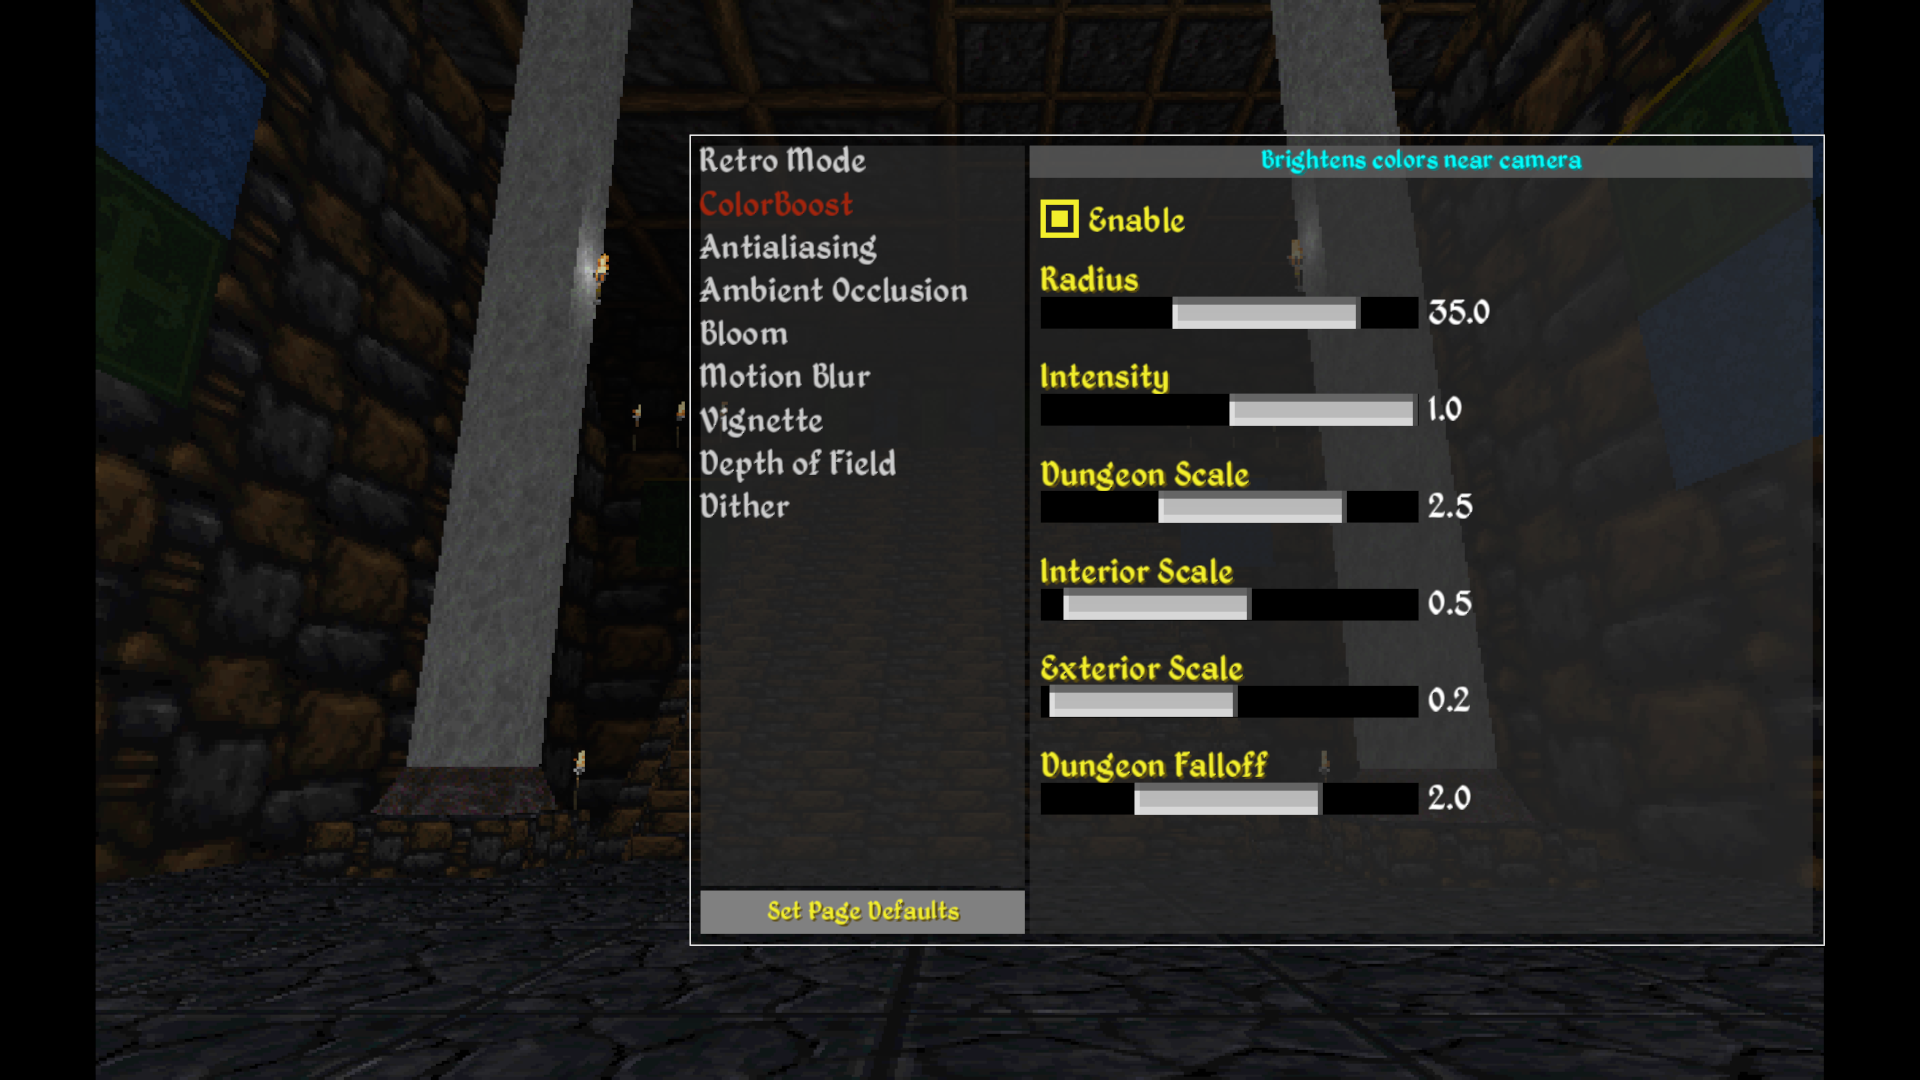
Speaking of mods and settings, you’ll likely need to dial-in ColorBoost to suit your environment and preferences. Everyone can have a unique setup and world can light very differently as a result. For this reason, ColorBoost config page has several sliders to help dial-in Radius of effect, global Intensity, strength of effect in Dungeons, Exteriors, Interiors, and control Dungeon Falloff. Like all effects, ColorBoost is disabled by default.
General Improvements & Fixes
This release also brings several minor fixes and refinements:
Don’t use transparent queue for standalone cutout billboards so they operate with AO and other depth effects
Fix volume collider blocking spells and other missiles (fixed in 0.13.2b)
Flag window textures in archives 171-173 to support emissive from replacements
Allow changing retro mode settings at runtime
Remove global UI FreeScaling method, this is now part of retro mode aspect correction
Fix overlapping text in popup message boxes with FreeScaling enabled
Change protections on MaterialReader Uniforms to public
Fix StreamingWorld.TrackLooseObject “mapPixelX” and “mapPixelY” (KABoissonneault)
Fix retro mode colour accuracy with higher precision render textures
Hide spell icons when pause options dropdown is open
Refine automap panel sizing with custom screen rect
Conclusion
We have now reached the end of rendering review in 0.13. Unless a blocking issue is found, the “preview” tag will be dropped from next release. Moving forward, there are no more large changes scheduled to engine or rendering, only bug fixes and minor refinements. This is to ensure best possible stability and mod compatibility moving towards 1.0.
If you are a mod author, please ensure your mod is rebuilt and tested compatible for 0.13.3. This release is very close to next full Beta release without “preview” tag.
Thank you for reading, and for playing Daggerfall Unity!
Get the most recent version of Daggerfall Unity:Releases