Improved Terrain Tiling

To date, I have used a brute-force approach when tiling textures in cities and terrains. Each texture tile is mapped to a quad of vertices where each corner describes a UV coordinate allowing its texture to be drawn normally, rotated, flipped, or both rotated and flipped. This saves a great deal of texture space as only one version of texture is required to achieve four variations.

While it saves on texture memory (great for a 1996 game), this system has some inherent problems, not least of which is the number of vertices being used. For example, a full 8×8 block terrain has a total of 128×128 quad tiles with 4 vertices each. That’s a total of 65536 vertices just to handle the ground plane of a big city like Daggerfall or Wayrest. This is larger than Unity’s maximum mesh size, so everything needs to be split up into chunks. As cities are completely flat, wouldn’t it be great if we could just render all these tiles onto a single quad, using only 4 vertices for an entire city?

Happily, this is not only possible, we can solve a few other problems with tiled textures in the process. All through the magic of custom shaders.

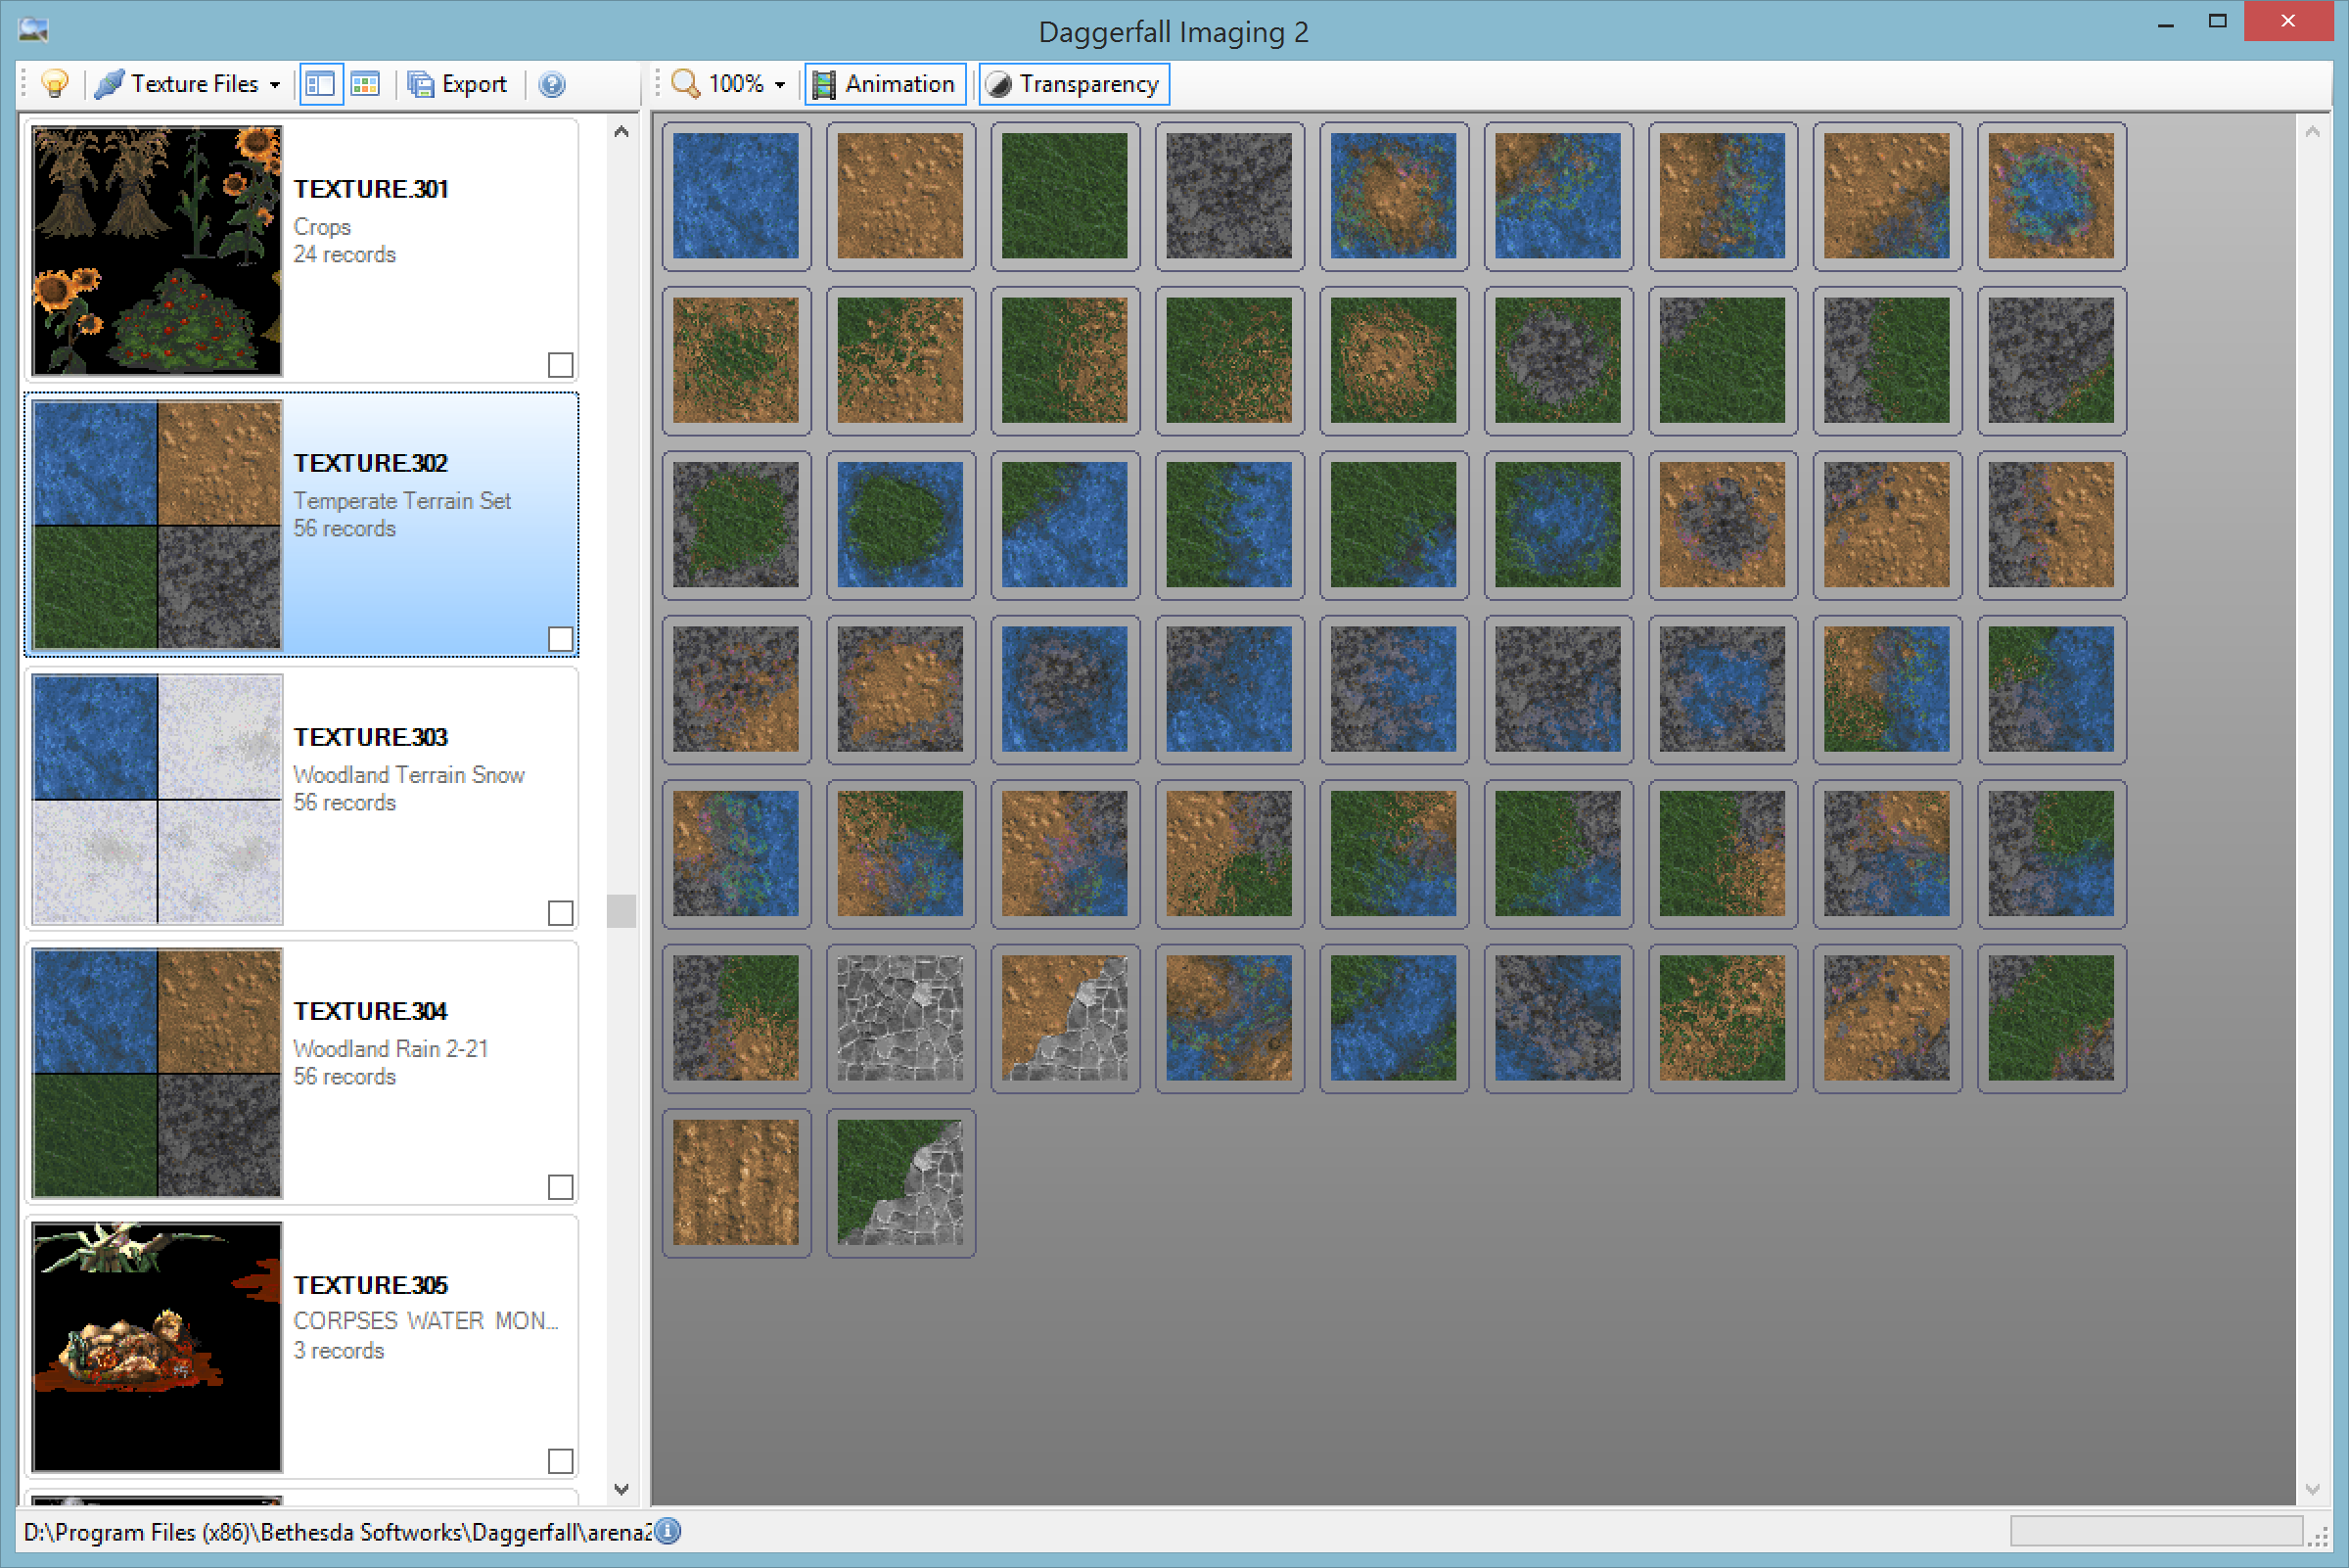
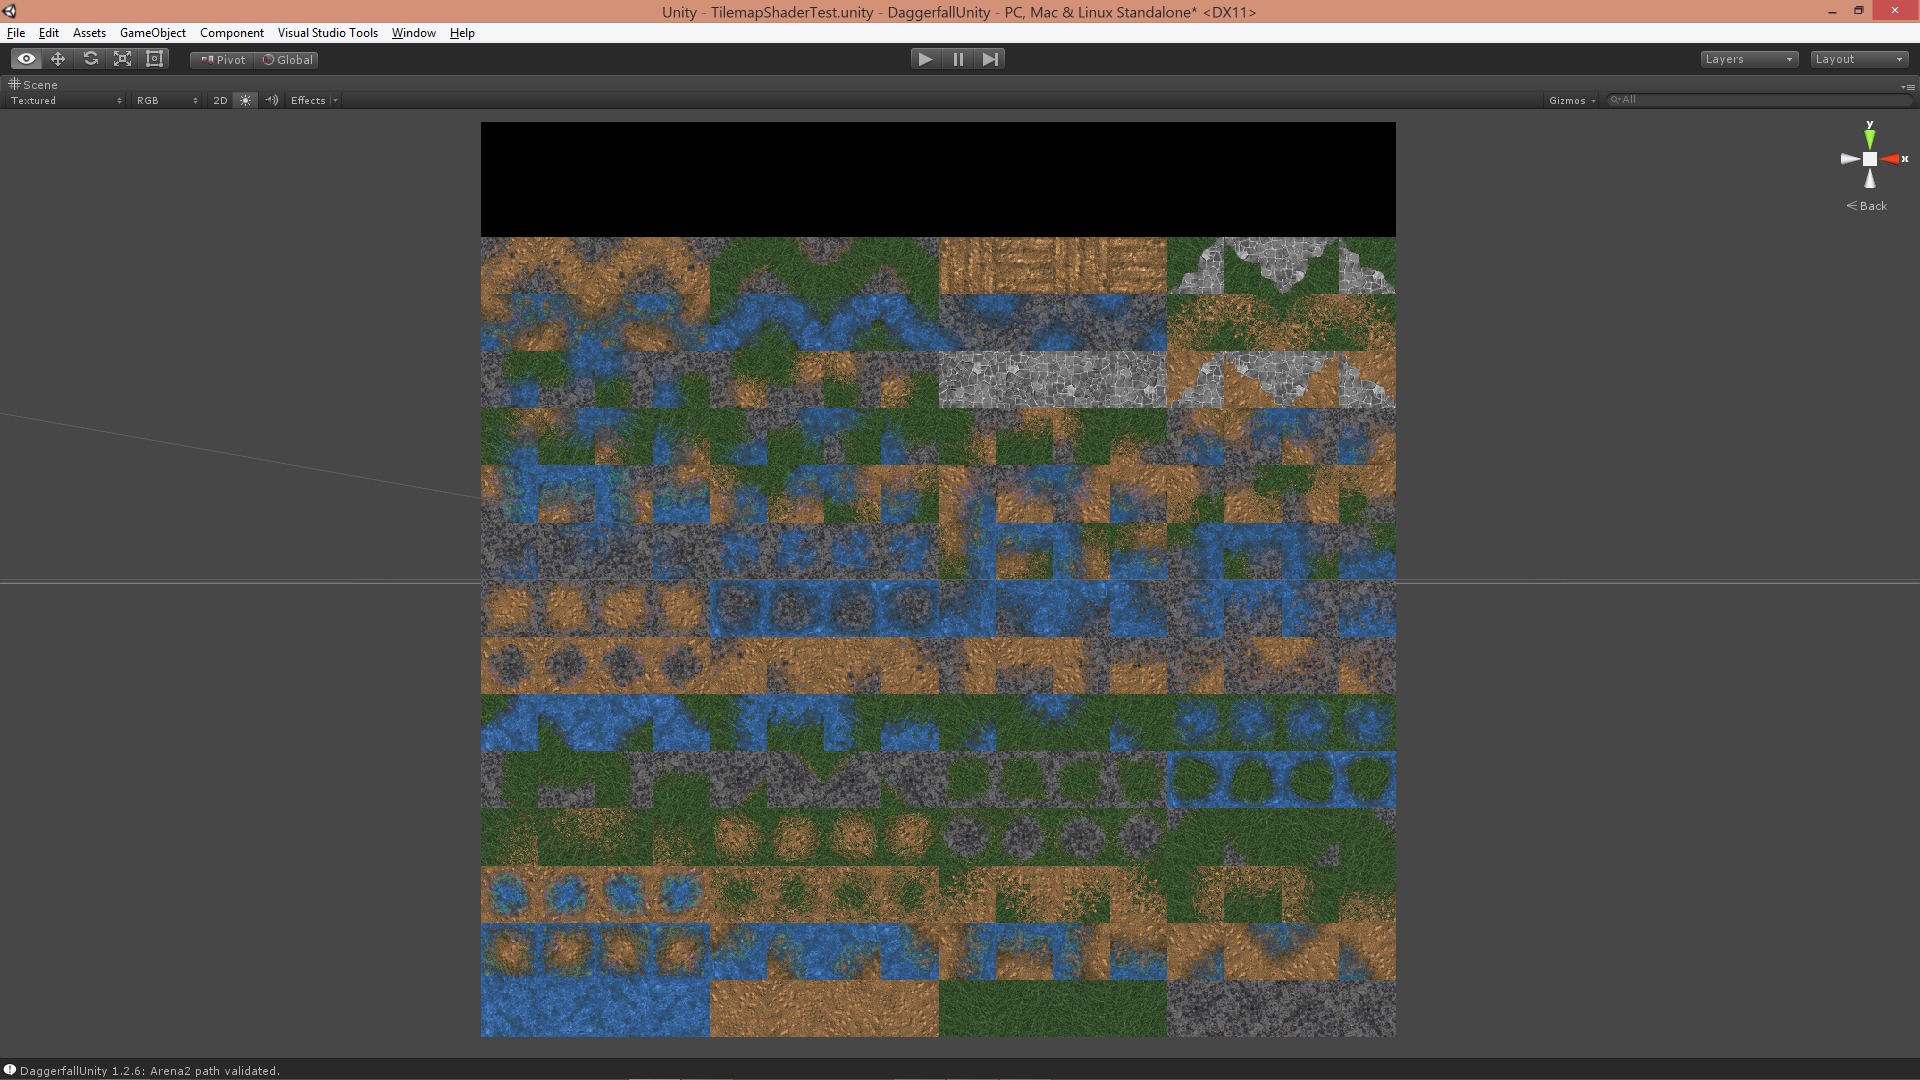
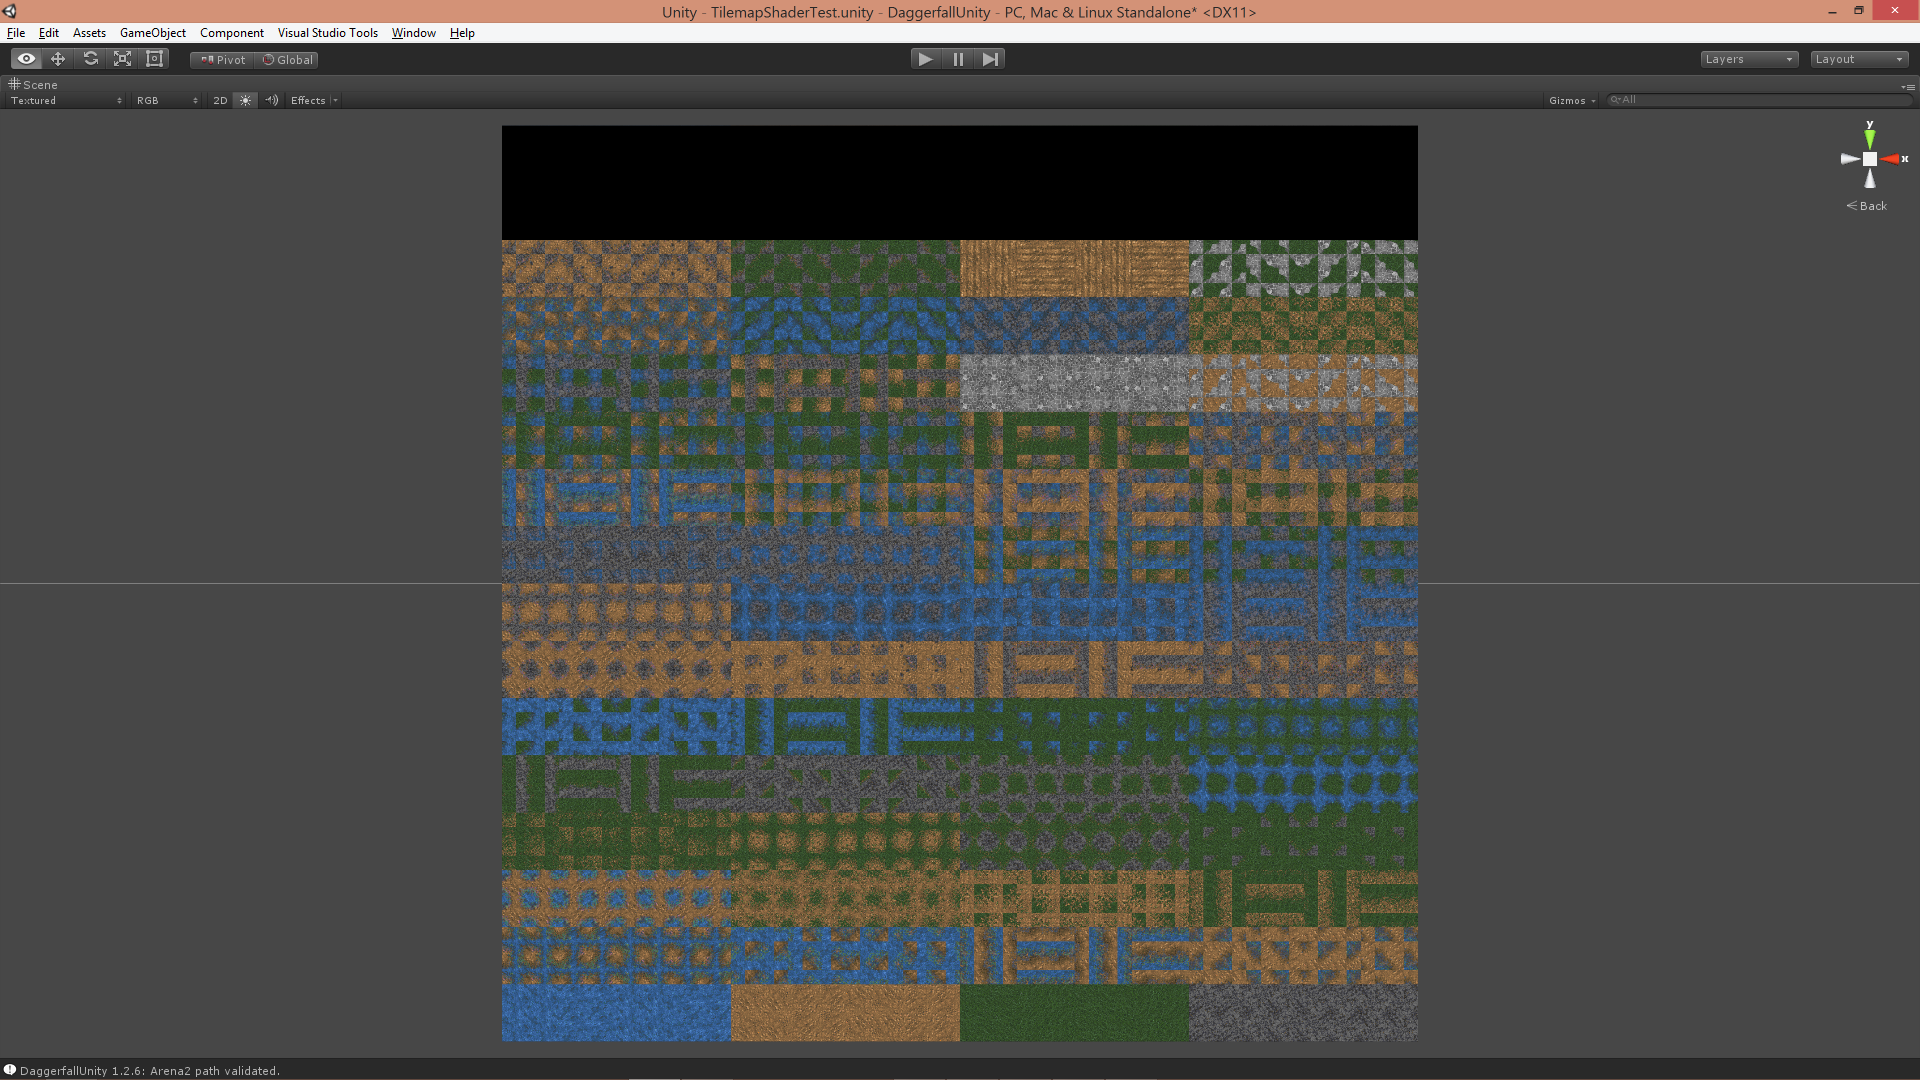
The first step is to change how the ground atlas is stored. Rather than just reference a single texture and modify using UVs, we’re going to pre-transform each texture in all 4 possible configurations (normal, rotated, flipped, rotated+flipped). This removes the need for UV changes and saves time in the fragment shader, and allows for some extra packing to happen as you’ll see shortly. The new tile set atlas looks like below (note that Unity texture [0,0] is bottom-left).

Atlas1

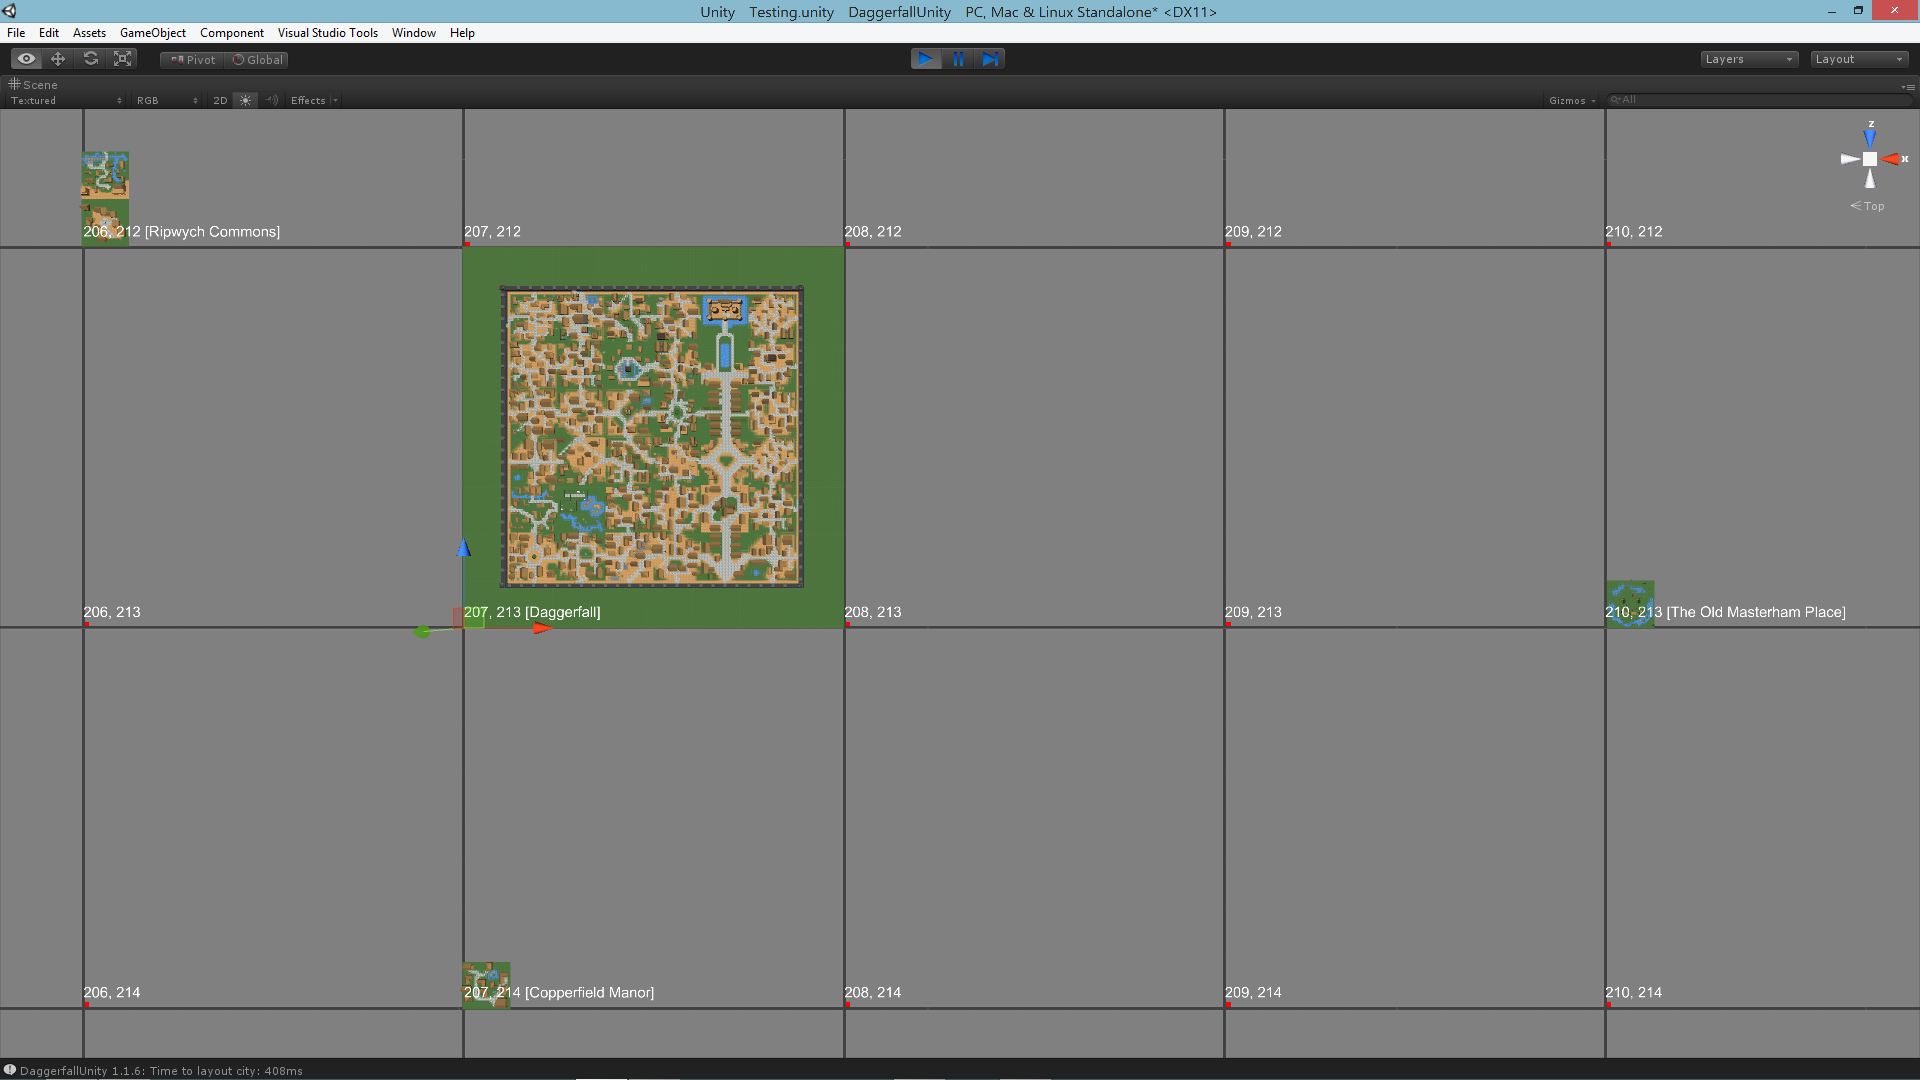
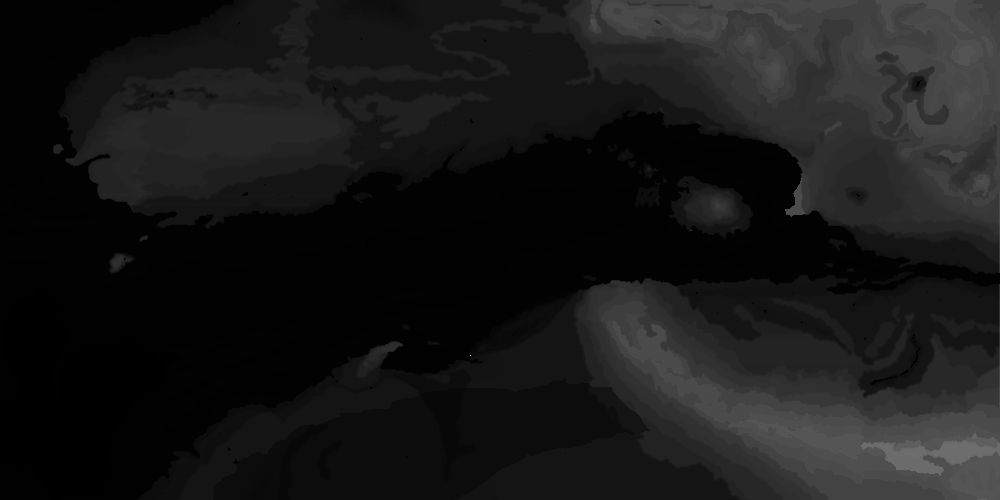
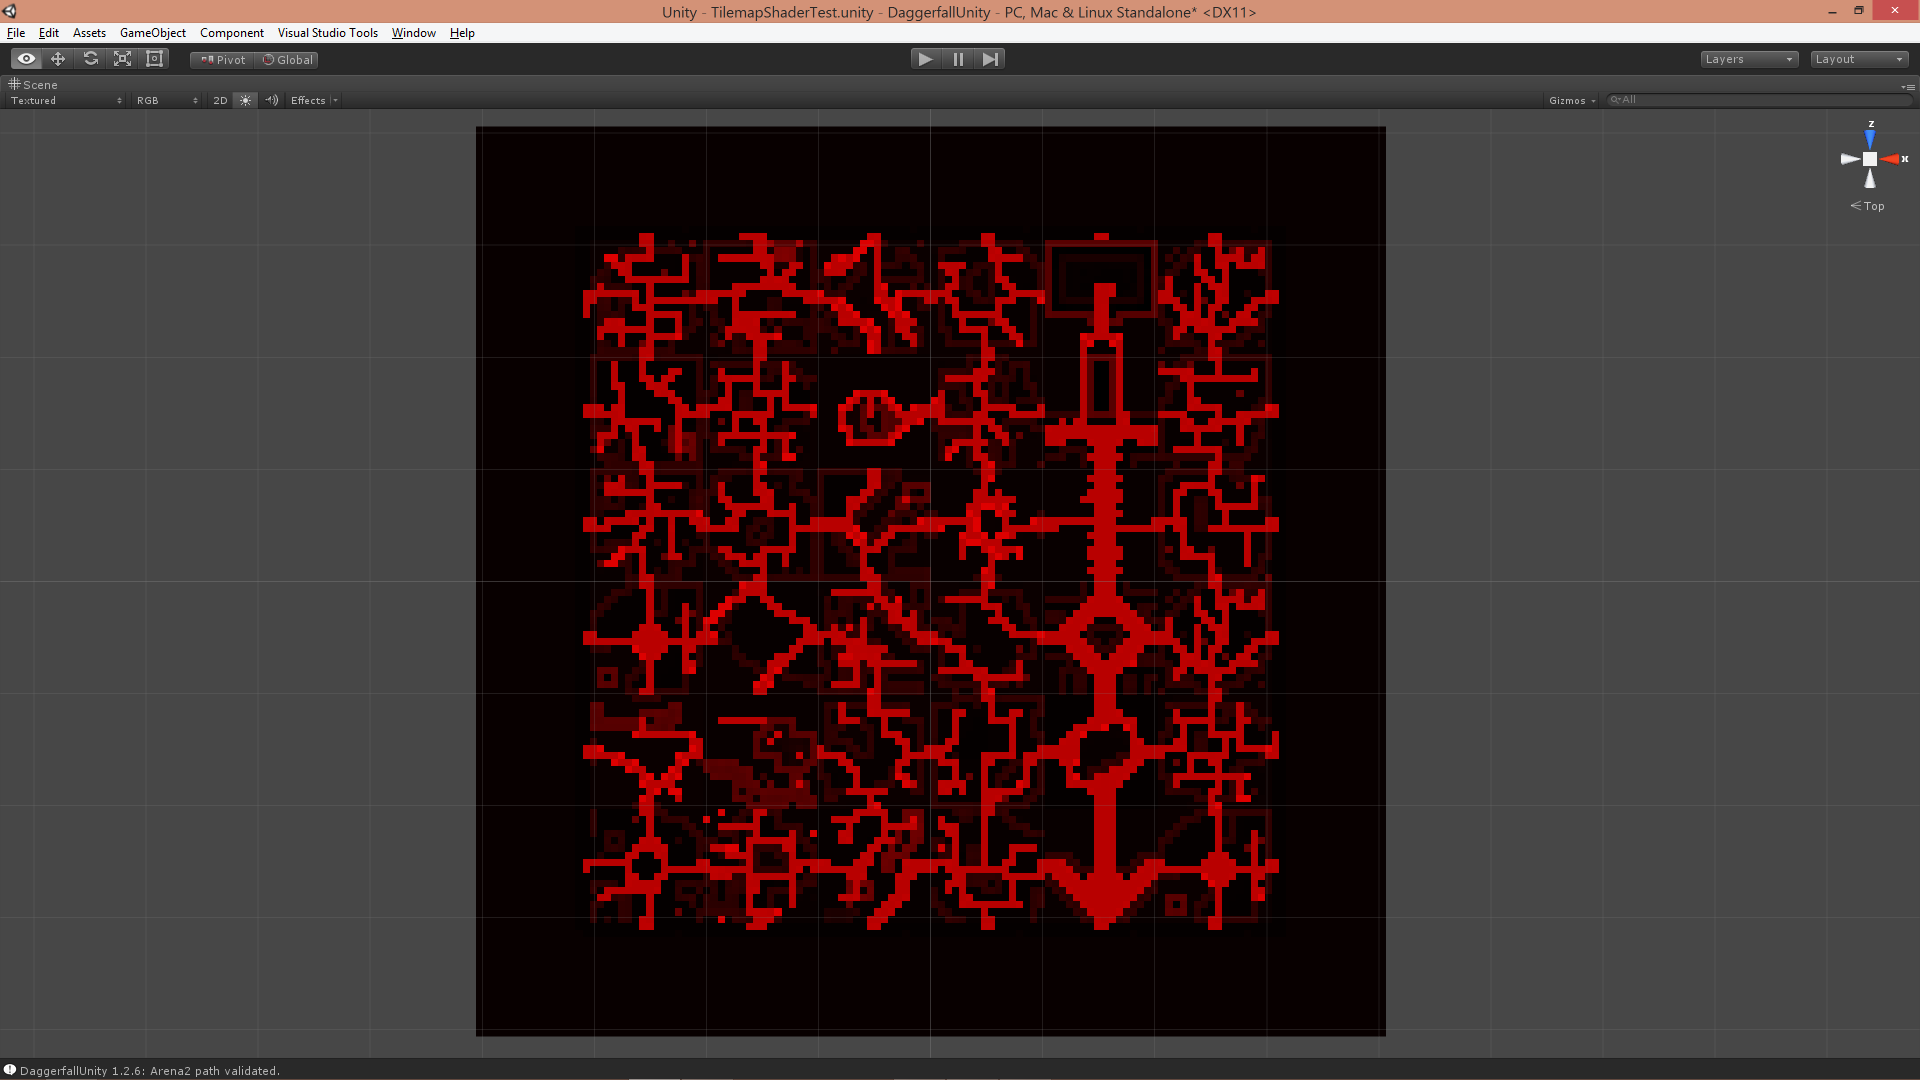
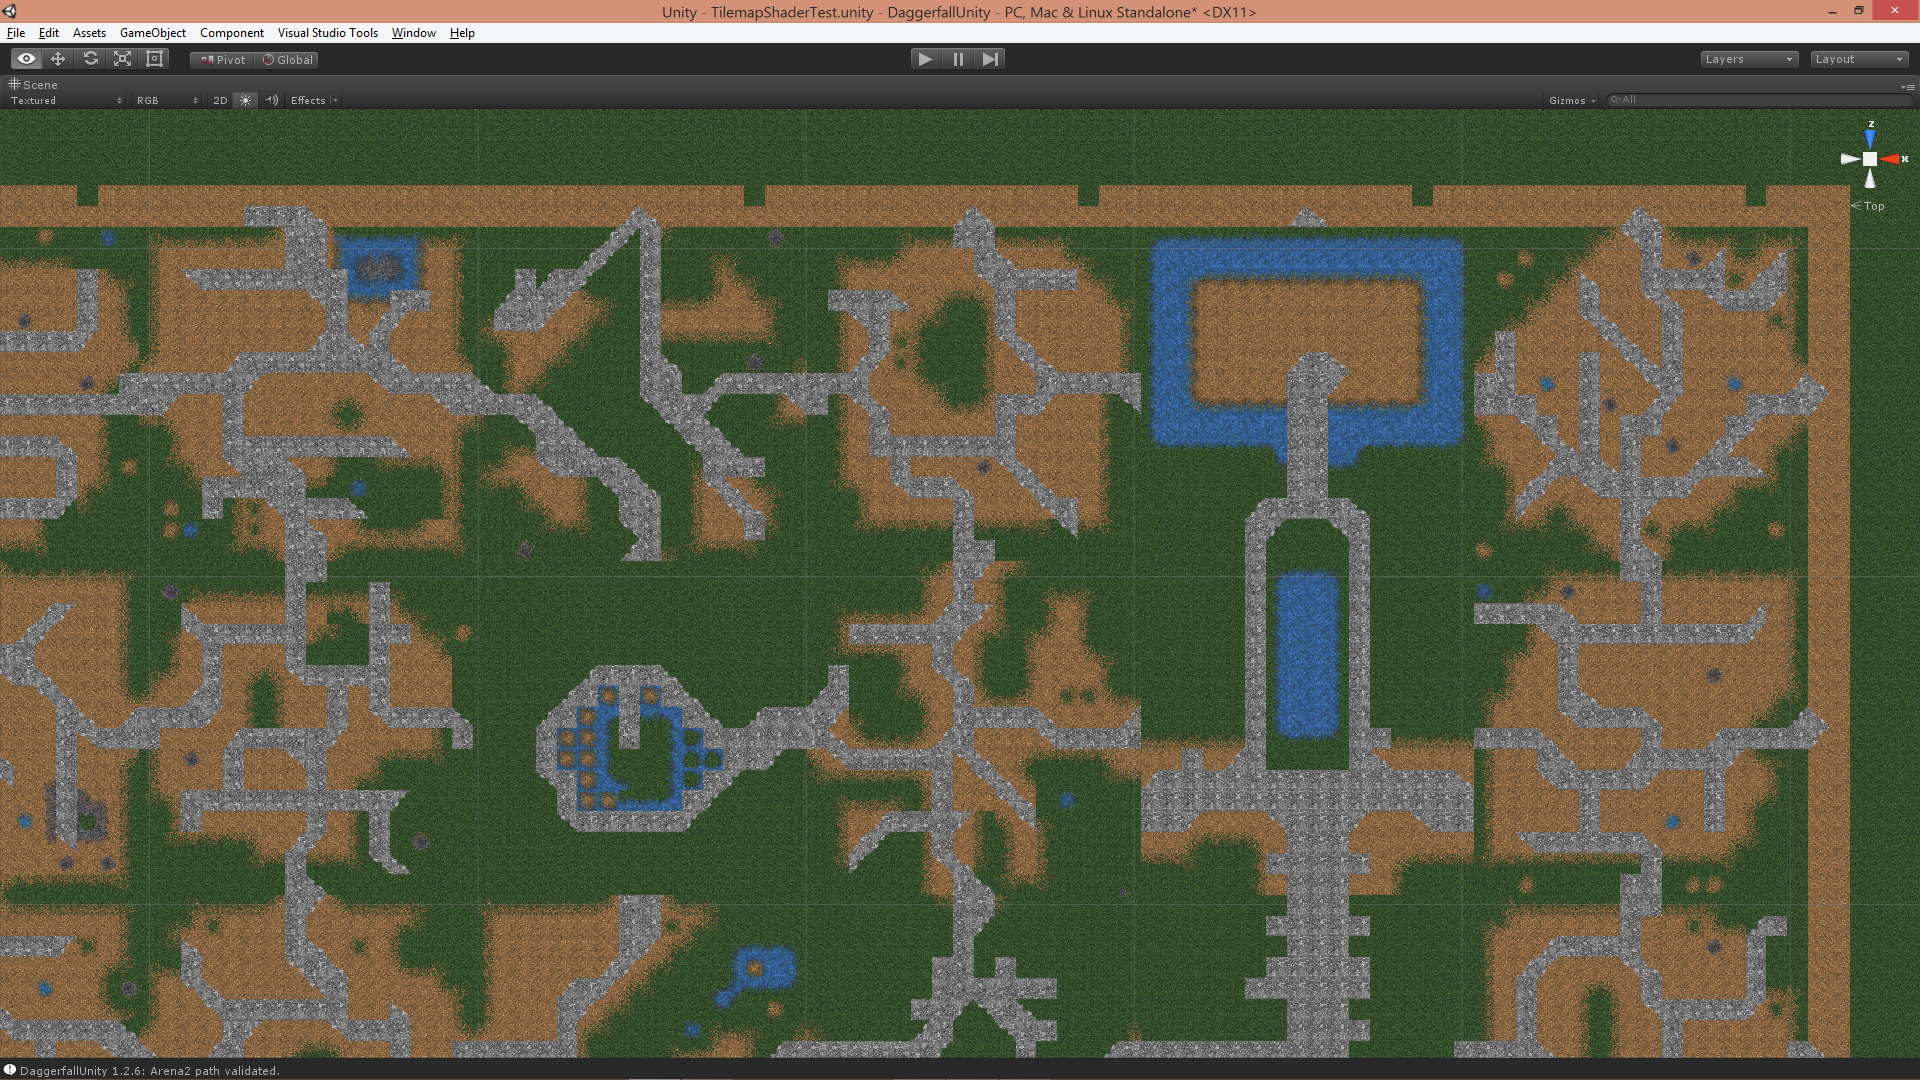
In order to reference these tiles in the fragment shader, we also create a tile map texture. This texture packs an index into the red channel that is basically a number 0-255 corresponding to a tile in the atlas above. This texture must be point-sampled to ensure no corruption of indices occurs. The tile map for Daggerfall city is below.

Tilemap

Now the shader has an atlas of tiles and indices referencing which tile to use. The following bit of code will read index from tile map then render out correct texture tile from the atlas.

int index = tex2D(_TilemapTex, i.texcoord0).x * _MaxIndex;
int xpos = index % _TilesetDim;
int ypos = index / _TilesetDim;
float2 uv = float2(xpos, ypos) / _TilesetDim;
float xoffset = frac(i.texcoord0.x * _TilemapDim) / _TilesetDim;
float yoffset = frac(i.texcoord0.y * _TilemapDim) / _TilesetDim;
uv += float2(xoffset, yoffset);
return tex2D(_MainTex, uv);

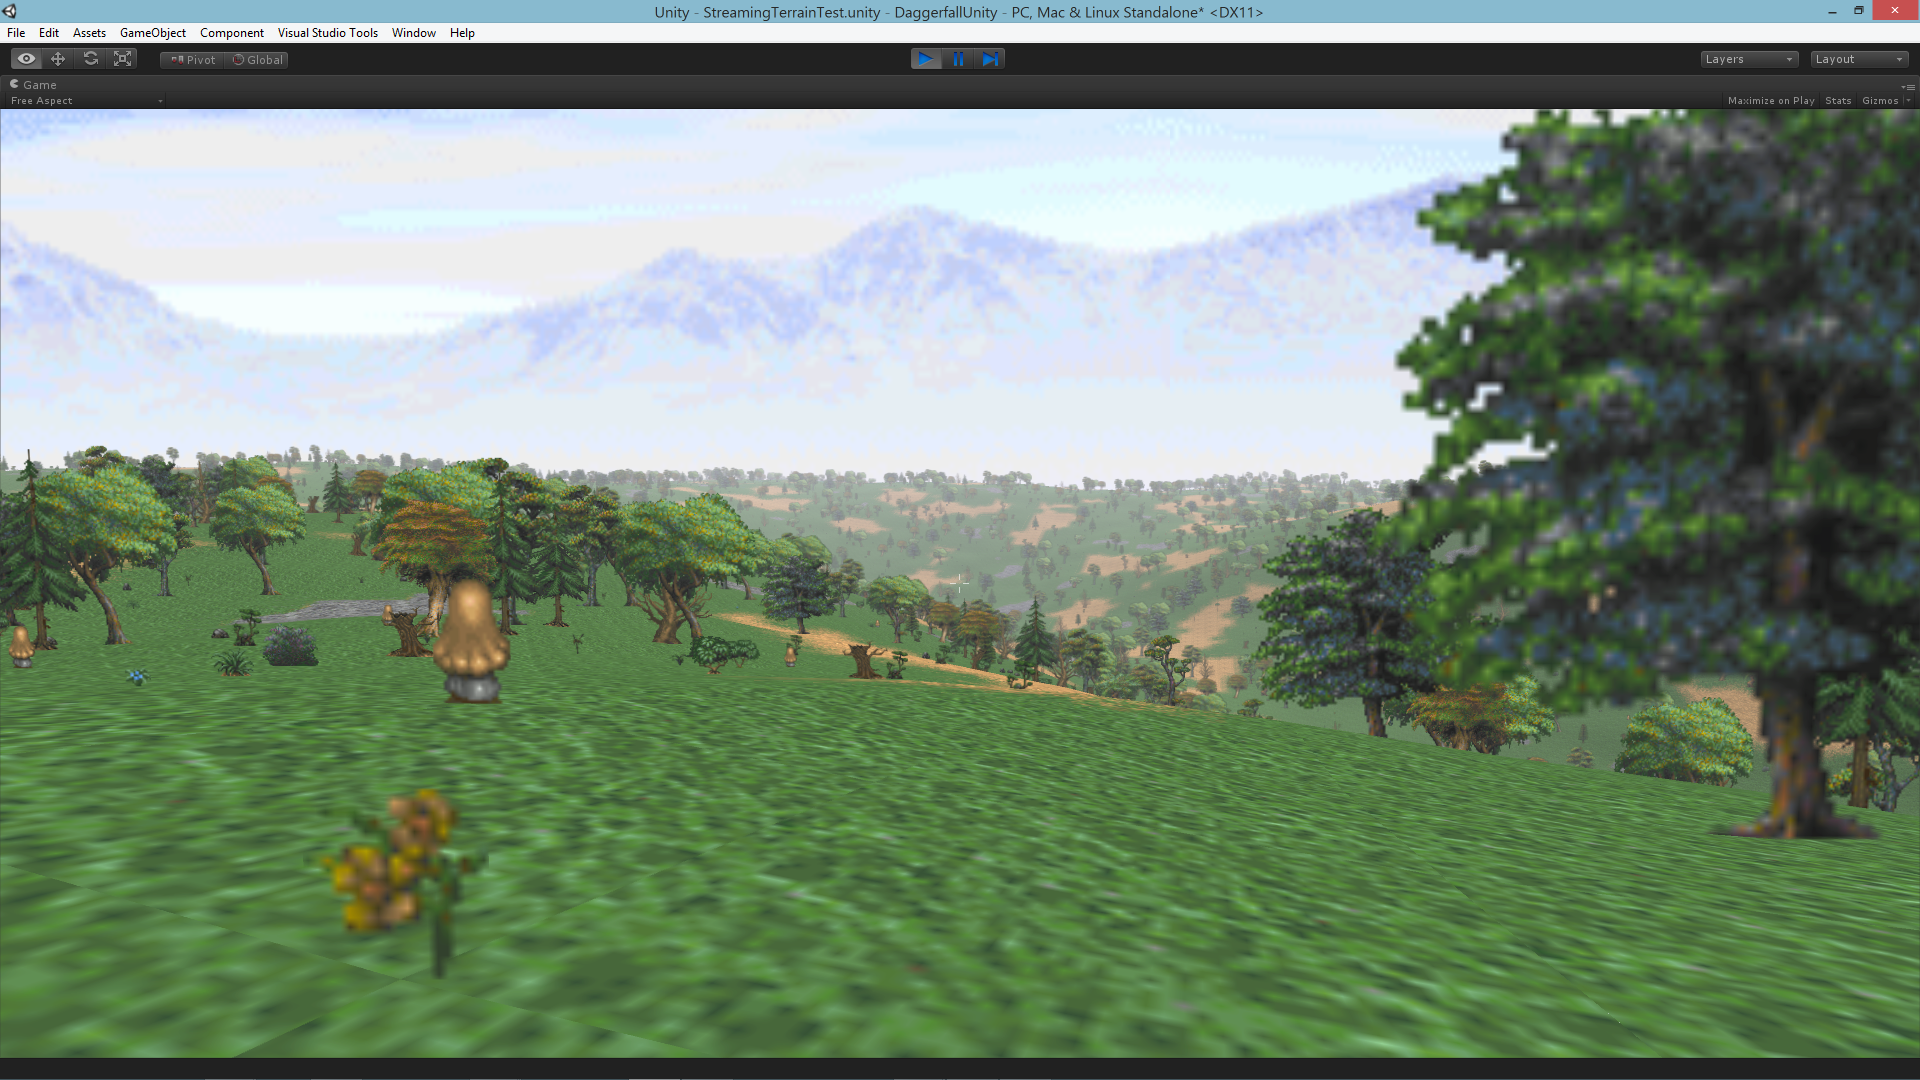
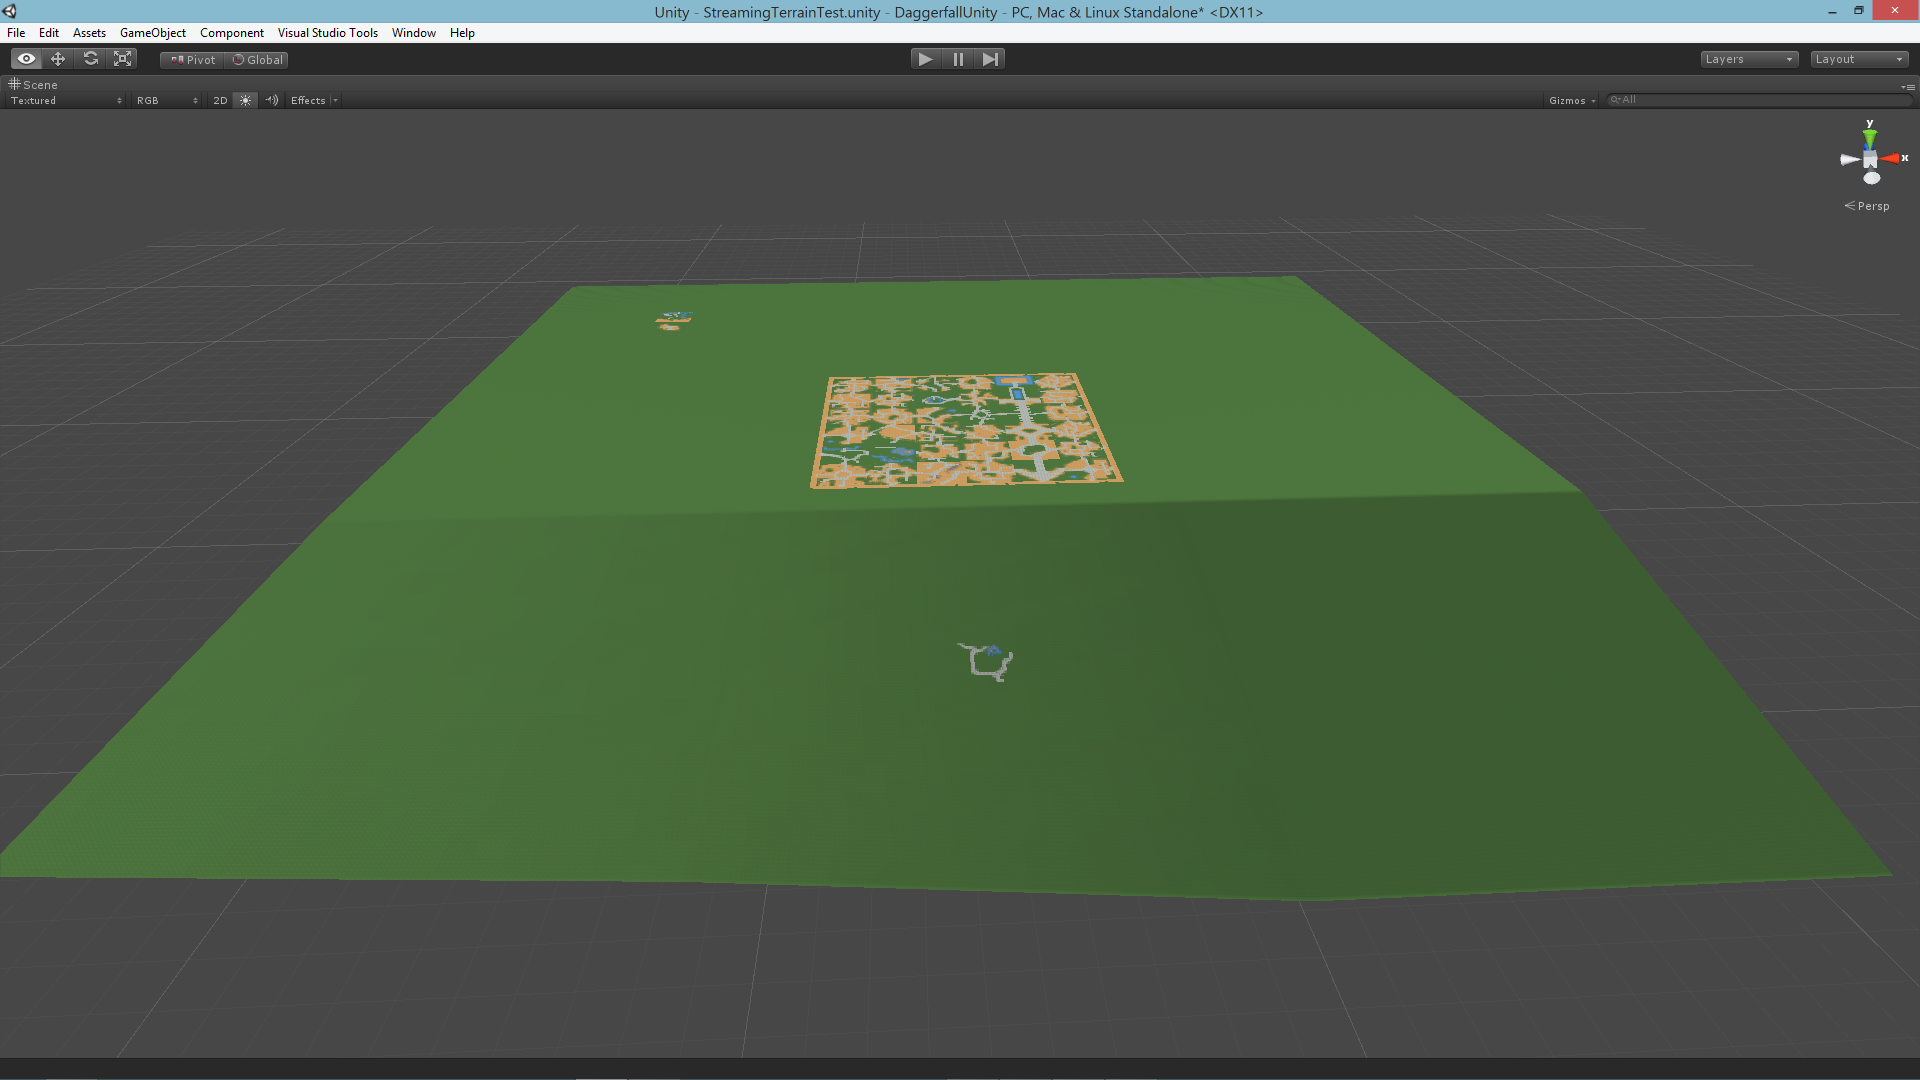
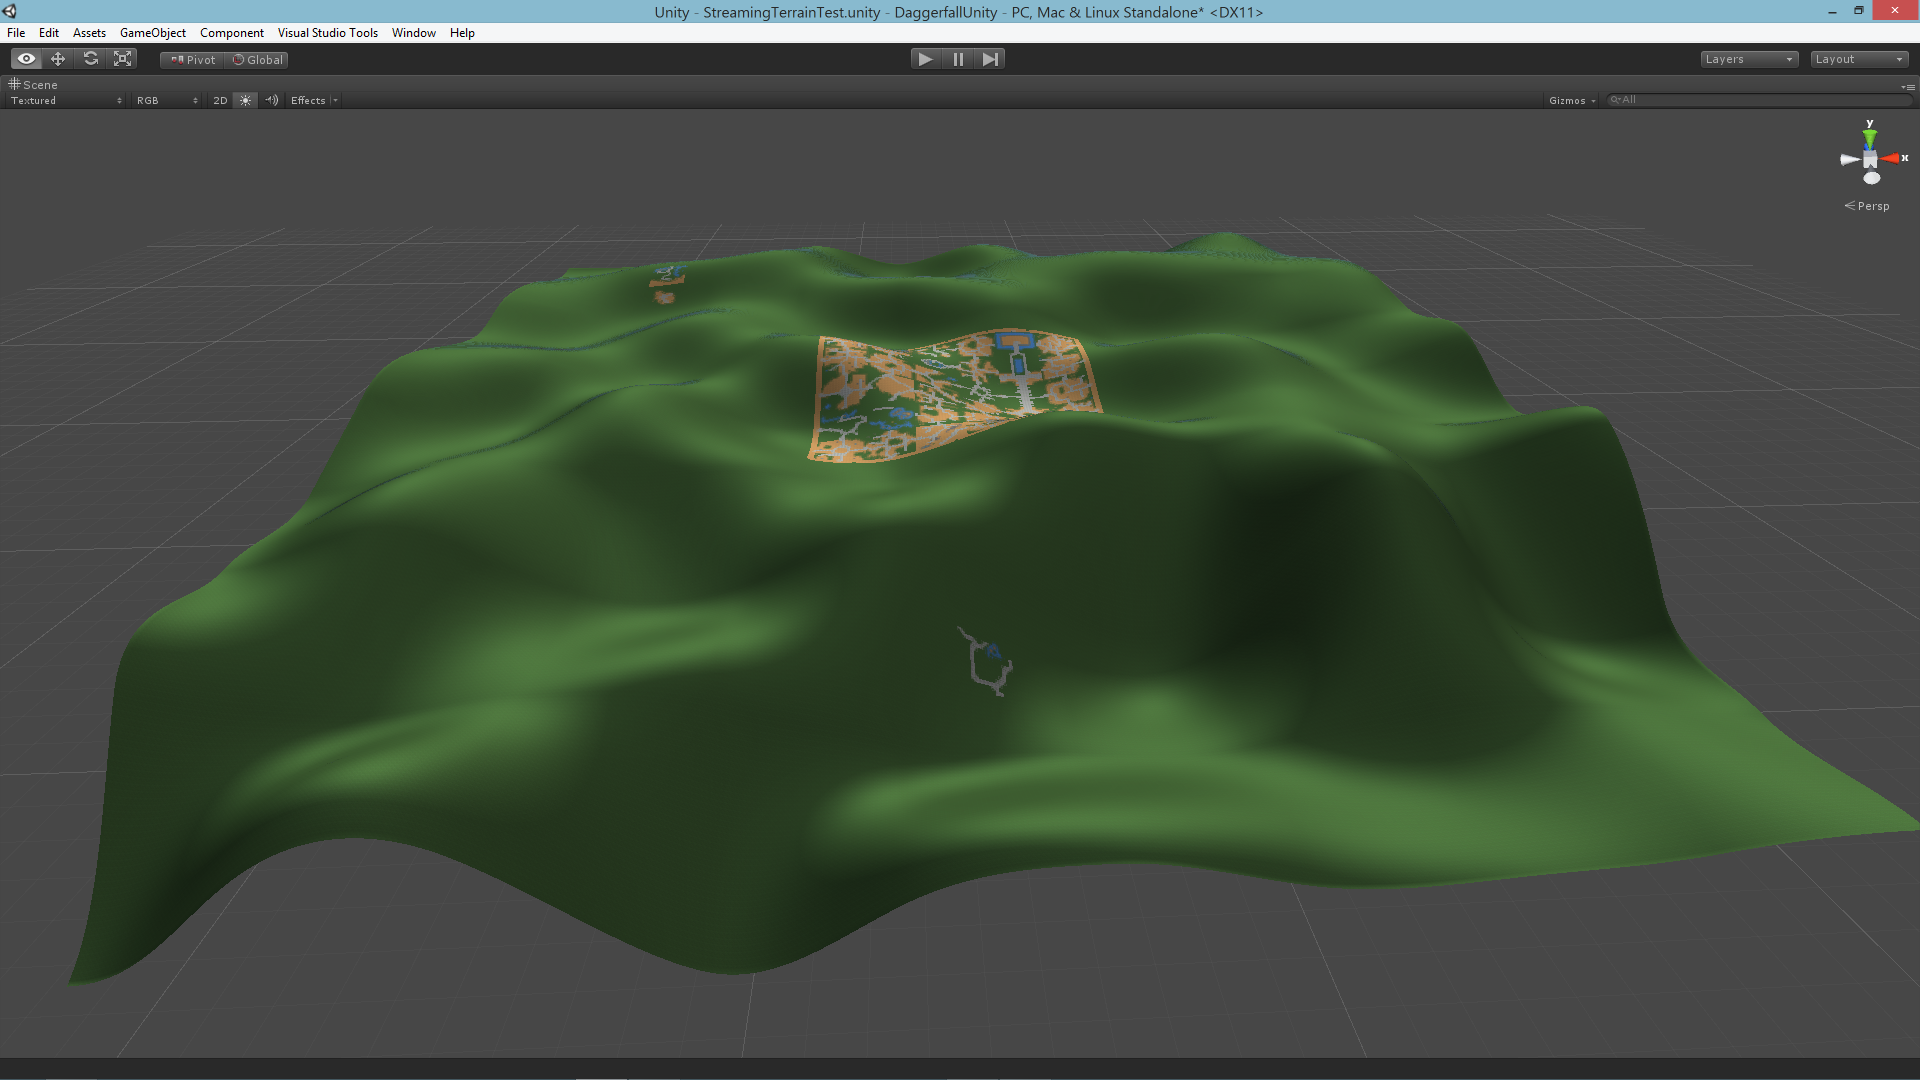
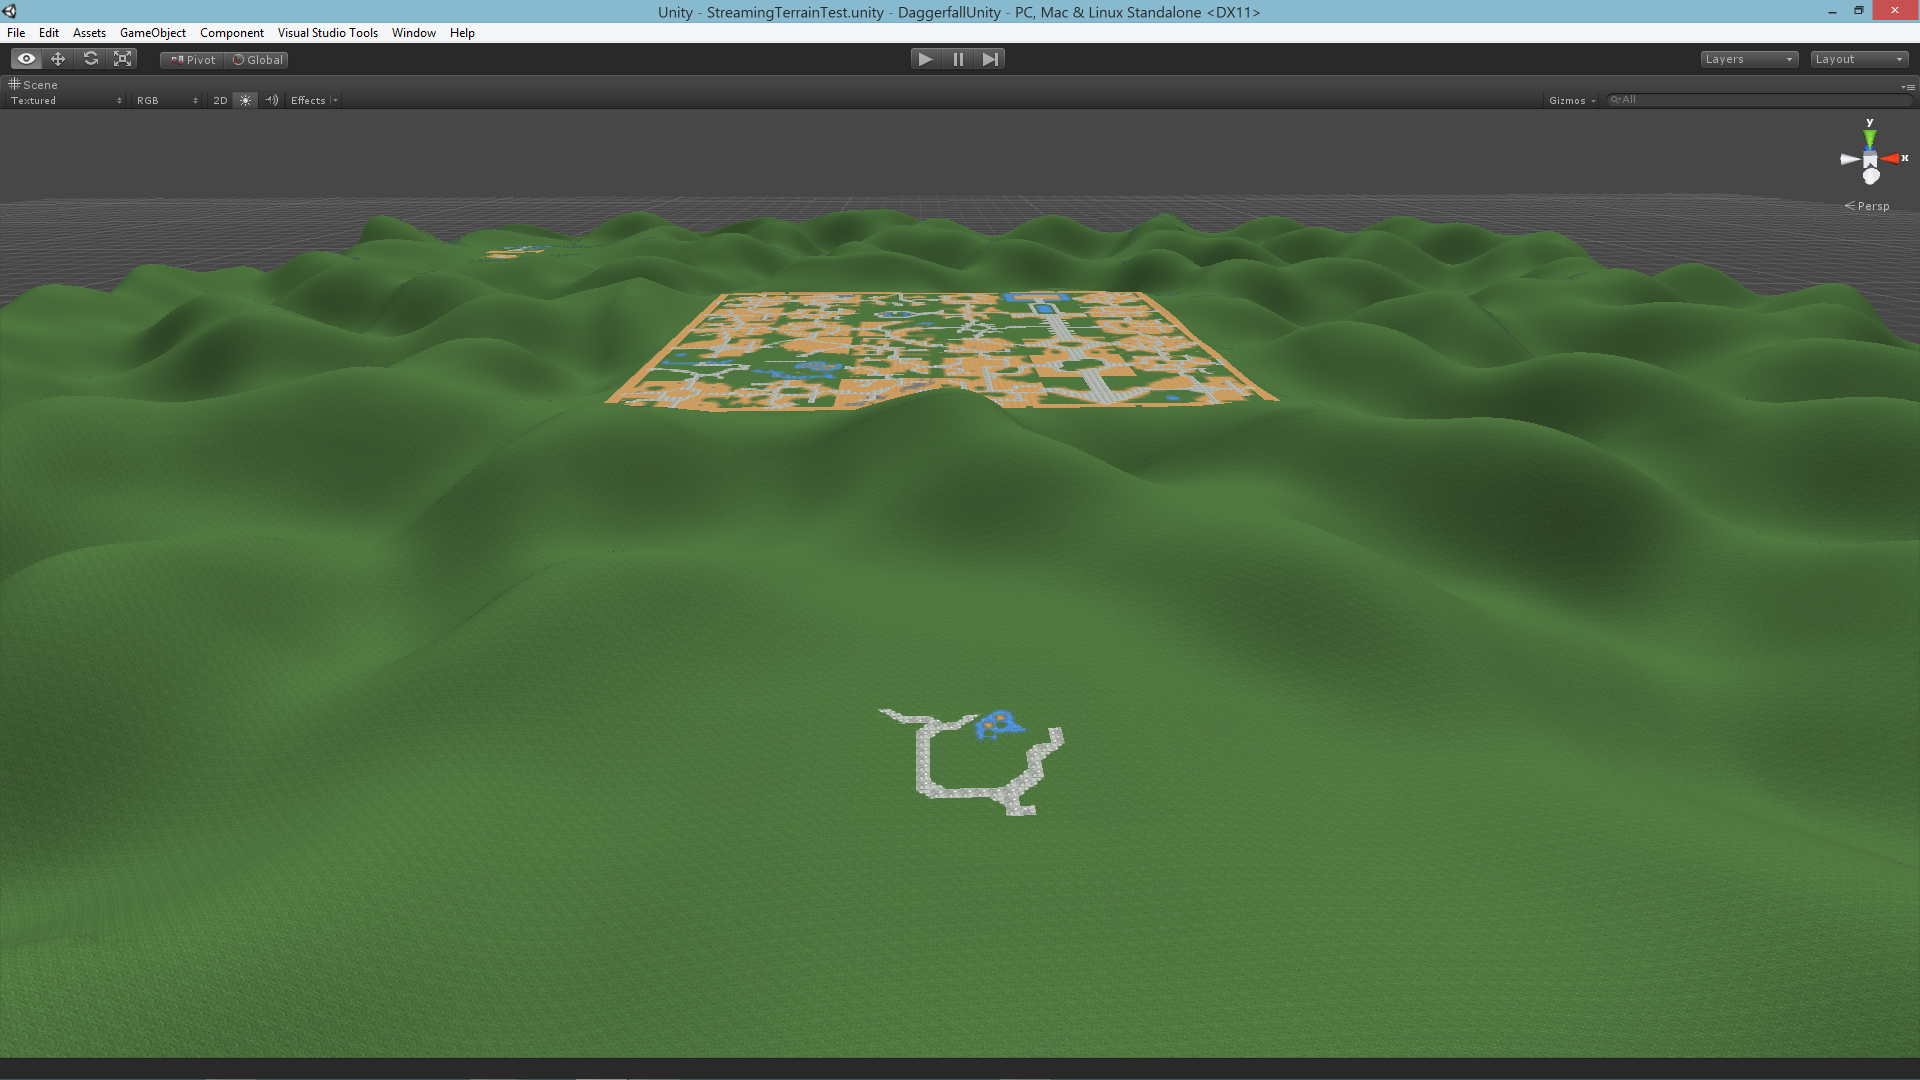
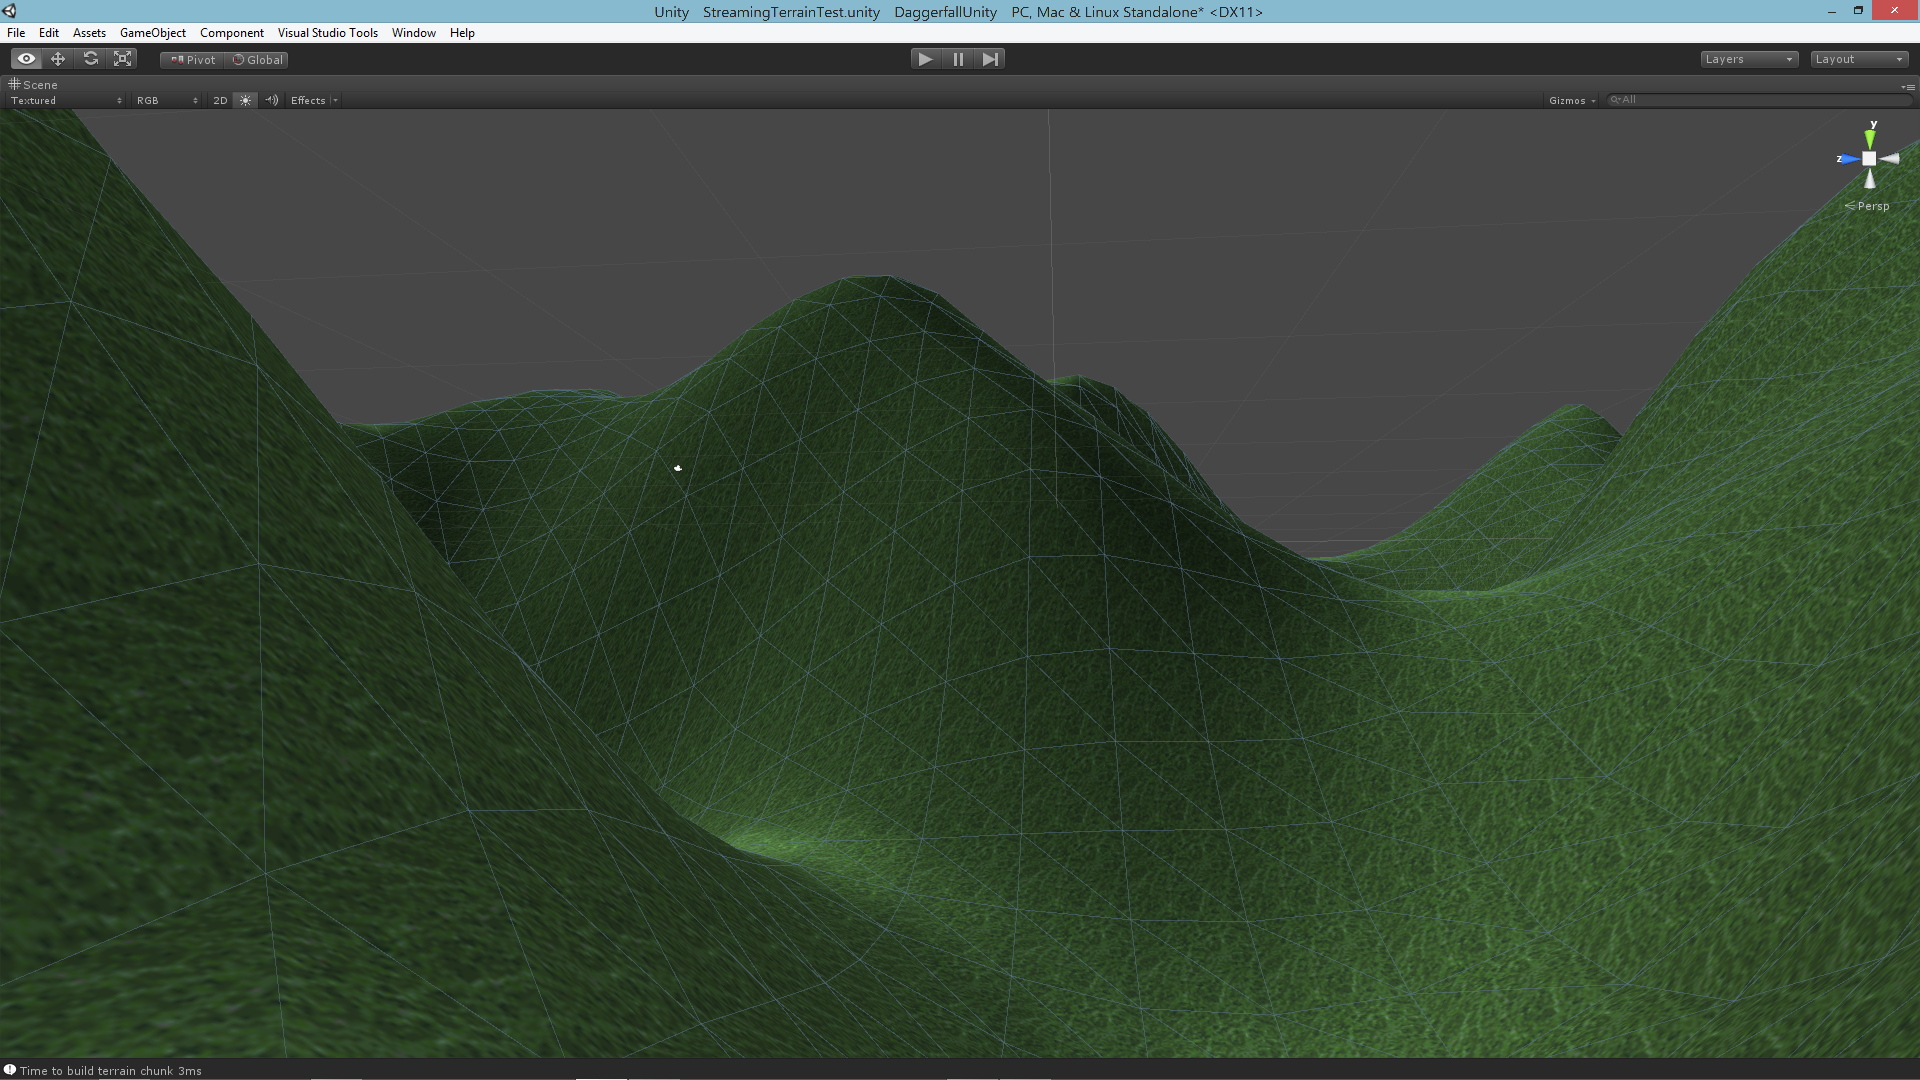
The result is a fully tiled city quad using just 4 vertices.

TilemapInAction

This works great, and it’s fast. If we were just using point filtering with no mipmaps, our job would be done already. Unfortunately linear filtering adds one set of problems and mipmaps add another. The first problem is texture colours bleeding in from adjacent tiles due to how linear filtering works. Image below demonstrates problem, note the dirt texture being sample at edge of water.

Bleeding

There are a few of ways to fix this, but one of the most robust is to manually wrap textures around to their opposite side in the atlas. This means that when the linear filter samples outside the tile area, texture wrapping will be simulated. The new atlas shows this concept with each tile wrapped 50% on all sides. Note: This solution works for tiling textures, but not for non-tiling textures where texture clamping needs to be simulated instead. The atlas generator is yet to support both wrapped and clamped tiles.

Atlas2

With a new atlas format, our fragment shader needs updating to sample interior part of each texture.

// Get offset to tile in atlas
int index = tex2D(_TilemapTex, i.texcoord0).x * _MaxIndex;
int xpos = index % _TilesetDim;
int ypos = index / _TilesetDim;
float2 uv = float2(xpos, ypos) / _TilesetDim;

// Offset to fragment position inside tile
float xoffset = frac(i.texcoord0.x * _TilemapDim) / _GutterSize;
float yoffset = frac(i.texcoord0.y * _TilemapDim) / _GutterSize;
uv += float2(xoffset, yoffset) + _GutterSize / _AtlasSize;

// Return fragment
return tex2D(_MainTex, uv);

These additions fix linear sampling to all but remove bleeding for tiling textures. Compare this image to the earlier version.

BleedingFixed

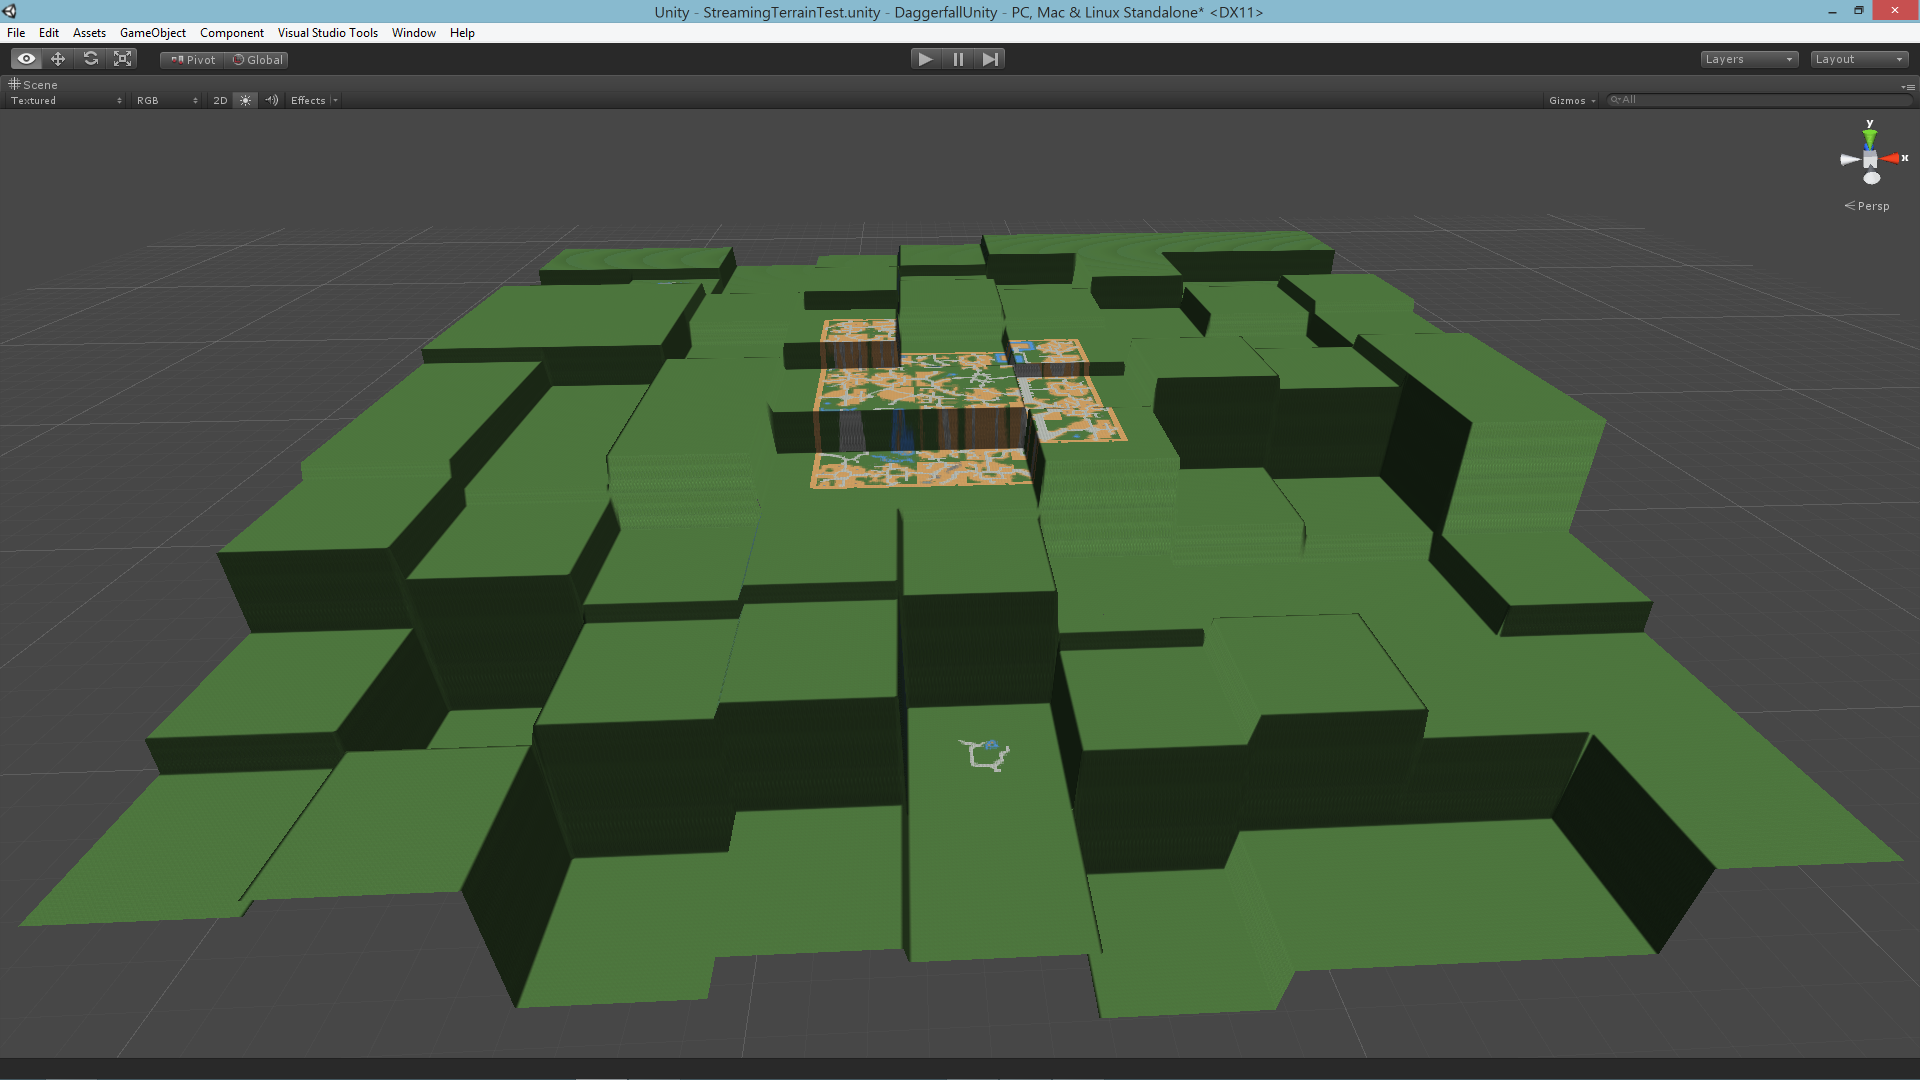
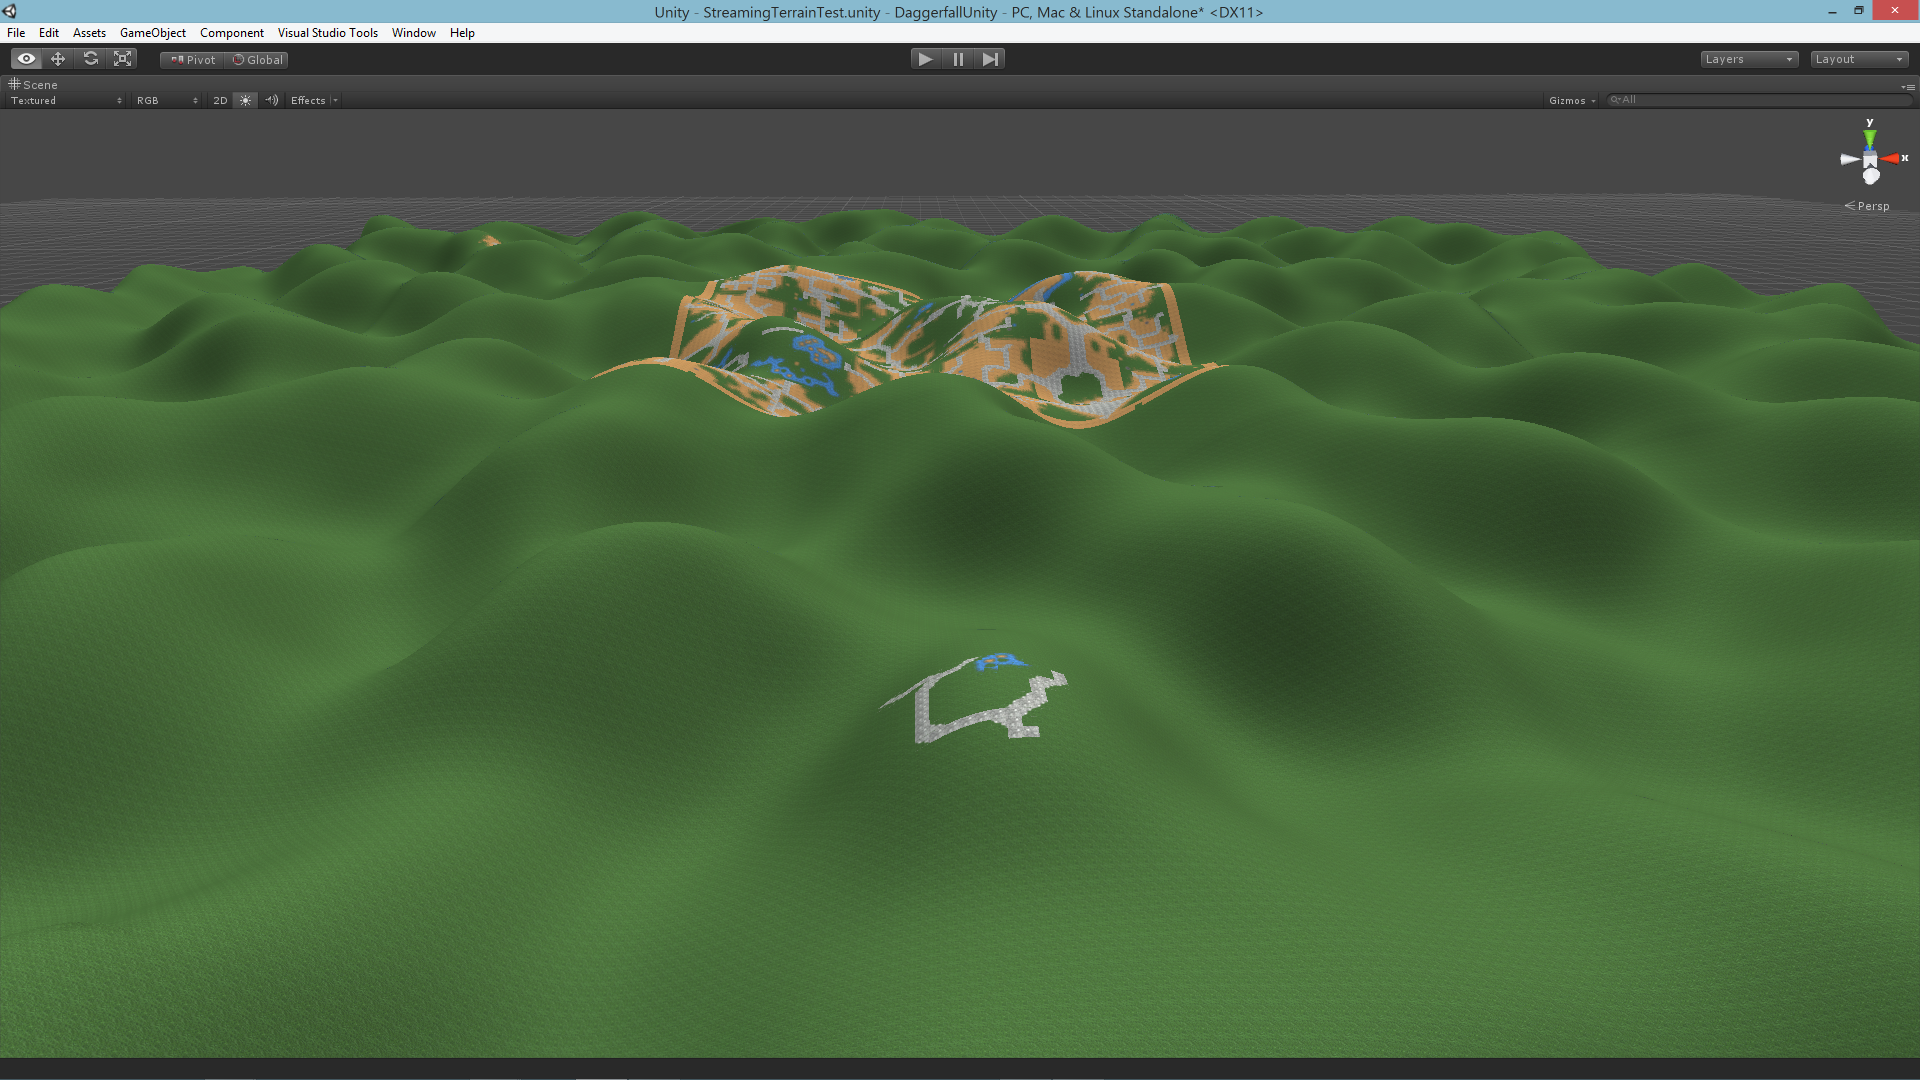
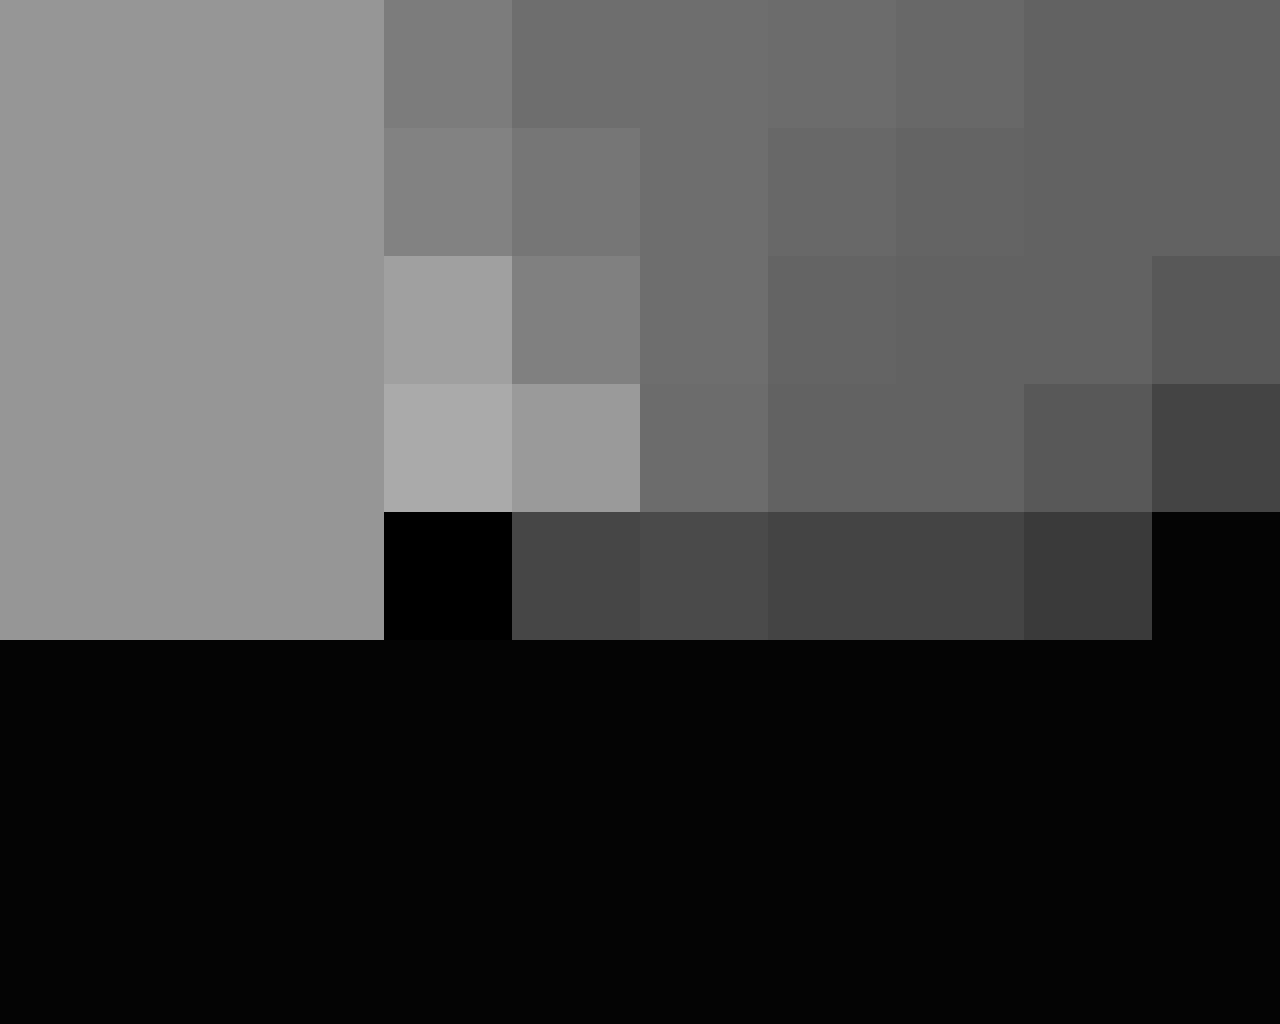
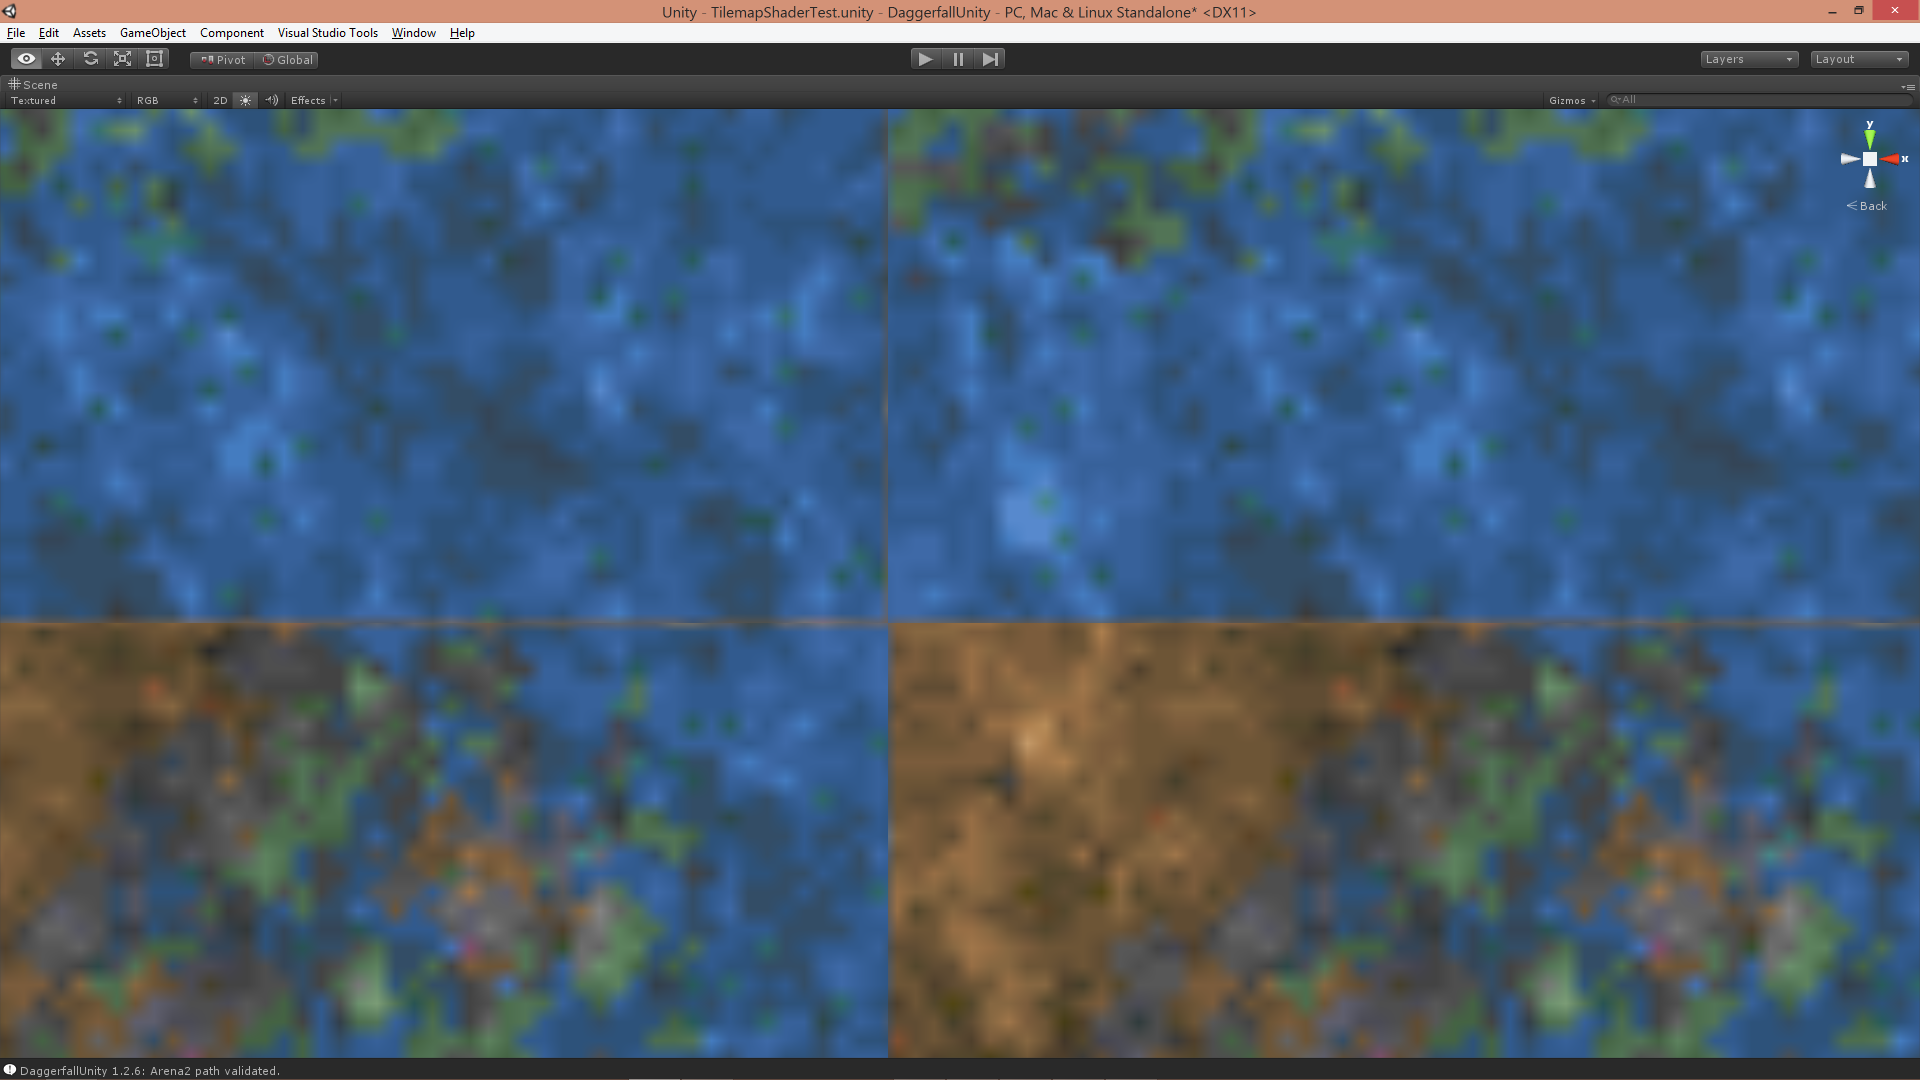
With texture bleeding taken care of, the next challenge is dealing with mipmaps. The graphics card has no understanding of our atlas, so tile wrapping makes it sample from the wrong mip level, which creates a whole new problem with cracks as shown below (you might need to open image to full size to see the cracking discussed).

MipMapCracks

Fixing this problem requires manually calculating the mip level in fragment shader. Fortunately there’s a lot of references online for dealing with this. Rather than just naively return the texture sample using tex2d, we need to use tex2dlod instead. Below is change to final line of code.

// Manually set mip level and return fragment
float mipLevel = GetMipLevel(i.texcoord0, _AtlasSize);
return tex2Dlod(_MainTex, float4(uv.xy, 0, mipLevel));

And the GetMipLevel() function.

float GetMipLevel(float2 iUV, float2 iTextureSize)
{
	float2 dx = ddx(iUV * iTextureSize.x);
	float2 dy = ddy(iUV * iTextureSize.y);
	float d = max(dot(dx, dx), dot(dy,dy));
	return 0.5 * log2(d);
}

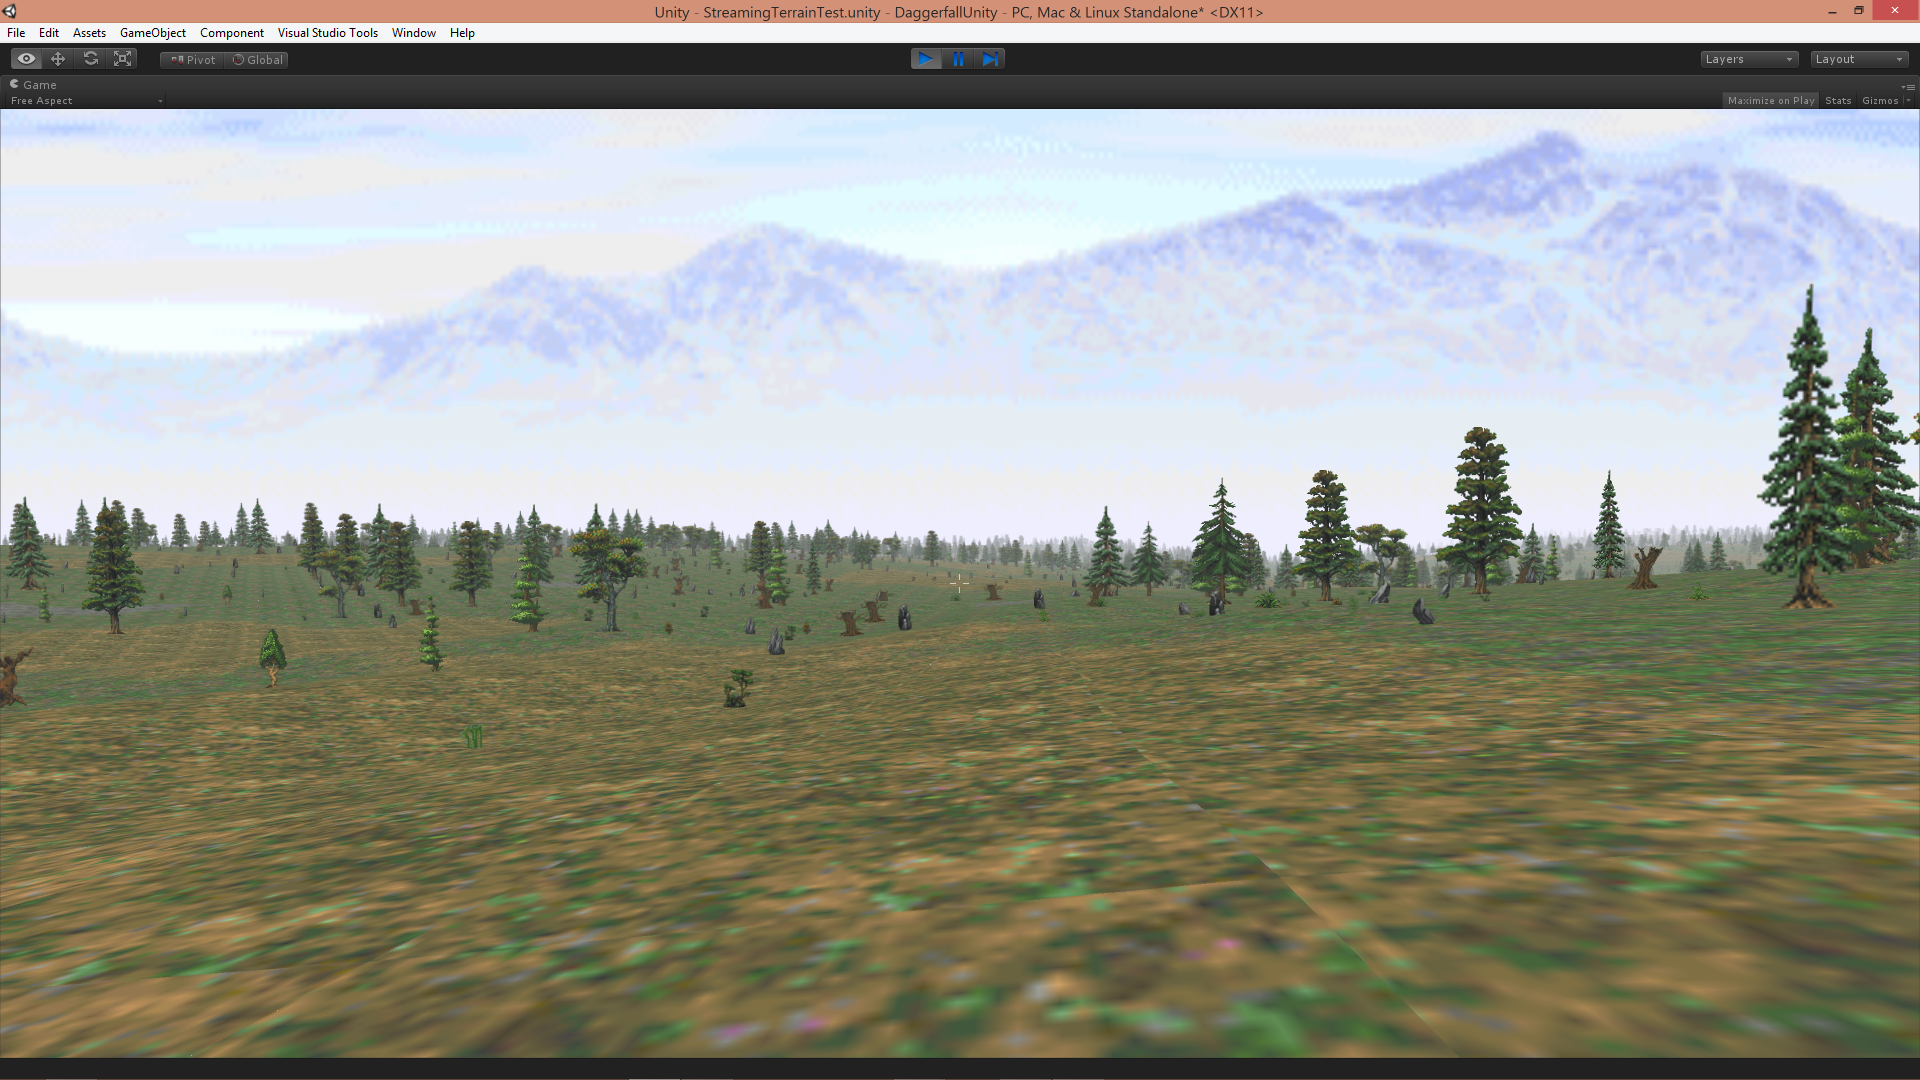
With this new code, our mip cracking problem has vanished.

MipMapCracksFixed

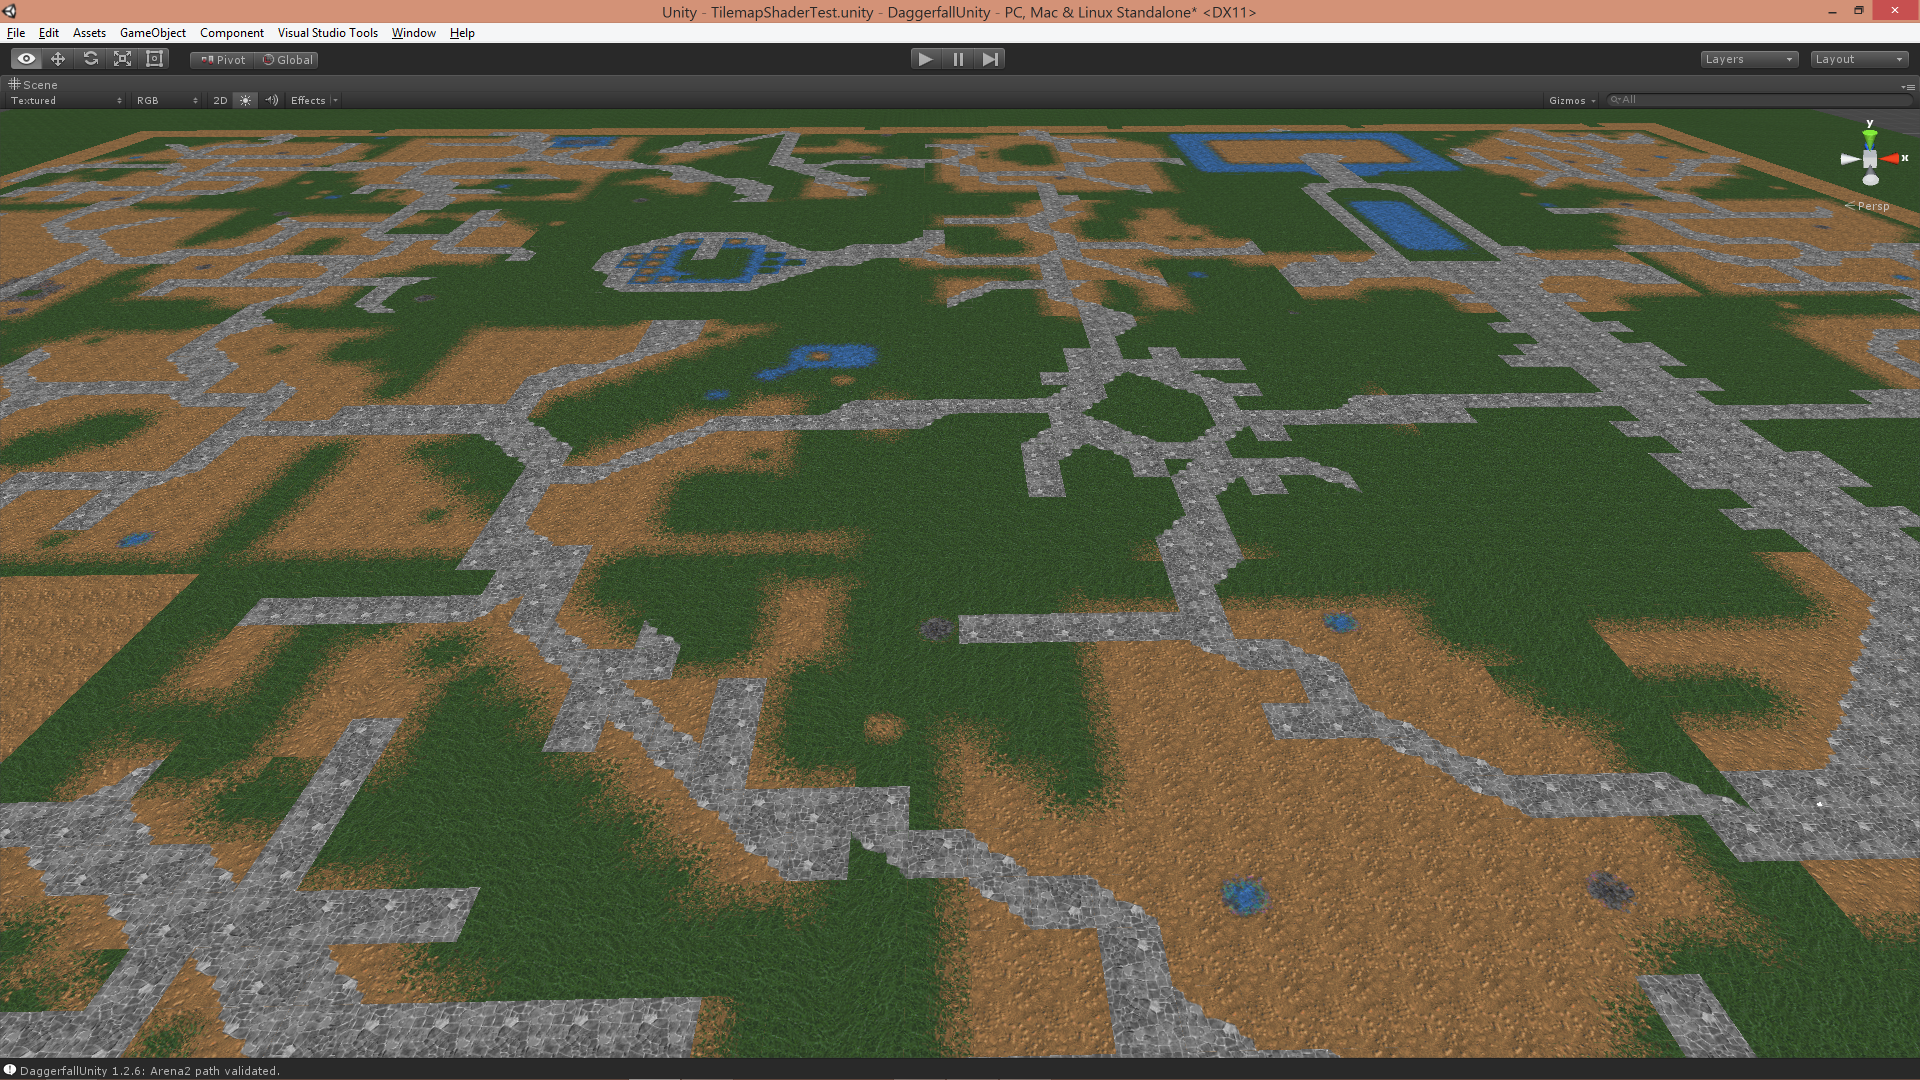
And there we have it. A super-fast method of tile mapping from an atlas which defeats both texture bleeding and mip sampling problems, and only needs a single quad mesh.

There’s still more work to do, mainly around atlas generation. I need to handle wrapped tiles and clamped tiles differently, and manually pack mip levels to improve overall quality. I will get back to this in the new year with my performance review. On the subject of performance, these concepts can be expanded to reduce draw calls for the terrain system and city environments. This is just the first spoke in a big wheel of optimizations.

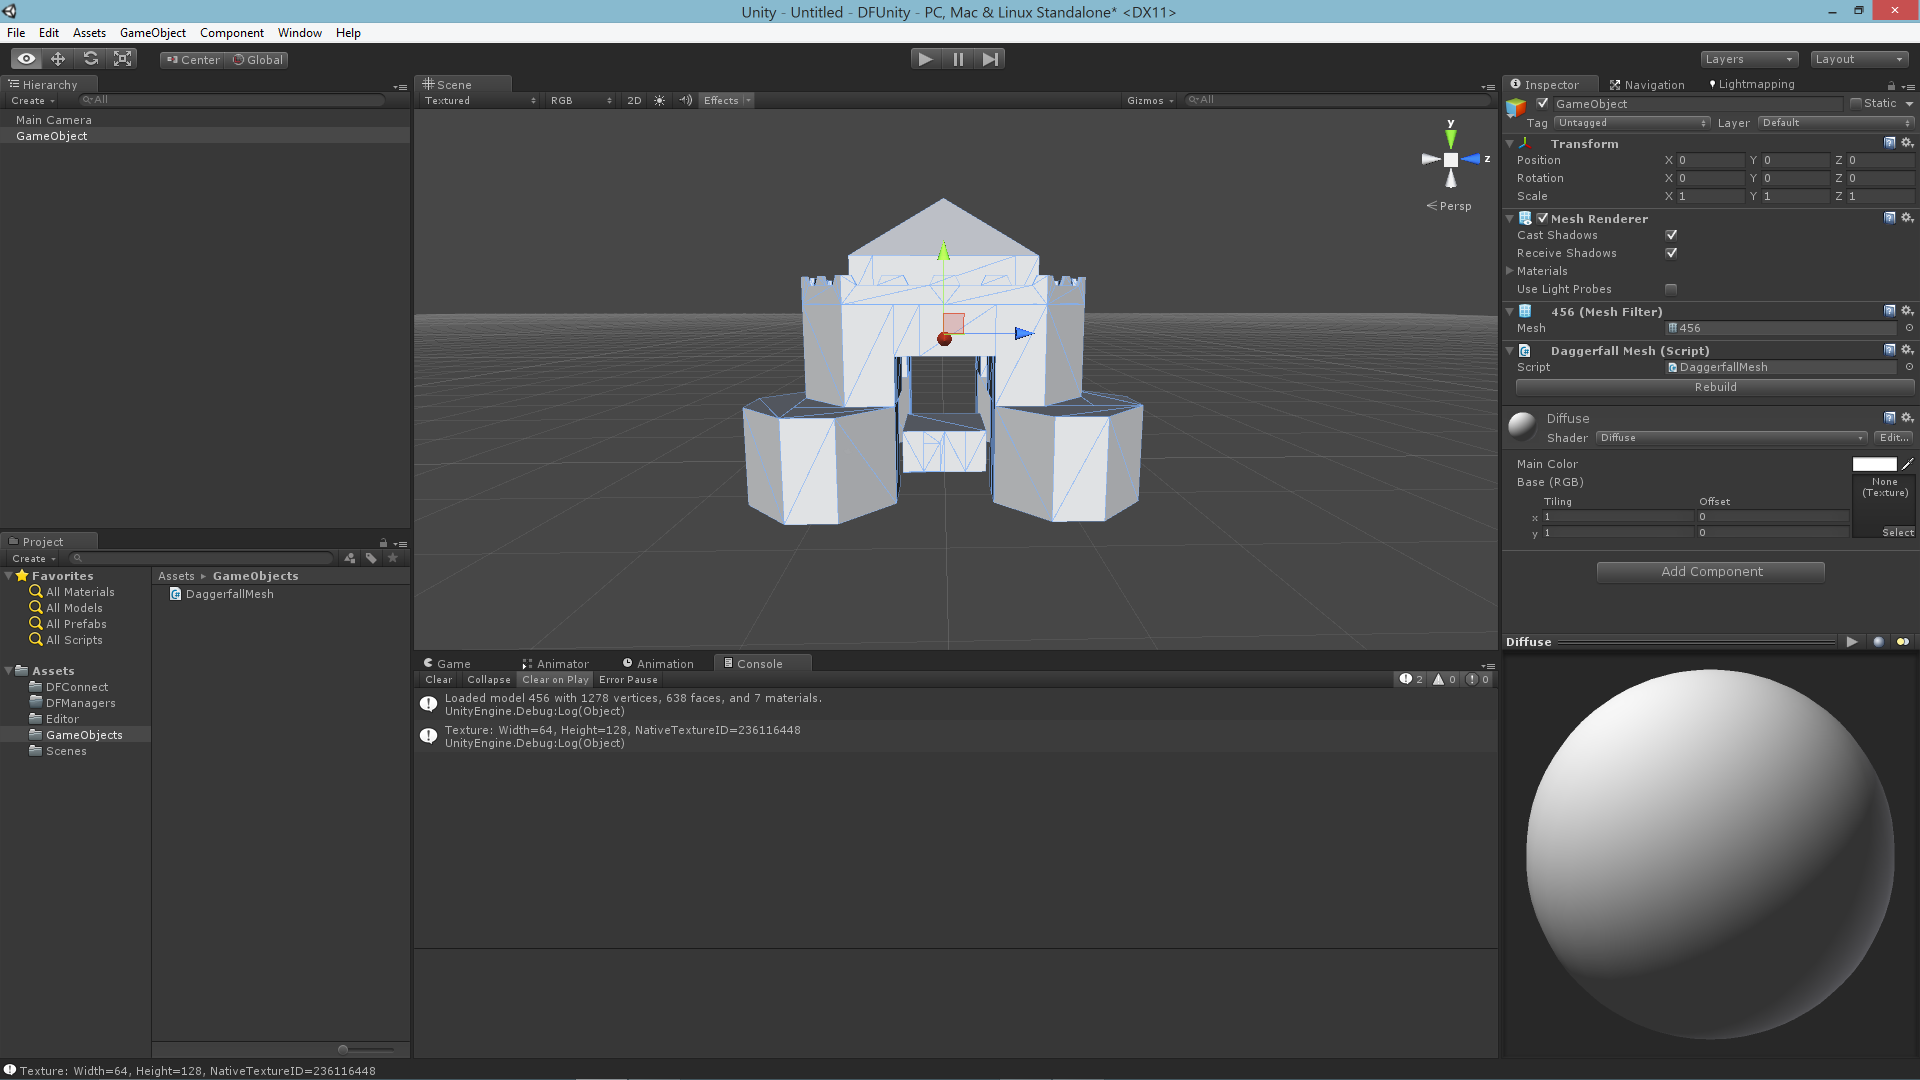
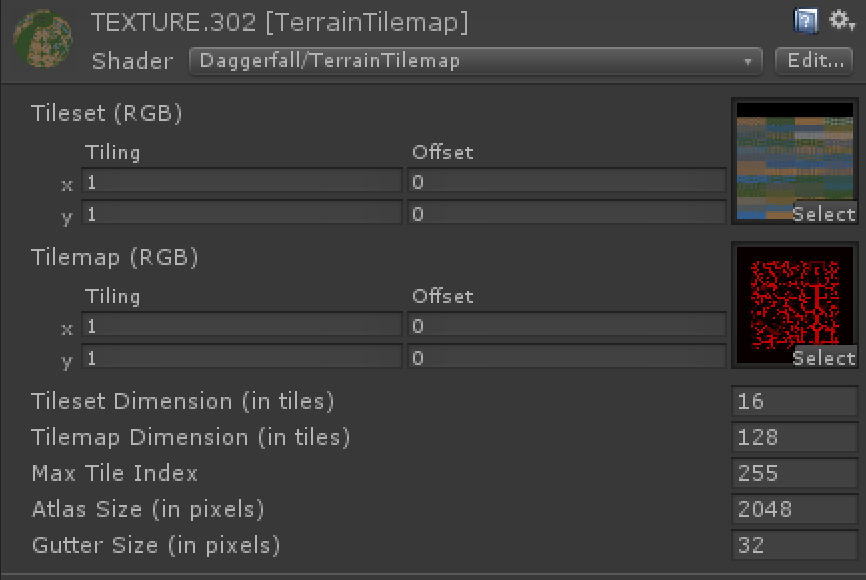
This last screenshot is of the material inside Unity editor, which shows how everything hangs together.

ShaderInEditor

References

I could not have pulled this off without the help of several people much smarter than myself. All the links below were used in formulating this solution.

Connor Hollis – Fast Tilemap Shader
http://connorhollis.com/fast-tilemap-shader/

IceFall Games – Terrain Engine
http://mtnphil.wordpress.com/2011/09/22/terrain-engine/

nVidia – Improve Batching Using Texture Atlasing
https://developer.nvidia.com/sites/default/files/akamai/tools/files/Texture_Atlas_Whitepaper.pdf

0 FPS – Texture atlases wrapping and mip-mapping
http://0fps.net/2013/07/09/texture-atlases-wrapping-and-mip-mapping/

Streaming World – Part 3

With all the major parts in place, next steps are all about improving overall appearance and boosting performance. I will tackle performance in the next and final part of this series. For now, let’s take a quick look at adding some visual appeal.

My first job is to improve texturing. All the screenshots you’ve seen so far have just been a flat grass texture. I implemented a basic simplex noise setup to create tiled patterns like below.

BeforeMarchingSquares

I then used marching squares to handle tile transitions from water > dirt > grass > stone. Daggerfall actually has a wider range of possible transitions (e.g. water > grass) but for simplicity I’ve only implemented the basic transitions so far. With marching squares the transitions look like this.

AfterMarchingSquares

I also added a little fog so distant terrain gradually blends into horizon. This gives the atmosphere a greater feeling of depth at long ranges like you would see in the real world.

The final step was to add nature flats (vegetation, rocks, etc.) to scene. This is just a basic random function with a density set per tile type. This could be expanded later to change vegetation density based on any number of variables. Finally, we have a world that almost looks ready to explore.

In the hills near Daggerfall

Hills of Daggerfall

Isle of Balfiera

Isle of Balfiera

Off the coast near Sentinel

Coastal Sentinel

Swamplands of Tigonus

Swamplands of Tigonus

There’s still a great deal of work to go before this is ready. Due to the rapid nature of development, nothing has been optimised yet and performance is very poor. My first priority is a full performance review of the entire tools to get this where it needs to be. Everything from loading textures and models all the way up to drawing terrain and foliage needs to be improved. This will unfortunately delay the streaming world features until early next year, but the end result will be a much improved code base.

Another, smaller item will be the overall scale of terrain and distribution of vegetation. If you look at the coastal Sentinel screenshot above, the terrain ramps up much too rapidly. I need to set terrain scale based on biome (e.g. desert is flatter than mountains), and terrain noise based on biome (e.g. desert is more rolling than mountains). This is just a matter of tuning the numbers going into terrain generation for an overall more pleasing game space.

On the whole, I’m very happy with how the streaming world is shaping up. It’s basically where I want it in terms of recreating Daggerfall’s simplistic overworld, and just needs performance and aesthetic tuning. I can’t wait to get all of this completed so you have a whole world to build on using Daggerfall Tools for Unity.

This will be my final post for the year. I’m shutting down work at the end of this week and will be spending valuable time with family. I wish you all a very happy and safe Christmas and look forward to catching up again in the New Year.

Progress Recap and Future Direction

I can’t believe it’s December already. The Holiday Season will be upon us before we know it. I also can’t believe Daggerfall Tools for Unity has only been in development a few months. If you’ve just started following this project, here’s how it looked on August 16th this year after wrangling import of a single model.

Scourg Barrow exterior model

Now it looks like the below and can do all this stuff. Check out the Direnni Tower Demo page if you would like to play the demo this video was created from.

In less than 4 months, this Unity Asset has gone from loading a single untextured model to full locations with dungeons, enemies, weapons, combat, sound, building interiors, and a fully streaming overworld system is on the way. I am very proud of what I’ve accomplished so far. But more importantly, I’m having fun.

And to my great pleasure and surprise, others have taken an interest in what this project signifies. You guys understand these tools represent freedom to do creative things with Daggerfall, beyond just remaking the game. The simple demo above is only a taste of what’s possible.

For the first time all content and gameplay of Daggerfall can be recreated using a modern, powerful game engine. An engine which supports more than a dozen platforms and provides an entire development ecosystem backed by an enthusiastic community. It’s now possible to create entirely new Daggerfall experiences and share your creations with other Daggerfall fans. For example, community member Eric managed to get a city build running on Android.

If you’re interested, you will even find great tutorials and documentation to help you get started. And of course, everything is 100% open source.

If you don’t have development skills, you can still help by letting others know about these tools. The sky’s the limit for Daggerfall now, we just need more interested people to help reach those heights.

So that’s the last four months. What happens next? Obviously my first priority is to release version 1.2 with streaming overworld features. But that’s only a short-term goal, I also have plans for 2015 to share with you.

I want to keep growing and refining these tools, and encourage other developers to get on board. I believe the time is finally right to build a small game with Daggerfall Tools for Unity. This not only shows what is possible, it provides a starting point for others and helps critically evaluate suitability of these tools for larger projects. Part of the process will be tightening up loose screws and adding features to solve problems encountered on a real project. The result will be a new Daggerfall-styled game for you to enjoy, and a more refined version of the tools. I will talk more about this project in early 2015.

I also need to provide a support hub for Daggerfall Tools for Unity. Beyond just documentation and tutorials, support means engaging with new developers and giving them a place to cooperate and share information. This hub will be a new site attached to dfworkshop.net with a community focus. I want to make the emphasis all about you and what you create, no matter how large or small. There’s no reason we can’t build a microcosm of the lively mod scene enjoyed by later Elder Scrolls titles. I am planning out the beginnings of this site now and should be ready to launch in first half of 2015.

So that’s the tools in review, with exciting new things to come. I’m feeling very positive about next year and look forward to meeting new Daggerfall fans in the future.

One more thing. If you’d like to keep tabs on my daily progress, I try to tweet small updates as frequently as possible. You will find me on Twitter @dfinterkarma.

Streaming World – Improving Terrain Noise

I decided to take a step back and have quick look at my base terrain generation. I wasn’t very happy with the overall appearance and contours of noise, and smooth noise functions alone weren’t enough to achieve the desired result.

To fix this, I changed my mind about using the the large height map data (sometimes called the noise map) which is also in WOODS.WLD. If you’re not familiar with this additional map, it is a 5000×2500 version of the 1000×500 height map I showed in part 1. Not all of this map is usable as there is a grid-like pattern overlayed with an unknown purpose.

Below are 3×3 terrains with city of Daggerfall in the middle. I have increased height scale so any deformations are more visible. This is basically the terrain from my previous article with all noise removed. Bilinear interpolation is used to smooth transition between height samples.

SmallHeightBilinearThis really isn’t very interesting. Next I’m going to use the large height map, which has 3×3 samples per terrain instead of 1×1. This looks like the following when using nearest-neighbour interpolation.

LargeHeightPointSamples

There’s definitely more sample points, but it resembles Minecraft more than Daggerfall. Let’s smooth things out a bit using trusty bilinear interpolation.

LargeHeightBilinearSamples

Ouch, that’s still really ugly. With more sample points, bilinear isn’t really an appropriate choice anymore. The next best thing is bicubic interpolation.

LargeHeightBicubicSamples

Much better! Bicubic ensures a nice continuous curve through all sample points and provides a more interesting base terrain compared to the very first screenshot. I am much happier with this as a starting point.

So far, all this data is being read from Daggerfall’s files. I haven’t added anything besides scaling up the height. As before, I will use a bit of smooth noise to add fine details at ground level and flatten out the city areas.

Now that’s out of the way, I can go back to improving other aspects of terrain quality.

Streaming World – Part 2

In the first part of this series, we looked at how the world in Daggerfall is constructed from multiple 1000×500 pixel maps, and how procedural techniques can be applied to add more fine detail to Daggerfall’s height map.

This article shows how continuous height map data generated by world readers is injected into scene as continuous meshed terrain and how terrain is landscaped into flat areas for cities.

First up, I have chosen not to use Unity’s native terrain system. There are several reasons for this, but chiefly is that Daggerfall terrain textures work very differently from Unity. In Unity (like most modern 3D engines) the terrain is textured using a splat map – a special texture which determines how detail textures are to be blended at every vertex. Daggerfall on the other hand uses a grid of quads textured from a selection of 56 tiles. These tiles are earth, sand, grass, stone, and road with hand-painted transitions between most states.

TerrainTextureTiles

Above is the temperate terrain set as viewed from Daggerfall Imaging 2. There is one complete set of 56 tiles per climate base (desert, temperate, mountain, swamp) with one variant for snow and another for rain. To save texture space, these tiles also use UV modification to be rotated, flipped, or both rotated and flipped where required.

In order for the terrain to blend seamlessly from wilderness into city tiles, it becomes necessary to build a custom terrain system which understands how Daggerfall works. This unfortunately excludes the default Unity terrain. The code is modular however, so you can always replace part or all of my terrain system with something else.

With the decision made to create a Daggerfall-like terrain system, the next stage is to transform raw height data into streaming mesh samples and format ground for locations.

The first step of this journey was actually implemented a few weeks back in the 1.1 update. See article Time & Space and More for details about PlayerGPS and WorldTime components. Suffice to say, the toolset already has a good understanding of where the player is in the world and what locations are nearby. I will copy an image from the time and space article here as it pertains to world streaming.

WorldStreaming

Above is a snapshot of the world in pure numerical form. Each of these tiles represents a Map Pixel (discussed in part 1), which is the size of a full-sized city. The player is standing at the origin of Daggerfall city at map pixel 207, 213. In the immediate vicinity are Ripwych Commons to the north-west (206, 212) and Copperfield Manor to the south (207, 214). Keep an eye on them, as we’ll be seeing more of them soon.

At a high level, the StreamingWorld component stores data much like the above. It keeps track of a small bubble of world space around player in a 2D array. As the player moves, tiles are shifted up, down, left, or right in the array (based on direction player is moving). New map pixels are loaded as required and everything is occasionally snapped back to near origin, which avoids precision errors at extreme limits of the map. From the player’s perspective, they are walking endlessly into the distance. In reality, they are on a terrain treadmill.

Inside each of these map pixels a DaggerfallTerrain object is created for the entire area. This is generated procedurally from Daggerfall’s height map combined with smooth noise to add small details. This terrain is then broken up into several DaggerfallTerrainChunk objects, which represent the actual mesh objects and colliders for the player to see and walk on.

The edge vertices and normals of each adjacent terrain are stitched together to create a nice continuous terrain. The next screenshot shows a 3×3 terrain area, once again centred on Daggerfall, with the tiling texture system discussed above. Right now it is just set to grass. I also have turned up the noise scale to make the deformations a little more interesting.

StartingTerrain

The locations are there in memory, but nothing is being drawn yet. Before we can insert locations, some foundations must be laid. First come the appropriate texture tiles. Unlike the earlier screenshot, the locations are centred inside their map pixel. Daggerfall city is in the middle, Copperfield Manor is to the south, and Ripwych Commons is just barely visible to the north-west.

LocationGroundTextures


Now location textures are in the right place, but there’s a big problem – cities in Daggerfall need a flat plane to sit on. This raises two questions. What level should the terrain be flattened to and how can everything be smoothed out cleanly?

I evaluated several different methods for selecting city level. The below screenshot shows a few of them without any smoothing.

FlattenVariants

I didn’t like the highest point as it made everything feel too raised. The average is pretty good as the city is leveled evenly in between all deformations, but I rejected it also as another pass was required to determine average elevation after applying noise. World height was very cheap to obtain but sometimes felt a little too high or too low. I ended up settling on median bilinear height (from the map reader), which is also very cheap and consistently landed somewhere between the world height and true average. So that’s the level I went with.

The next stage was to blend the flat areas into the random terrain. Interestingly, even full-sized cities like Daggerfall do not really fill their entire map pixel. They have a band of 14 tiles around the outside to use as blend space. These even have special index (>55) to indicate not to use RMB-defined tiles and instead blend with terrain.

The blending process gave me serious headaches for a few days. I tried several different methods of blending heights but none of them gave me a perfect transition from the rectangular city area all the way to edge of terrain. In the end, I created a system of building scale maps with linear rolloff from edge of city to edge of terrain. This uses linear interpolation for the straight rects and bilinear in the corner rects to keep everything smooth.

What is important is the scale is 0 all the way around terrain bounds and smoothly reaches 1 at the location bounds. Drawing the scale map for Copperfield Manor looks like the following. Each of the points below represents the blend weight for random terrain vs level terrain. The further out from the centre rect, the more influence random terrain will have. It looks similar to a pure radial falloff, but if you look carefully you will notice everything converges on a rectangular area, not a single point as would be the case with radial.

ScaleMap

Applying the scale map gives us a nice smooth transition from flat area into random terrain. The terrain features can still express themselves, but the transition feels natural and remains completely walkable even with lots of noise.

SmoothedTerrain

From here, it’s a simple matter of plopping down locations where needed and let the player go exploring.

The next part of this series will be about enhancing details of terrain. I will discuss adding textures outside of cities, improving elevation noise, and adding trees and other wilderness flats.

Streaming World – Part 1

For the last week or so, I’ve been knuckling down on creating a fully streaming overworld in Daggerfall Tools for Unity. If you’re not sure what I aim to accomplish, here’s a brief overview of how I want this to work from the Unity Editor.

  1. Setup DaggerfallUnity singleton as normal.
  2. Add prefab StreamingWorld into scene hierarchy.
  3. Add prefab PlayerAdvanced into scene hierarchy.
  4. Set player virtual position in PlayerGPS and virtual time in WorldTime.
  5. Hit Play and explore entire Illiac Bay, entering any building, any dungeon, and experiencing full day/night cycle with climate and seasons.

In many ways, I’m already very close to this goal. The tools have procedural loading of cities and dungeons, virtual time and space, climates and seasons, day and night, interiors and exteriors, and more. What’s missing is a full terrain setup and intelligent loading/unloading of blocks as player traverses the world.

You can probably imagine what a huge job this is. While I am working very quickly towards this goal, it will be another 3-4 weeks before it all comes together in a state that I’m happy with. To maintain regular updates over that time, I will split news on my progress over multiple articles.

In this first article, let’s take a look at Daggerfall’s height map and how it translates into useful terrain.

Similar to the 1000×500 maps found in POLITIC.PAK and CLIMATE.PAK, Daggerfall also stores a 1000×500 elevation map in WOODS.WLD. Here’s a grayscale dump of that data (click for full size).

HeightmapFull

You can also see a nice false-colour version of this map here.

Like most height maps, dark areas are low elevations (values of 2 or less are water) and bright areas are high elevations. Daggerfall also stores a noise map in WOODS.WLD, which I’m not going to talk about as I plan to use a better method of noise generation.

To better understand the scale of this data, here is a zoomed-in 10×8 sample grabbed from along the northern coastline (I have brightened image so individual points are easier to make out). Each of the below squares represents a single “map pixel”, equivalent to one full-sized city like Daggerfall or Wayrest. If you measure the time it takes to cross from one side of Wayrest to the other, it would take 10x that amount of time to cross the below sample west-to-east.

HeightmapZoomOriginal

Once the scale is understood, it becomes apparent there’s not much height data here considering the actual size of terrain represented. This is why Daggerfall’s terrain is mostly flat. It’s stretching a single height sample over a huge area then modulating that with a little noise. Sometimes you can fluke a nice bit of terrain, but it’s very rare. On the whole, the overworld in Daggerfall is very flat and bland.

To improve this situation, there needs to exist more data in between height samples above. This new data must be quick to sample, use very little memory, and create a continuous grade between samples with plenty of interesting variety. To accomplish this, I am combining a few basic techniques.

The first problem to solve is the rate of elevation change between map pixels. It’s incredibly boring to have a huge flat area abruptly stepping up or down into yet another huge flat area. Our baseline needs to be a nice continuous elevation change from sample-to-sample.

I have added a new API method called GetHeightBilinear(). This quickly samples any point in the 1000×500 map with any number of bilinear interpolations between samples. The result is a much smoother overworld full of curves as each height sample blends into the next.

Below is the same zoomed-in terrain sample using bilinear interpolation to create additional sample points across the surface.

HeightmapZoomWithBilinear

If written out to a full-size image, this would be 128000×64000 pixels, enough to create a reasonably detailed overworld at the same grid resolution found in RMB blocks. New sample points are created on the fly from existing data, and it doesn’t require any additional memory.

There’s still a problem however. Despite having nice continuous samples, the terrain is still quite boring. The next technique is to add some noise and break things up a little. I’m using a fast simplex noise generator to create small variations at ground level. Below is an example of noise overlayed with interpolated heightmap.

HeightmapZoomWithBilinearNoise

You won’t see it in the thumbnail, but if you click through to full-size image you will see small whorls of coherent noise added to the height data. Compare this with the blocky first image, and you can see just how much fine data has been mathematically inserted. This can be scaled to any grid resolution and tweaked as required.

Of course, this is just the beginning. The next step is to create real terrain chunks from this data and tune noise generation towards interesting-looking terrain based on climate data.

Before wrapping up, I will leave you with the following image of a small patch of terrain (equivalent to 2×2 RMB blocks, or 1/4 the size of a full city. I have noise turned up to show the kind of deformations possible.

TerrainChunks


Over the course of the next few weeks, I will continue building on this foundation, adding better texturing, cities, and climates into the mix.